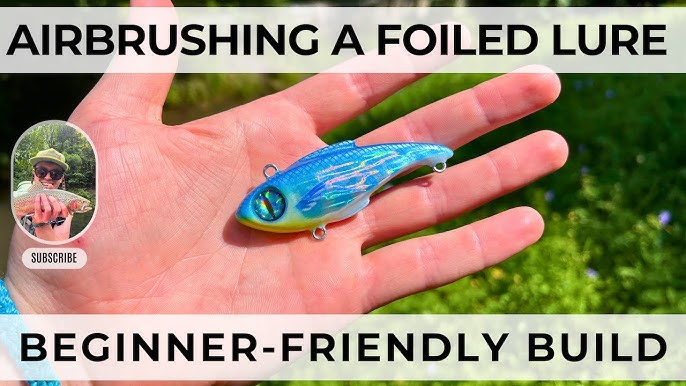
If you want your fishing lures to stand out and catch more fish, learning how to airbrush them is a game-changer. Imagine creating custom colors and designs that mimic real bait, making your lures irresistible to fish.
In this guide, you’ll discover simple steps to master airbrushing, even if you’ve never tried it before. By the end, you’ll have the skills to transform plain lures into eye-catching works of art that can boost your fishing success. Ready to make your lures truly unique?
Let’s dive in.
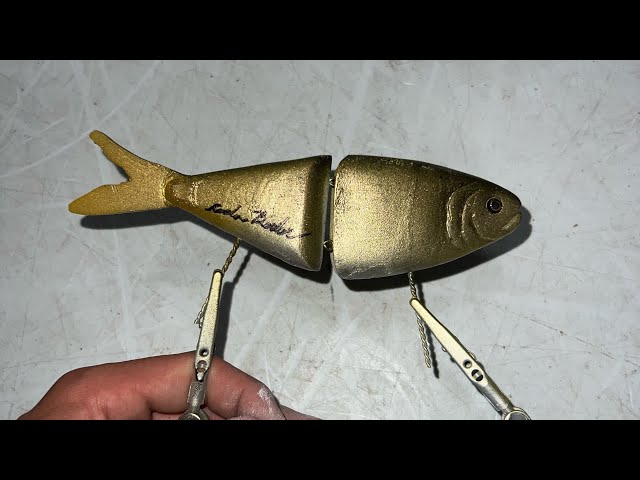
Credit: www.youtube.com
Choosing The Right Airbrush Tools
Airbrushing fishing lures can make them more attractive to fish. The right tools ensure a smooth and even finish.
Choosing the correct airbrush tools is essential for creating detailed and vibrant designs on your lures.
Types Of Airbrushes For Lures
Different airbrush types suit various design needs. Selecting the right one depends on the precision and coverage you require.
- Single Action Airbrush: Easier for beginners, controls air only.
- Double Action Airbrush: Offers control over both air and paint flow.
- Gravity Feed Airbrush: Ideal for fine detail work.
- Siphon Feed Airbrush: Suitable for larger coverage and multiple colors.
Essential Accessories
Accessories enhance the airbrushing process. They help maintain the airbrush and improve its performance.
| Accessory | Purpose |
| Compressor | Provides consistent air pressure |
| Cleaning Kit | Keeps airbrush parts clean |
| Hoses and Fittings | Connects airbrush to compressor |
| Airbrush Holder | Securely holds the airbrush when not in use |
Selecting Paints And Inks
Paints and inks are vital for achieving vibrant and lasting lure designs. The right choice affects the lure’s appearance and water resistance.
Preparing Lures For Airbrushing
Preparing your fishing lures before airbrushing is important. It helps paint stick better and last longer.
Good preparation also makes your lures look smooth and professional. Follow these steps carefully.
Cleaning And Sanding
Start by cleaning the lure to remove dirt and oils. Use warm soapy water and a soft brush.
After cleaning, lightly sand the surface with fine-grit sandpaper. This helps the paint stick well.
- Use 400-600 grit sandpaper for best results
- Sanding also removes old paint or rough spots
- Wipe the lure with a clean cloth after sanding
Priming The Surface
Apply a primer to the lure to create a smooth base for paint. Choose a primer made for plastic or wood.
Spray thin, even coats of primer. Let each coat dry fully before adding the next.
- Use a light primer color for bright paint
- Primer improves paint adhesion and durability
- Allow primer to dry in a dust-free area
Setting Up A Workspace
Choose a clean, well-ventilated area for airbrushing. Good airflow removes paint fumes and dust.
Protect surfaces with newspaper or plastic sheets. Keep your tools and paints organized nearby.
- Use a spray booth or cardboard box if possible
- Wear a mask to avoid inhaling paint
- Keep lights bright to see details clearly
Airbrushing Techniques For Lures
Airbrushing is a popular way to paint fishing lures. It helps create smooth colors and designs. Using the right techniques gives your lures a unique look.
In this guide, you will learn basic spraying skills, how to make patterns, and how to layer colors well. These tips help you paint better lures.
Basic Spraying Techniques
Hold the airbrush about 6 to 8 inches from the lure. Keep your hand steady and move it smoothly. This makes an even coat of paint.
Start with thin layers. Spray lightly to avoid paint runs. Let each layer dry before adding the next one.
- Keep air pressure around 15-20 PSI
- Use smooth, steady strokes
- Move the airbrush side to side or up and down
- Spray in thin coats, not thick
- Clean the airbrush often to prevent clogging
Creating Patterns And Textures
Patterns make your lure look more real and attract fish. Use stencils or tape to block parts of the lure while spraying. This creates sharp shapes.
Textures add depth to your lure. Try sponging paint or spraying with different air pressures. You can also flick paint drops for a spotted look.
- Use masking tape for stripes or spots
- Try lace or leaves as stencils for unique textures
- Vary air pressure for different paint effects
- Use a sponge to dab paint gently
- Flick paint with a brush for small dots
Layering Colors Effectively
Layering colors helps create depth and realism. Start with a light base color. Add darker or brighter colors on top for contrast.
Wait for each layer to dry before adding another. Use thin coats so colors blend smoothly. This avoids clumps and runs.
- Apply a light base coat first
- Add shadows with darker colors
- Use bright colors for highlights
- Let each layer dry completely
- Spray thin coats to blend colors well
Adding Details And Finishing Touches
Adding details to fishing lures makes them look more real and attractive. Finishing touches protect your paint and improve lure performance. This guide covers key techniques for a professional finish.
Use careful methods like stenciling and shading to add depth. Apply clear coats to seal and shine your work. These steps ensure your lure lasts longer in water.
Stenciling And Masking
Stenciling helps add sharp patterns and shapes on your lure. Masking protects areas from overspray during airbrushing. Use fine tape or special masking fluid for clean edges.
- Choose or create stencil shapes that mimic fish scales or spots.
- Secure stencil tightly to avoid paint bleeding underneath.
- Apply paint lightly in layers for better control and detail.
- Remove stencil carefully after paint dries to keep edges crisp.
- Use masking tape to cover areas you want to keep paint-free.
Highlighting And Shading
Highlighting and shading add depth and realism to your lure. Use lighter colors on raised areas and darker shades in recesses. Blend colors softly for a smooth look.
| Technique | Purpose | Tips |
| Highlighting | Make areas stand out | Use light colors, spray gently |
| Shading | Create shadows and depth | Apply darker colors, blend edges |
| Blending | Smooth transition between colors | Use soft airbrush setting, keep moving |
Applying Clear Coats
Clear coats protect paint from chips and water damage. They give your lure a shiny or matte finish, depending on the product. Apply thin, even layers to avoid runs and bubbles.
- Use a clear coat designed for airbrushing or plastics.
- Spray in a well-ventilated area with light passes.
- Allow each layer to dry fully before adding another.
- Consider multiple coats for extra durability.
- Let the final coat cure for 24 hours before use.
Maintenance And Cleanup Tips
Keeping your airbrush clean is key to painting fishing lures well. Regular care helps the airbrush work longer and keeps colors clear. This guide covers simple steps for maintenance and cleanup.
Follow these tips to keep your airbrush and tools in top shape. Proper storage and quick fixes can save time and prevent damage.
Cleaning Your Airbrush
Clean your airbrush after every use to avoid clogs and paint buildup. Use water or the right cleaner for your paint type. Disassemble parts carefully for a deep clean.
- Flush airbrush with cleaner until clear fluid flows
- Remove needle and clean gently with cloth
- Soak small parts in cleaner for stubborn paint
- Dry all parts before reassembling
- Use soft brushes to reach tight areas
Storing Equipment Properly
Store your airbrush and tools in a clean, dry place. Keep parts organized to avoid damage or loss. Proper storage keeps your equipment ready for the next project.
| Item | Storage Tip |
| Airbrush | Keep in a padded case upright |
| Needles | Use a needle protector or small tube |
| Paints | Seal tightly and store in cool place |
| Cleaning Brushes | Rinse and dry before storing |
Troubleshooting Common Issues
If your airbrush sputters or paint flows unevenly, check for clogs or air leaks. Fixing small problems quickly keeps your work smooth.
- Check needle for bends or paint build-up
- Make sure air hose is tightly connected
- Clean paint cup and nozzle regularly
- Adjust air pressure for consistent spray
- Replace worn seals or parts as needed

Credit: www.battlbox.com
Inspiring Ideas For Unique Lure Designs
Airbrushing fishing lures lets you create eye-catching designs. These designs attract fish and show your creativity.
Try different styles to make your lures stand out. Use colors and patterns that fit your fishing needs.
Natural Patterns
Copy patterns found in nature like fish scales, water ripples, and insect wings. These patterns make lures look real and tempting to fish.
- Use soft colors like green, brown, and silver to mimic real fish.
- Create scale patterns by spraying paint through mesh or stencil.
- Add small dots or stripes to imitate insects or small baitfish.
Bold And Abstract Styles
Use bright colors and bold shapes to catch fish attention. Abstract styles let you play with lines, splashes, and dots.
Try these bold ideas:
- Use neon colors like orange, pink, or yellow for high visibility.
- Airbrush splash effects for a lively, moving look.
- Create swirl patterns for a unique water flow effect.
Customizing For Specific Fish Species
Each fish species prefers different colors and shapes. Adjust your lure design to match the fish you want to catch.
| Fish Species | Preferred Colors | Design Tips |
| Trout | Olive green, brown, silver | Use natural scale and spot patterns |
| Bass | Bright green, yellow, black | Add bold stripes and eye spots |
| Salmon | Red, pink, white | Use shiny finishes and subtle patterns |

Credit: spraygunner.com
Frequently Asked Questions
What Materials Do I Need To Airbrush Fishing Lures?
You need an airbrush kit, compressor, paint suitable for plastic, masking tape, and safety gear. Quality paints ensure durability and vibrant colors on lures.
How Do I Prepare Fishing Lures For Airbrushing?
Clean lures thoroughly to remove dirt and oils. Sand surfaces lightly for better paint adhesion. Apply a primer for a smooth base before airbrushing.
What Airbrush Techniques Work Best On Fishing Lures?
Use light, even coats for smooth coverage. Practice layering colors for realistic effects. Mask areas to create patterns and avoid paint bleeding.
How Long Should I Let Paint Dry Between Coats?
Allow 10 to 15 minutes drying time between coats. This prevents smudging and ensures even color layering. Drying times may vary with paint type.
Conclusion
Airbrushing fishing lures adds color and detail with ease. Practice helps improve your technique and results. Use good paint and keep your tools clean. Try different patterns to attract more fish. Small steps lead to better and unique lures. Enjoy the process and have fun creating.
Your lures will look professional with patience. Keep experimenting to find what works best. This skill makes fishing even more enjoyable. Happy airbrushing and tight lines!