Are you looking for a simple way to make name tents for your meetings, events, or classrooms? Creating name tents in Word is easier than you might think.
With just a few steps, you can design clear, professional-looking name tents that grab attention and help everyone stay organized. In this guide, you’ll learn exactly how to create name tents that stand out, save you time, and make your next gathering run smoothly.
Keep reading—you’re about to discover a quick and effective method that anyone can use.
Prepare Your Document
Creating name tents in Word is simple. Follow these steps to make your documents look professional.
Proper setup ensures your name tents are the right size and fit well on your page.
Set Page Size And Orientation
First, decide on the page size and orientation. This affects how your name tents will print.
- Open the “Layout” tab in Word.
- Click on “Size” and choose the desired size.
- Select “Orientation” and pick either “Portrait” or “Landscape”.
Adjust Margins For Name Tents
Adjusting margins helps your name tents align properly on the page. Set them to ensure enough space for text.
| Margin Type | Recommended Size |
| Top | 1 inch |
| Bottom | 1 inch |
| Left | 0.5 inch |
| Right | 0.5 inch |
Make sure to preview your document before printing. This ensures everything looks correct.

Credit: www.seaofknowledge.org
Design Name Tent Layout
Creating name tents in Word is easy and helps organize seating. You can design a neat layout using tables. Tables give structure and space for names and decorations.
Below are key steps to design your name tents. You will learn how to insert a table, merge and resize cells, and add borders and shading.
Insert Table For Structure
Start by inserting a table to create the base of your name tent. A simple table with two or three columns works well. Each cell holds a part of the name tent.
- Open Word and go to the Insert tab.
- Click on Table and select a 2×3 or 3×2 table.
- The table will appear on your page as the name tent base.
- You can add text or images inside each cell.
Merge And Resize Cells
Merging and resizing cells help make the name tent look balanced. You can combine cells to create bigger spaces for names. Adjust the cell size to fit the text.
- Select the cells you want to merge by clicking and dragging.
- Right-click and choose Merge Cells.
- Click and drag the cell borders to resize them.
- Make sure the name fits well and is centered.
Add Borders And Shading
Borders and shading make your name tents easy to see and more attractive. Use simple colors and lines to highlight the tent edges.
| Border Option | Description | Use Case |
|---|---|---|
| Solid Line | A clear, continuous line around cells. | Defines the name tent edges. |
| Dashed Line | Broken line style for a softer look. | Decorative borders inside the tent. |
| Shading | Light background color in cells. | Makes text easier to read. |
Add Text And Formatting
Name tents are small cards that show names and titles at events. You can make them easily in Word.
This guide helps you add text and format it well for clear name tents.
Type Names And Titles
Start by typing the person’s full name on the tent. Add their job title or role below the name.
Use separate lines for names and titles to keep the layout clean and easy to read.
Choose Fonts And Colors
Pick fonts that are simple and easy to read from a distance. Avoid fancy or script fonts.
- Use bold or larger fonts for names
- Use smaller or italic fonts for titles
- Choose colors with good contrast, like black text on white background
- Keep colors consistent for all name tents
Align Text Properly
Align text to make the name tents look neat. Center alignment is common and works well.
Credit: www.avery.com
Duplicate Name Tents
Creating multiple name tents in Microsoft Word can save you time. You can easily duplicate a single tent and adjust the names.
This method works well for small groups or events where you need several tents with similar designs.
Copy And Paste For Multiple Tents
Copying and pasting is a simple way to make many name tents quickly. First, design one tent with the name and style you want.
Then select the entire name tent, copy it, and paste it as many times as needed. You can change the text in each copy.
- Highlight the name tent design
- Press Ctrl+C (Cmd+C on Mac) to copy
- Press Ctrl+V (Cmd+V on Mac) to paste duplicates
- Edit each name to match your guests
Use Mail Merge For Bulk Creation
Mail Merge lets you create many name tents at once from a list of names. This method is good for large events.
You need a Word document for the tent design and a data source like Excel with all the names.
| Mail Merge Step | Description |
| Prepare List | Create an Excel file with a column for names |
| Set Up Template | Design one name tent in Word and insert merge fields |
| Start Mail Merge | Use the Mailings tab to connect Word to Excel |
| Insert Fields | Add the name field where names appear on the tent |
| Complete Merge | Generate all name tents with unique names |
Print And Fold
Creating name tents in Word is easy and useful for events or meetings.
This guide shows how to print and fold your name tents neatly.
Set Print Options
Adjust your print settings to ensure the name tents print correctly.
- Open your Word document with the name tents.
- Go to the File menu and select Print.
- Choose the correct paper size, usually letter or A4.
- Select landscape orientation for better layout.
- Set margins to narrow to use more space.
- Use multiple pages per sheet if needed to save paper.
- Preview the print to check alignment and spacing.
Fold Name Tents Neatly
Folding your name tents cleanly makes them stand well on tables.
| Fold Step | Instruction |
|---|---|
| 1 | Fold the paper in half lengthwise, matching edges. |
| 2 | Press firmly along the fold to create a sharp crease. |
| 3 | Place the tent on the table with the name facing out. |
Tips For Customization
Creating name tents in Word is simple and fun. You can make them look unique with some easy changes.
Customizing your name tents helps them stand out and fit your event style better.
Add Logos Or Images
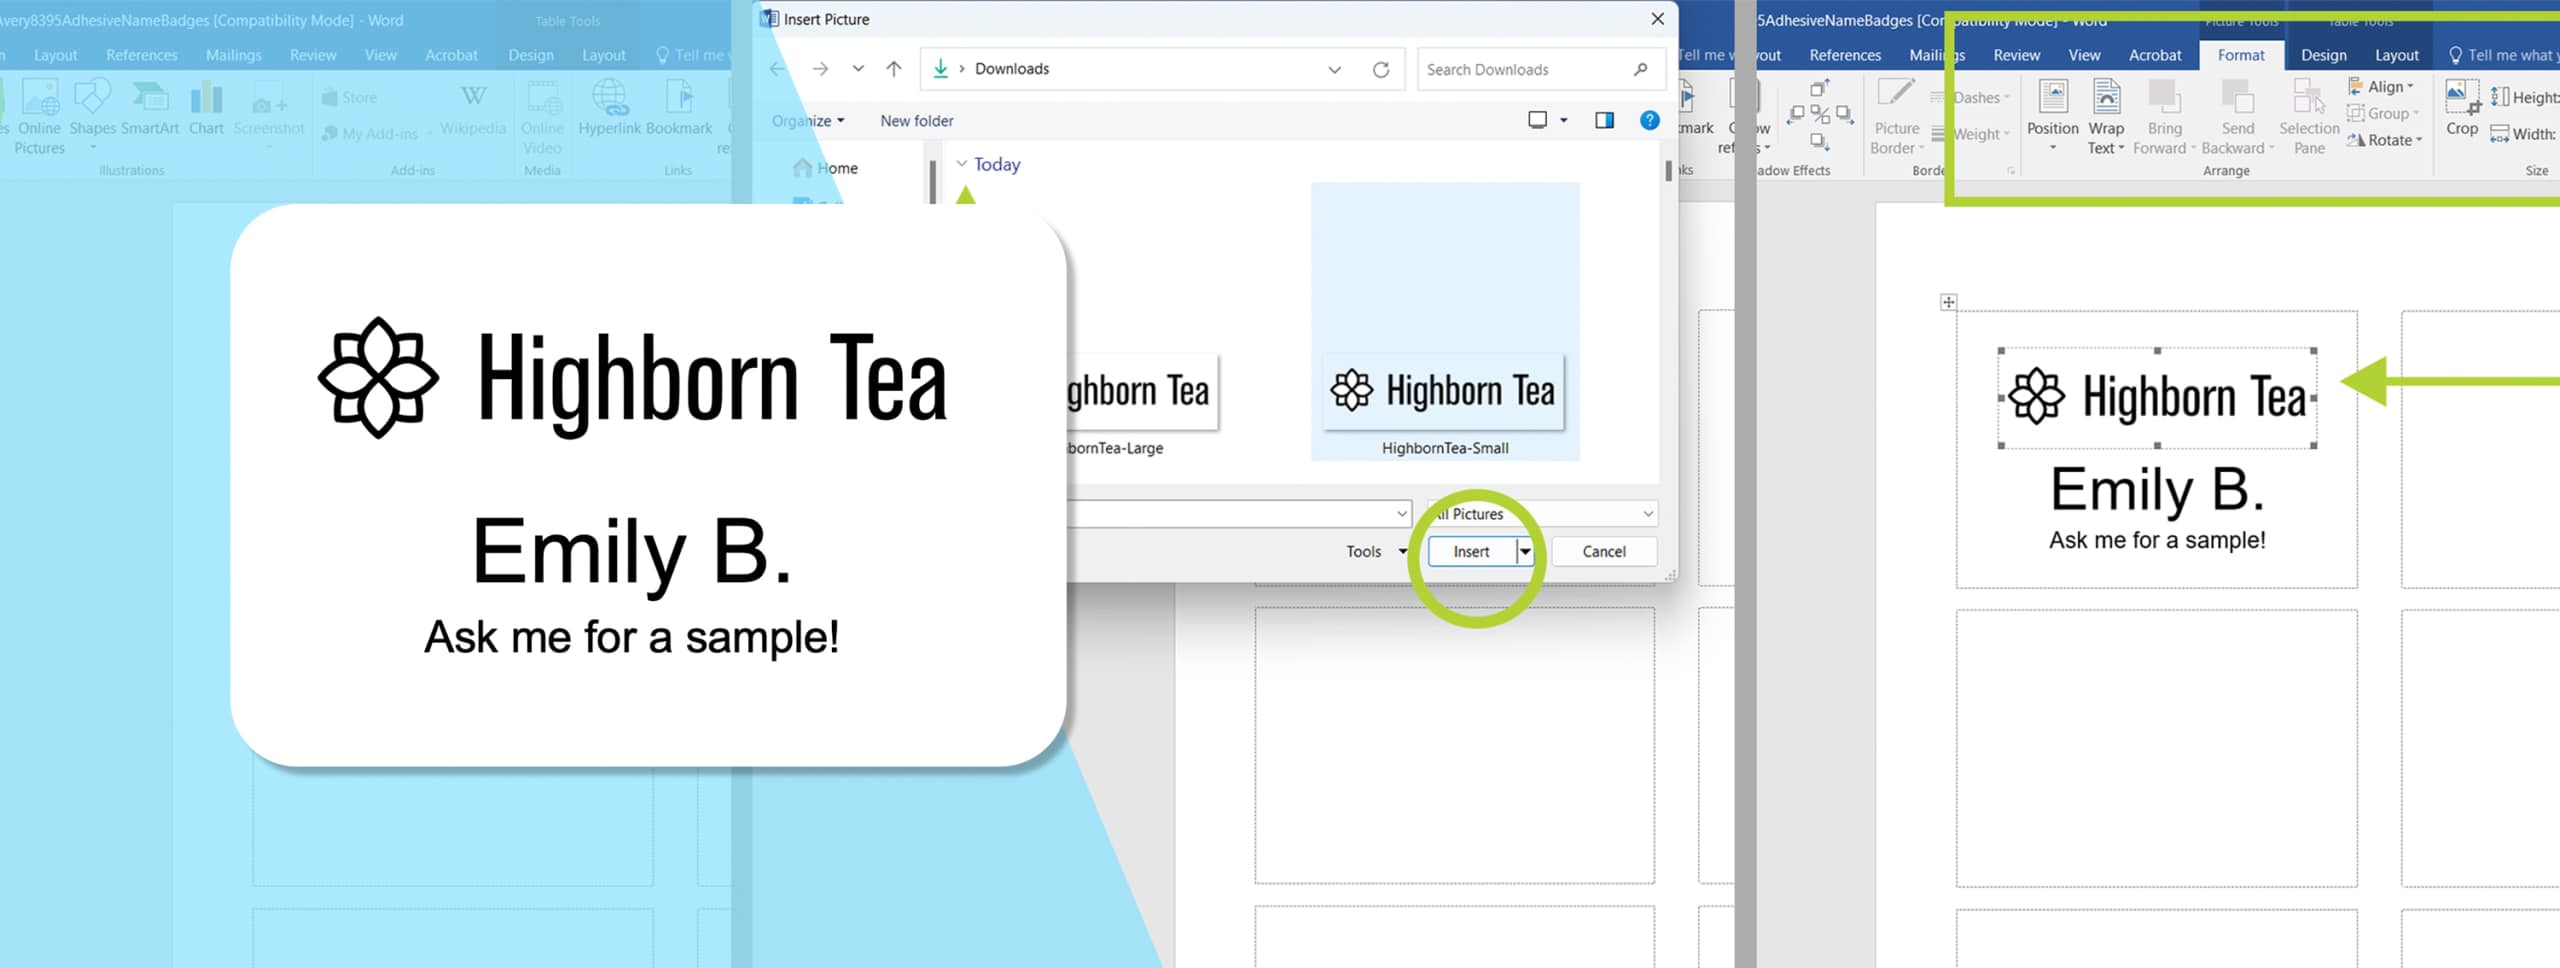
Adding logos or images gives your name tents a personal touch. It also shows your brand or theme clearly.
Insert a small logo or picture in the corner or near the name. Keep it simple so it does not cover the text.
- Use the Insert > Pictures option in Word
- Resize images to fit without blocking names
- Place images in headers or footers for uniform look
- Choose clear, high-quality images for best results
Use Templates For Efficiency
Templates save time by giving you a ready design. You only change the names and details.
Pick a template that matches your event style. This keeps your name tents consistent and neat.
- Find free or built-in name tent templates in Word
- Edit text fields quickly without changing layout
- Reuse templates for future events by saving files
- Adjust colors and fonts easily within templates

Credit: www.seaofknowledge.org
Frequently Asked Questions
How Do I Start Creating Name Tents In Word?
Begin by opening a new Word document. Use the “Table” tool to create a two-column, one-row table. This acts as the tent’s base. Customize size and fonts to fit your needs. Fold the paper along the table’s center for a standing tent.
Can I Customize Fonts And Colors In Name Tents?
Yes, Word lets you easily customize fonts, sizes, and colors. Highlight the text inside the table and use the toolbar options. Choose styles that match your event theme. This makes your name tents visually appealing and professional.
How Do I Print Multiple Name Tents On One Page?
Use the “Copy and Paste” method inside the table. Duplicate the name tent design multiple times to fill the page. Adjust the table size to fit several tents per sheet. Print on sturdy paper for best results.
Is There A Template For Name Tents In Word?
Word offers pre-made templates for name tents. Search for “name tent” in the template section. These templates are customizable and save time. You can modify text, colors, and layout easily to suit your event.
Conclusion
Creating name tents in Word is simple and quick. You can design clear, neat tents for any event. Using Word’s tools, you control size, font, and layout easily. This helps guests find their seats fast. Practice a few times to get comfortable.
Soon, you’ll make tents that look great and save time. Try it now and see how easy it can be!