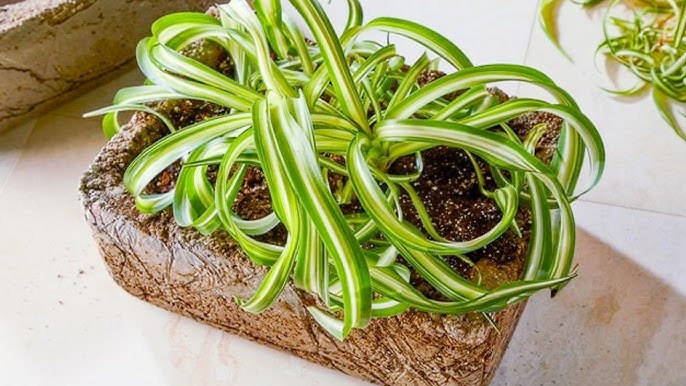
Are you looking for a unique way to showcase your plants while adding a touch of rustic charm to your garden or home? Making hypertufa planters might be exactly what you need.
These lightweight, durable containers look like natural stone but are much easier to create yourself. Imagine crafting your own custom-sized planters that perfectly fit your space and style. In this guide, you’ll discover simple steps to make your very own hypertufa planters, even if you’ve never worked with concrete before.
Ready to transform your gardening experience and impress your friends with your creativity? Let’s get started!
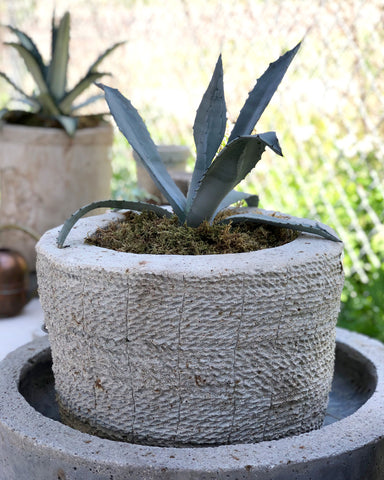
Credit: studiologyware.com
Materials Needed
Creating hypertufa planters is a fun and creative project. You’ll need the right materials to make sturdy, long-lasting planters.
Let’s look at the essential ingredients, tools, and safety gear required for this DIY activity.
Essential Ingredients
These ingredients form the base of your hypertufa mixture. It’s important to have the correct balance for the best results.
- Portland cement
- Peat moss
- Perlite or vermiculite
- Water
Tools Required
The right tools make the process easier and help achieve a smooth finish.
| Tool | Purpose |
| Mixing container | To mix ingredients |
| Garden trowel | For stirring and applying mixture |
| Measuring cups | To ensure accurate proportions |
Safety Gear
Safety gear is essential to protect yourself while working with cement and other materials.
- Protective gloves
- Dust mask
- Safety goggles
Preparing The Mixture
Making hypertufa planters starts with the right mixture. This blend creates a lightweight, porous material that holds plants well.
Preparing the mixture carefully ensures your planter is strong and durable. Follow the steps below to get the best results.
Choosing The Right Ratios
Use the right mix of ingredients to make hypertufa. The main parts are cement, peat moss, and perlite or vermiculite.
| Ingredient | Ratio by Volume |
| Portland Cement | 1 part |
| Peat Moss | 1.5 parts |
| Perlite or Vermiculite | 1.5 parts |
Mixing Techniques
Mix dry ingredients well before adding water. This helps the blend become even and consistent.
- Put cement, peat moss, and perlite in a wheelbarrow or large container.
- Use a shovel or trowel to stir the dry mix thoroughly.
- Slowly add water while mixing to avoid clumps.
- Keep stirring until the mix feels like thick mud.
Consistency Tips
The right consistency is key for shaping your planter. The mix should be firm but not too dry or wet.
Check the mix by squeezing a handful:
- If water drips, it is too wet.
- If it crumbles, it is too dry.
- It should hold shape without dripping water.
Molding Your Planters
Molding hypertufa planters is a fun and creative process. It shapes the soft mixture into beautiful containers. You will learn how to pick molds, shape the mix, and add drainage.
Good molding helps your planter look nice and last long. Let’s start by choosing the right molds for your project.
Selecting Molds
Select molds that fit the size and style you want. You can use plastic containers, wooden boxes, or even old pots. Make sure the mold is sturdy and clean.
- Choose molds with smooth surfaces for easy release
- Use waterproof molds to avoid damage
- Pick different shapes to create variety
- Consider the size based on the plants you want
Layering And Shaping
Layer the hypertufa mix in your mold carefully. Start with a thin base layer and build up walls. Press the mix firmly to avoid air pockets.
- Spray the mold with cooking spray for easy removal
- Put a layer of mix about one inch thick on the bottom
- Build up the sides to your desired thickness
- Smooth the surface with a trowel or your hands
- Let the planter rest for a few minutes before moving it
Creating Drainage Holes
Drainage holes let water escape and keep plants healthy. Add holes before the mix dries completely. Use a stick or a screwdriver to make holes.
| Tip | Details |
|---|---|
| Hole size | About ½ inch wide |
| Number of holes | Two or three, spaced evenly |
| Location | Bottom center of the planter |
| Timing | Make holes when mix is firm but still wet |
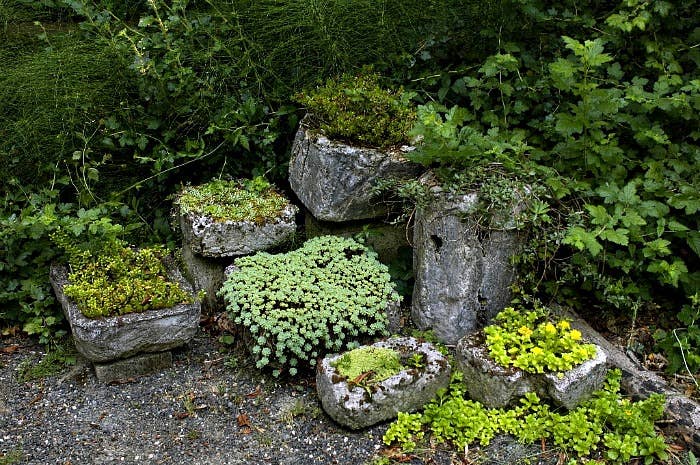
Credit: dengarden.com
Curing Process
Curing is an important step in making hypertufa planters. It helps the planter become strong and last longer. Proper curing stops cracks and breaks.
In this section, we will explain how to dry and cure your hypertufa planters. Follow these steps to get the best results.
Initial Drying
After you shape your hypertufa planter, start with initial drying. Keep it in a cool, shady place. This step helps remove extra water slowly.
Do not move or touch the planter too much during this time. Let it dry for about 2 to 3 days. This prevents quick drying, which can cause cracks.
Long-term Curing
Once the planter feels firm, start long-term curing. Wrap it in plastic to keep moisture inside. This helps the planter cure evenly and get stronger.
Keep the wrapped planter in a cool place for 4 to 6 weeks. Check it every few days and mist with water if it feels dry. This keeps the curing process active.
Avoiding Cracks
Cracks can ruin your hypertufa planter. To avoid cracks, dry the planter slowly and keep it moist during curing. Never dry it in direct sun or wind.
- Keep the planter out of direct sunlight
- Wrap in plastic to keep moisture
- Mist with water if it feels dry
- Avoid moving the planter during drying
- Be patient and let curing finish fully
Finishing Touches
Finishing your hypertufa planters well makes them look great and last longer. These final steps improve the planter’s feel and appearance.
In this section, you will learn how to smooth edges, protect the surface, and add creative decorations.
Sanding Edges
Sanding removes rough spots and sharp edges from your planter. It creates a smooth and safe surface to touch.
Use fine-grit sandpaper and work gently. Sand all edges and corners until smooth. Wipe away dust with a damp cloth.
Sealing Options
Sealing protects hypertufa from water damage and dirt. It helps keep the planter strong and looking good.
You can choose from different sealers depending on your needs and look. Apply sealers according to the product instructions.
- Water-based sealers: easy to use and eco-friendly
- Penetrating sealers: soak into the material for deep protection
- Clear acrylic sprays: add shine and guard against moisture
Adding Decorative Elements
Decorations make your planter unique and fit your style. You can add texture, patterns, or small objects before the hypertufa dries.
Try pressing leaves, stones, or tiles into the surface. Paint designs or use stencils after the planter cures. Be creative and gentle.
Planting And Care
Hypertufa planters are light and porous, making them great for many plants. Taking care of your plants in these containers helps them grow strong.
Proper planting and care keep your hypertufa planters looking nice and your plants healthy.
Choosing Suitable Plants
Pick plants that like well-drained soil and dry conditions. Succulents and herbs work well in hypertufa planters. Avoid plants that need lots of water.
- Succulents like aloe and sedum
- Herbs such as thyme and rosemary
- Small flowering plants like pansies
- Cacti for dry environments
Soil And Drainage Tips
Use soil that drains water quickly to stop roots from rotting. Mix potting soil with sand or perlite for better drainage. Make sure your hypertufa planter has holes to let water out.
- Mix 50% potting soil with 50% sand or perlite
- Check planter for drainage holes or add some
- Place a layer of small stones at the bottom
Maintenance Advice
Water plants only when the soil feels dry. Too much water can harm roots in hypertufa planters. Fertilize lightly during the growing season to help plants stay healthy.
- Water once the top inch of soil is dry
- Use a balanced, slow-release fertilizer
- Remove dead leaves to prevent pests
- Move planters to shelter in harsh weather
Troubleshooting Common Issues
Making hypertufa planters is fun but can have some problems. Fixing these issues helps your planter last longer.
We will look at how to fix cracks, stop mold, and repair damage on your hypertufa planters.
Fixing Cracks
Cracks can appear if the mix is too dry or dries too fast. Small cracks can be fixed easily to keep the planter strong.
- Clean the cracked area with a brush to remove dust.
- Mix a small batch of hypertufa using the same recipe.
- Apply the mix into the cracks using a putty knife.
- Let it dry slowly by covering it with plastic.
- Sand the area smooth after it fully dries.
Preventing Mold
Mold grows when planters stay wet and don’t dry well. You can prevent this with good care.
- Place planters where air flows well.
- Use a mix with good drainage materials like perlite.
- Water plants only when needed, avoid overwatering.
- Seal the planter inside with a breathable sealant to reduce moisture.
- Keep planters out of shaded, damp places.
Repairing Damage
Chips and breaks can happen if the planter falls or is hit. Fixing damage keeps it usable and safe for plants.
| Damage Type | Repair Method |
| Small chips | Fill with fresh hypertufa mix and smooth it. |
| Large breaks | Glue pieces with waterproof epoxy, then fill gaps. |
| Loose parts | Reattach with strong adhesive and clamp until dry. |

Credit: m.youtube.com
Creative Ideas
Hypertufa planters are light and easy to make. You can create many interesting designs with simple materials.
Try new shapes, colors, and materials to make your planters stand out in your garden or home.
Unique Shapes
Hypertufa allows you to make planters in many shapes. Use molds or freehand to create your design.
Try round, square, or even geometric shapes. You can also make animal or abstract forms.
- Use plastic bowls or boxes as molds
- Create layered shapes by stacking molds
- Make irregular shapes by hand molding
- Try animal shapes like turtles or birds
- Use cookie cutters for small designs
Coloring Techniques
You can add color to hypertufa by mixing pigments into the concrete. This changes its look easily.
Paint your planter after it dries for a brighter or softer look. Use natural dyes for a subtle effect.
- Mix powdered pigments into the wet hypertufa mix
- Use acrylic paint for detailed designs after drying
- Try natural dyes like coffee or tea for soft tones
- Apply a sealant to protect painted surfaces
- Blend several colors in the mix for a marbled look
Combining Materials
Add other materials into hypertufa to create texture and style. Stones, shells, and glass work well.
These materials can be pressed into the surface or mixed inside. They make your planter unique and strong.
- Press small stones or pebbles into the planter walls
- Embed broken glass pieces for colorful effects
- Mix coarse sand or small gravel inside for texture
- Use shells or bits of pottery for decoration
- Combine wood pieces for rustic planter edges
Frequently Asked Questions
What Materials Are Needed For Hypertufa Planters?
You need Portland cement, peat moss, perlite, water, and gloves. These materials create a lightweight, durable mix ideal for planters. Proper proportions ensure strength and porosity for healthy plant growth.
How Long Does Hypertufa Take To Cure?
Hypertufa planters typically cure in 4 to 7 days. Keep them moist and covered during this time. Proper curing increases durability and prevents cracking.
Can Hypertufa Planters Be Used Outdoors?
Yes, hypertufa planters are perfect for outdoor use. They resist weather, are lightweight, and allow good drainage. This makes them ideal for gardens and patios.
How Do I Make Hypertufa Planters Waterproof?
Adding a sealant after curing protects hypertufa planters from water damage. Use a breathable, non-toxic sealant to maintain moisture balance for plants. This extends planter life and appearance.
Conclusion
Making hypertufa planters is a fun and rewarding project. You only need a few materials and some patience. These planters look natural and last a long time. They are perfect for gardens, patios, or balconies. You can customize their size and shape easily.
Plus, they help plants grow well by keeping roots cool. Try making one yourself to enjoy the process and results. Simple steps lead to beautiful, sturdy planters anyone can create. Give it a go and see how satisfying it feels!