Have you ever been caught in a sudden downpour, only to find water seeping through your tent seams? It’s frustrating and can ruin your outdoor adventure.
But what if you could stop that leak before it starts? Seam sealing your tent is a simple step you can take to keep your shelter dry and comfortable. In this guide, you’ll learn exactly how to seam seal your tent quickly and effectively.
By the end, you’ll feel confident protecting your tent from rain, so nothing stands between you and a good night’s sleep outdoors. Keep reading—you don’t want to miss these easy tips that can save your camping trip.

Credit: www.yahoo.com
Why Seam Sealing Matters
Seam sealing is an important step for keeping your tent dry. It stops water from entering through the stitched areas.
Seams are weak spots where water can leak in. Applying sealant makes your tent stronger and more water-resistant.
Preventing Leaks
Seam sealing blocks tiny holes and gaps in the stitching. This keeps rain and moisture out of your tent.
Without seam sealing, water can drip inside and soak your gear. A sealed tent stays dry during wet weather.
Extending Tent Lifespan
Water can damage your tent fabric over time. Seam sealing protects the stitches and fabric from wear and tear.
Sealed seams last longer because they keep moisture and dirt out. This helps your tent stay strong for many trips.
Enhancing Outdoor Comfort
A dry tent means a comfortable camping experience. Seam sealing stops leaks that cause dampness and cold inside.
Keeping water out helps keep the inside air fresh. You can sleep better and enjoy your time outdoors.
Tools And Materials Needed
Seam sealing a tent helps keep water out and extends its life. You need the right tools and materials to do it well.
Choosing proper supplies makes the process easier and more effective. Below are key items to prepare before you start.
Choosing The Right Seam Sealer
Select a seam sealer made for your tent fabric. Most tents use polyurethane or silicone sealers.
Check that the sealer is waterproof and flexible. It should match your tent’s material for best results.
- Polyurethane sealers work well on nylon and polyester
- Silicone sealers suit silicone-coated fabrics
- Clear or tinted options available to match tent color
- Read product labels to confirm compatibility
Gathering Cleaning Supplies
Clean tent seams before sealing. Dirt or oils stop sealer from sticking properly.
Use gentle supplies to avoid damaging fabric. Avoid harsh chemicals or abrasive tools.
- Mild soap or tent cleaner
- Warm water
- Soft cloth or sponge
- Rubbing alcohol for stubborn areas
- Clean towels for drying
Essential Application Tools
Apply seam sealer smoothly using simple tools. These help spread the sealer evenly.
Choose tools that give good control and reach tight seams easily.
- Small paintbrush or foam brush
- Applicator bottle with fine tip
- Masking tape to protect fabric edges
- Gloves to keep hands clean
- Plastic scraper or old credit card to smooth sealer
Preparing Your Tent
Seam sealing a tent helps keep water out and extends its life. Preparing your tent is key for good results. Clean and dry the tent well before you start.
This guide focuses on three main steps: cleaning the seams, drying thoroughly, and setting up a workspace.
Cleaning The Seams
Remove dirt and old sealant from the seams before applying new sealant. Clean seams help the sealant stick better and last longer.
- Use a soft brush to remove loose dirt
- Apply rubbing alcohol on a cloth to wipe the seams
- Scrape off old sealant carefully with a plastic scraper
- Let the seams dry after cleaning
Drying Thoroughly
Make sure your tent is completely dry before sealing. Moisture can prevent the sealant from sticking and cause leaks.
| Drying Method | Tips |
| Air Dry | Hang tent in a sunny, breezy spot |
| Towel Dry | Use a clean towel to pat dry seams |
| Indoor Dry | Place tent in a warm, dry room |
Setting Up A Workspace
Choose a clean, flat space where you can work comfortably. Good lighting and ventilation help the sealing process.
- Flat surface like a table or floor
- Good natural or artificial light
- Ventilation to avoid fumes
- All tools and sealant within reach

Credit: www.yahoo.com
Step-by-step Seam Sealing
Seam sealing helps keep your tent waterproof and safe from leaks. It fills tiny holes and gaps along the seams. Doing it right makes your tent last longer in wet weather.
This guide shows you how to apply seam sealer carefully for the best result. Follow each part to protect your tent well.
Applying Seam Sealer Evenly
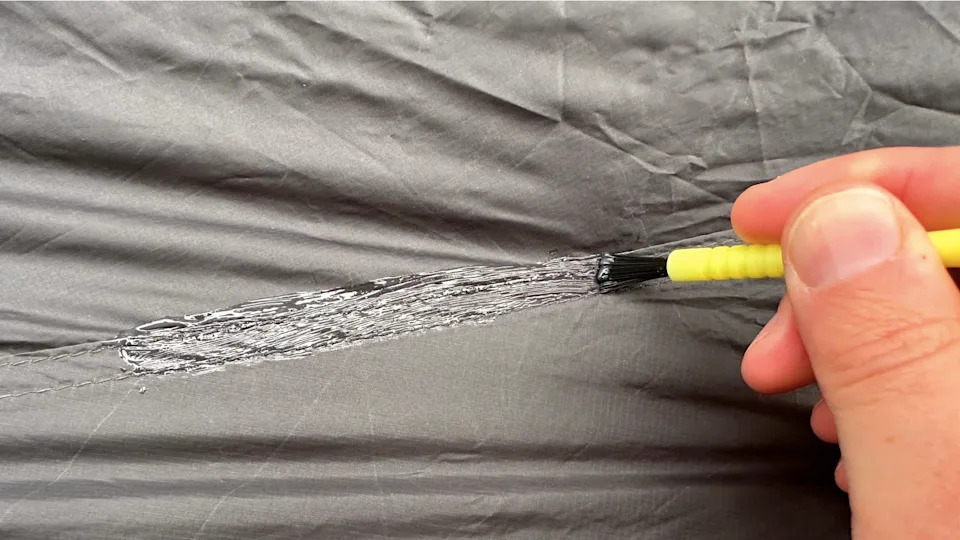
Start by cleaning the tent seams with mild soap and water. Let the fabric dry completely before sealing. Use a small brush or applicator to spread the sealer thinly and evenly along each seam.
- Work in small sections for better control
- Apply a steady, thin layer without gaps
- Cover all stitching and fabric folds
- Wipe off any excess sealer quickly
Letting It Cure Properly
Once you finish applying, let the sealer dry fully. The curing time may vary by product, usually between 8 to 24 hours. Keep the tent flat and avoid touching the seams during this time.
| Sealer Type | Drying Time | Notes |
| Silicone-Based | 12-24 hours | Flexible when dry |
| Polyurethane-Based | 8-12 hours | Strong and durable |
| Latex-Based | 6-10 hours | Good for light use |
Checking For Missed Spots
After curing, inspect the seams carefully. Look for any areas without sealer or thin coverage. You can use a flashlight to help spot gaps. If you find missed spots, apply more sealer and let it dry again.
Tips for inspection:
- Check seams inside and outside the tent
- Press gently to feel for weak spots
- Look for changes in fabric texture or color
Tips For Best Results
Seam sealing your tent is crucial to keep it dry. Proper sealing prevents water from entering.
Follow these tips to ensure your tent stays waterproof for your next adventure.
Sealing In Warm Conditions
Warm weather helps the sealant cure faster. Choose a sunny day for best results.
Make sure the tent fabric is dry before you start. This ensures the sealant adheres well.
- Set up your tent in a sunny spot
- Ensure no rain is expected
- Wait until morning dew has evaporated
Reapplying Over Time
Seam sealant can wear off over time. It is important to reapply it regularly.
Check your tent seams every season. Reapply when you see wear or leaks.
- Inspect seams before each trip
- Reapply every year for frequent use
- Use a quality sealant for lasting results
Avoiding Common Mistakes
Many make mistakes when sealing tents. Avoid these to keep your tent dry.
Never rush the process. Take your time to cover all seams properly.
- Do not apply too much sealant
- Avoid sealing in wet conditions
- Let the sealant dry fully before packing
Alternative Waterproofing Methods
Seam sealing is important to keep your tent dry. Sometimes, you may need other ways to waterproof your tent. These methods can help you protect your tent from rain and moisture.
Using alternative waterproofing methods can be quick and easy. They work well if you do not want to sew or use traditional seam sealers.
Using Waterproof Sprays
Waterproof sprays add a protective layer to your tent fabric. They make the material repel water and keep it dry. You can spray the seams and the whole tent surface.
These sprays are easy to apply and dry fast. They work best on clean and dry fabric. Make sure to spray evenly and cover all areas you want to protect.
- Clean the tent fabric before spraying
- Apply spray in a well-ventilated area
- Allow the tent to dry completely
- Reapply spray after heavy use or washing
Tape Sealing For Quick Fixes
Tape sealing is a fast way to fix leaks on tent seams. Special waterproof tape sticks to the fabric and blocks water from entering. It works well for small tears or worn seams.
Use tape sealing as a temporary solution until you can do a full repair. Make sure the area is dry and clean before applying the tape. Press firmly to avoid air bubbles.
- Clean and dry the tent surface
- Cut tape to fit the damaged area
- Press tape firmly on the seam
- Check for leaks after rain
Maintaining Your Tent’s Waterproofing
Seam sealing keeps your tent dry by protecting weak spots. Regular care helps your tent last longer and stay waterproof.
Checking your tent and storing it correctly prevent damage to the waterproof coating. Here are key ways to maintain your tent’s waterproofing.
Regular Inspections
Look over your tent’s seams and fabric before and after each trip. Find small tears, worn spots, or old sealant that needs repair.
- Set up your tent in good light to see details clearly.
- Touch seams to feel if they are soft or cracked.
- Check for dirt or dust that can block waterproof coatings.
- Look inside for leaks or water stains.
- Note areas that need resealing or patching.
Proper Storage Practices
Store your tent dry and loosely packed. Avoid damp or hot places that break down waterproof layers.
| Storage Condition | Effect on Tent |
| Wet or damp | Causes mold and weakens fabric |
| Direct sunlight | Fades fabric and breaks down sealant |
| Tightly packed | Crushes seams and reduces waterproofing |
| Cool, dry place | Preserves fabric and sealant quality |

Credit: www.yahoo.com
Frequently Asked Questions
What Is Seam Sealing And Why Is It Important?
Seam sealing protects tent seams from water leaks and extends tent life. It prevents moisture from entering through needle holes. This process keeps you dry and comfortable during camping trips. Proper seam sealing enhances tent durability in wet conditions.
How Do I Prepare My Tent For Seam Sealing?
Clean your tent thoroughly and let it dry completely. Remove dirt and old sealant with mild soap and water. Ensure the surface is dry and free of debris for better adhesion. Proper preparation ensures effective seam sealing results.
What Tools And Materials Are Needed For Seam Sealing?
You need seam sealant, a small brush or applicator, and clean cloths. Some prefer seam tape for extra waterproofing. Use sealants compatible with your tent fabric. Having the right tools ensures a smooth and effective process.
How Long Does Seam Sealing Take To Dry?
Seam sealant usually dries within 12 to 24 hours. Drying time depends on temperature and humidity. Avoid packing or using the tent until sealant is fully cured. Proper drying ensures maximum waterproof protection.
Conclusion
Seam sealing your tent keeps you dry during rain and wind. It also helps your tent last longer. Follow the steps carefully for best results. Use the right sealant and apply it evenly. Let it dry fully before packing your tent away.
Regular checks and resealing protect your gear from water damage. A well-sealed tent makes camping more comfortable and stress-free. Take time to seal seams properly. Your outdoor adventures will be much better with a dry shelter.