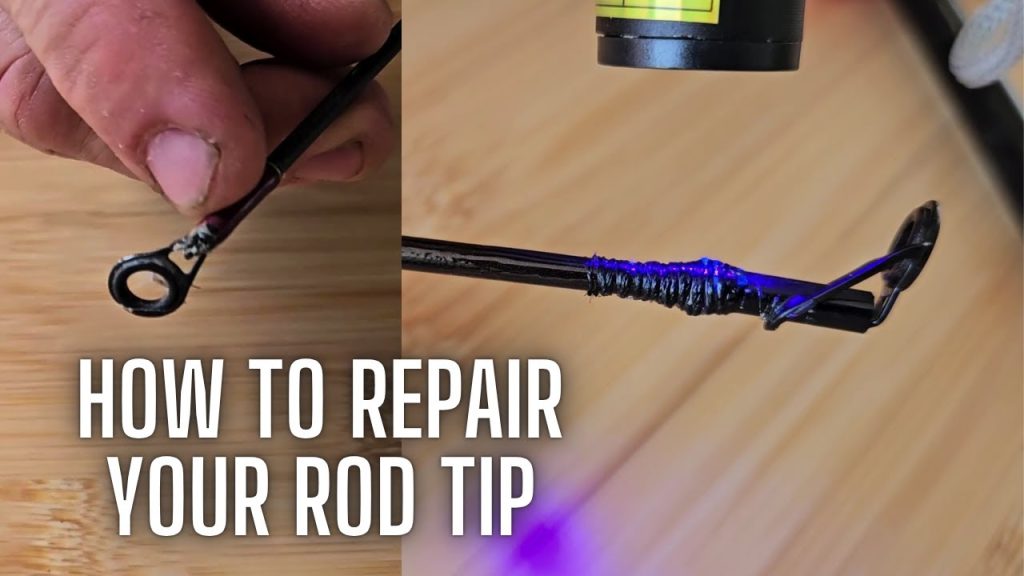
Have you ever felt the frustration of a broken fishing rod tip just when you’re ready to cast? It’s a common problem, but it doesn’t have to ruin your fishing trip or cost you a lot to fix.
Imagine being able to quickly repair your rod tip yourself and get back to what you love—fishing. In this guide, you’ll discover simple, practical steps to fix your fishing rod tips easily and effectively. By the end, you’ll have the confidence to handle this repair on your own, saving time and money.
Let’s dive in and bring your fishing gear back to life!

Credit: www.youtube.com
Common Rod Tip Issues
Fishing rod tips are delicate and can easily get damaged. Knowing common issues helps you fix them fast.
This guide covers cracks, missing tips, and guide damage on fishing rods.
Cracks And Breaks
Cracks and breaks happen from drops or heavy use. Small cracks can grow if not fixed. Use strong glue to seal cracks. For breaks, replace the tip or use a rod tip repair kit.
Loose Or Missing Tips
Tips can become loose or fall off during fishing trips. Fix loose tips by tightening or using epoxy glue. If the tip is missing, buy a new one that fits your rod. Attach it carefully to avoid damage.
- Check if the tip fits your rod size
- Clean the rod end before gluing
- Use epoxy glue for a strong hold
- Allow glue to dry fully before use
Guide Damage
Guides help your line run smooth. Damaged guides can cut or tangle the line. Replace bent or broken guides to protect your line and improve casting.
| Guide Issue | Fix Method |
| Bent guide | Use pliers to gently bend back |
| Broken guide frame | Replace with new guide |
| Loose guide | Re-glue or wrap with thread |
Tools And Materials Needed
Fixing a fishing rod tip is easy with the right tools. Gather these materials to ensure a smooth repair process.
Having the correct tools and materials on hand will make fixing your fishing rod tip quick and effective.
Replacement Tips
Replacement tips come in different sizes. Choose a tip that matches your rod. Ensure it fits snugly for proper function.
- Measure the diameter of your rod’s tip
- Select a tip with the same diameter
- Consider buying a multi-pack for future repairs
Epoxy And Adhesives
Use epoxy or strong adhesives to attach the new tip. They provide a firm hold and last long.
- Two-part epoxy is ideal for a strong bond
- Super glue can work for temporary fixes
- Follow the instructions on the adhesive for best results
Basic Repair Tools
Basic tools are needed for a smooth repair. These tools help remove old tips and attach new ones.
- Heat gun or lighter for loosening old glue
- Small pliers or tweezers for removing old tips
- Cloth for cleaning the rod before applying new tip
Removing A Broken Tip
Fixing a broken fishing rod tip can save your gear. Removing the old tip carefully is the first task.
This guide shows simple ways to soften glue and take out the broken tip without damage.
Softening The Old Glue
Glue holds the tip tightly to the rod. Softening it helps remove the tip easily.
- Heat the tip area with a hairdryer for 2 to 3 minutes.
- Apply a small amount of rubbing alcohol to the glue.
- Let the alcohol soak in for 5 minutes to weaken the adhesive.
- Repeat heating and alcohol application if the glue remains hard.
Safely Extracting The Tip
Removing the softened tip requires care to avoid breaking the rod further.
| Tool | Use |
| Pliers | Grip and twist the tip gently |
| Wooden dowel | Push the tip out from inside the rod |
| Soft cloth | Protect rod surface from scratches |
Hold the rod firmly and twist the tip slowly with pliers. If it does not move, push it out gently with a dowel.
Choosing The Right Replacement Tip
Fixing a fishing rod tip needs careful choice of the replacement part. Using the right tip keeps your rod working well and lasts longer.
Focus on size and style to match your rod. Also, pick the right material for strength and durability.
Matching Size And Style
Choose a tip that fits the rod’s original size and shape. The diameter and length must match exactly. This keeps the rod balanced and the line running smoothly.
- Measure the old tip’s inner and outer diameter
- Check the length to fit the rod end
- Match the style: single-foot or multi-foot tip
- Look at the color and finish to blend with the rod
Material Considerations
Material affects the tip’s strength and flexibility. Different materials suit different fishing styles and rod types.
| Material | Pros | Cons |
| Stainless Steel | Strong and corrosion-resistant | Heavier than other materials |
| Aluminum Oxide | Lightweight and smooth for line | Less durable under heavy stress |
| Ceramic | Very smooth, reduces friction | Can chip if hit hard |
| Titanium | Very strong and light | More expensive than others |
Attaching The New Tip
Fixing the tip of your fishing rod needs care and the right tools. This guide covers how to attach a new tip properly.
Following simple steps ensures the tip stays secure and works well during fishing.
Applying Adhesive Properly
Use the correct adhesive to hold the new tip firmly. Too much glue can cause a mess. Too little glue may make the tip fall off.
- Clean the rod tip and the new tip with rubbing alcohol.
- Apply a thin layer of epoxy or super glue inside the new tip.
- Spread the glue evenly to avoid lumps.
- Insert the new tip onto the rod quickly but carefully.
- Hold the tip in place for a few minutes to let the glue set.
Aligning The Tip Correctly
Align the new tip so it matches the line guides on the rod. Proper alignment helps with casting and line flow.
| Tip Position | Effect on Fishing |
|---|---|
| Aligned with guides | Smooth casting and better control |
| Misaligned slightly | Line may catch or tangle |
| Severely misaligned | Poor casting and possible damage |

Credit: www.reddit.com
Drying And Curing Time
Fixing fishing rod tips requires proper drying and curing. This step ensures the repair is strong and lasts long.
Patience during this phase prevents damage to the rod and improves performance on your next fishing trip.
Best Conditions For Setting
Choose the right place and environment for drying the repaired rod tip. The setting affects how well the adhesive or epoxy cures.
- Keep the rod tip in a warm area, ideally between 70°F and 80°F (21°C to 27°C).
- Ensure good air circulation but avoid direct wind or drafts.
- Place the rod in a horizontal position to prevent sagging or bending.
- Keep the rod away from dust and dirt to avoid contamination.
- Avoid touching the repaired area during the curing time.
Avoiding Common Mistakes
Many anglers rush the drying process or ignore environmental factors. These mistakes reduce the repair quality.
| Common Mistake | Effect | How to Avoid |
| Rushing drying time | Weak bond, easy breakage | Allow full curing time as per instructions |
| Exposing to moisture | Adhesive failure | Keep rod in dry place during curing |
| Touching repair area | Contamination, uneven surface | Handle rod carefully, avoid contact |
| Placing in direct sunlight | Uneven curing, heat damage | Use shaded area with good airflow |
Testing The Repair
After fixing your fishing rod tip, testing the repair is important. This ensures the rod works well and stays strong.
Testing helps find any weak spots or problems before you use the rod again.
Flexibility And Strength Checks
Check the repaired tip by bending it gently. The tip should flex like the rest of the rod without breaking.
Try to feel if the repair is firm. The tip should not feel loose or weak at the fixed point.
- Bend the rod slowly and watch the repaired tip
- Look for cracks or soft spots near the repair
- Apply light pressure to test strength
- Listen for any unusual sounds like creaking
Field Testing Tips
Take your repaired rod to a fishing spot for a real test. Cast the line several times to check performance.
Notice how the tip reacts during casting and when the line pulls. It should handle normal stress without issues.
- Cast gently at first, then increase force gradually
- Watch the tip for any bending or wobbling
- Feel for any unusual movement or looseness
- Check the repair after testing for damage

Credit: anglersresource.net
Preventing Future Damage
Fixing fishing rod tips is important, but stopping damage is better. Taking care of your rod helps it last longer.
Using the right methods can keep your fishing rod strong and ready for your next trip.
Proper Storage
Store your fishing rod in a safe, dry place. Avoid leaving it in direct sunlight or damp areas.
- Keep rods upright or in a rod rack to prevent bending
- Use rod covers to protect the tip and guides
- Do not stack heavy items on top of stored rods
- Avoid storing rods near heat sources like heaters or engines
- Check storage space for pests that might damage rod materials
Regular Maintenance
Regularly clean and inspect your fishing rod to catch damage early. This keeps it in good shape for a long time.
| Maintenance Task | How Often | Purpose |
| Clean rod guides | After every fishing trip | Remove dirt and salt that cause wear |
| Check tip for cracks | Monthly | Spot damage before it gets worse |
| Lubricate reel seat | Every 3 months | Keep moving parts smooth |
| Tighten loose parts | Every 3 months | Prevent parts from falling off |
| Replace worn-out tips | As needed | Keep rod working well |
Frequently Asked Questions
How Do I Repair A Broken Fishing Rod Tip?
To repair a broken rod tip, clean the area and remove damaged parts. Use epoxy glue to attach a replacement tip guide. Allow it to dry fully before use. This restores rod functionality and prevents line damage.
What Tools Are Needed To Fix Fishing Rod Tips?
Essential tools include replacement tip guides, epoxy glue, sandpaper, and pliers. These help remove the broken tip, smooth the area, and securely attach the new guide.
Can I Fix Fishing Rod Tips At Home?
Yes, you can fix rod tips at home with basic tools and supplies. Follow step-by-step guides carefully for best results. Home repairs save time and money compared to professional services.
How Long Does Fishing Rod Tip Repair Take?
Repairing a fishing rod tip typically takes 30 to 60 minutes. Drying time for epoxy glue may extend this. Proper curing ensures a strong, durable fix.
Conclusion
Fixing fishing rod tips is simpler than many think. Small cracks or breaks can cause big problems. Using the right tools and materials helps restore your rod quickly. Taking care of your rod extends its life and improves fishing trips.
Practice these steps to keep your gear ready. Enjoy fishing without worry or frequent replacements. A little effort saves money and frustration in the long run. Stay patient and work carefully for the best results. Your fishing adventures will thank you.