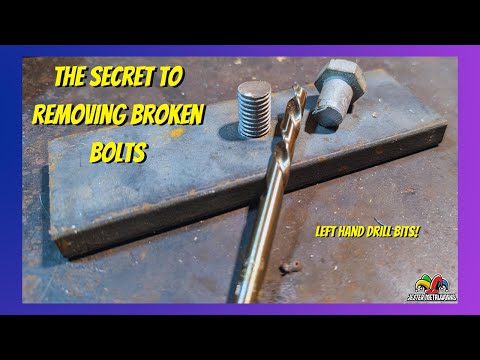
Have you ever struggled with a screw that suddenly sheared off, leaving you stuck and frustrated? You’re not alone.
Removing a sheared-off screw can feel like an impossible task, especially when it’s hidden deep inside your project. But don’t worry—this guide will show you simple, effective ways to get that stubborn screw out without damaging your work. Keep reading, and you’ll learn easy tricks that save time, reduce stress, and help you finish your job like a pro.
Common Causes Of Sheared Screws
Sheared screws break off and can be hard to remove. Understanding why screws shear helps prevent damage. Several common causes lead to this problem.
Below are the main reasons screws shear. Knowing these can save time and effort in repairs.
Overtightening And Material Fatigue
Applying too much force when tightening screws can cause them to shear. The screw metal gets stressed and may crack over time. Material fatigue happens with repeated use or vibration.
- Using a wrench or driver with too much torque
- Reusing screws multiple times
- Exposing screws to constant vibration or movement
Using Wrong Tools
Wrong tools can damage screw heads and cause shearing. Using a screwdriver that does not fit well puts uneven pressure on the screw.
| Tool Type | Effect on Screw |
| Incorrect screwdriver size | Strips head, increases shear risk |
| Worn driver bits | Slips and damages screw head |
| Using pliers instead of driver | Uneven force, causes breakage |
Corrosion And Rust Effects
Corrosion weakens screws, making them brittle. Rust changes the metal structure and causes cracks that lead to shearing.
Common corrosion causes include:
- Exposure to moisture or water
- Contact with salt or chemicals
- Poor protective coatings on screws

Credit: www.amazon.ca
Tools Needed For Screw Removal
Removing a sheared-off screw can be tricky. The right tools make the job easier and safer. This guide will help you understand the tools you need for removing a broken screw.
Let’s explore the essential tools for successful screw removal. Each tool has a special role in making the task easier.
Screw Extractors And Drills
Screw extractors are tools made to remove damaged screws. They grip the screw tightly, allowing you to twist it out.
Drills can help create a hole in the center of the screw. This makes it easier for the extractor to grip the screw.
- Use a small drill bit for precise holes
- Ensure the extractor is the right size
- Turn the extractor counterclockwise to remove
Pliers And Vise Grips
Pliers are useful for gripping the screw head. They can help twist out screws that are not too deep.
Vise grips lock tightly onto the screw. They give you more leverage to turn the screw and remove it.
- Adjust the vise grips to fit the screw
- Use steady pressure to avoid breaking the screw further
- Twist slowly to remove the screw
Lubricants And Penetrating Oils
Lubricants reduce friction and make it easier to turn the screw. They help free screws stuck due to rust or debris.
Penetrating oils seep into tight spaces, loosening the screw. They are ideal for rusty screws that resist removal.
- Apply oil and wait a few minutes
- Use oil before trying other tools
- Repeat if the screw does not move
Preparation Before Removal
Removing a sheared off screw needs careful preparation. This helps avoid damage and makes the process easier.
Proper steps before removal improve your chances of success. Follow these tips to get ready.
Clearing Debris Around The Screw
Remove any dirt, rust, or old paint around the screw. This gives better access and grip for tools.
- Use a small brush or compressed air to clean loose debris.
- Scrape off rust carefully with a wire brush.
- Wipe the area with a clean cloth to remove dust.
Applying Penetrating Oil
Penetrating oil helps loosen the screw by seeping into tight spaces. It reduces friction and corrosion.
| Type of Oil | Use | Drying Time |
|---|---|---|
| WD-40 | General purpose | 10-15 minutes |
| Liquid Wrench | For heavy rust | 15-20 minutes |
| 3-in-1 Oil | Light rust and lubrication | 10 minutes |
Ensuring Proper Lighting And Workspace
Good lighting and a clean workspace help you see the screw clearly. It reduces mistakes and frustration.
- Clear the work area of unnecessary items.
- Use a bright lamp or flashlight to light the screw.
- Arrange your tools nearby for easy reach.
- Wear safety glasses to protect your eyes.

Credit: www.youtube.com
Quick Removal Techniques
Removing a sheared off screw can be tricky. Using the right method saves time and effort.
This guide covers quick techniques to remove broken screws safely and efficiently.
Using A Screw Extractor
A screw extractor is a tool designed to remove damaged screws. It grips the broken screw to turn it out.
- Drill a small hole in the center of the broken screw.
- Insert the screw extractor into the hole.
- Turn the extractor counterclockwise with a wrench.
- The broken screw will loosen and come out.
Drilling A Pilot Hole
Drilling a pilot hole helps create a starting point to remove the broken screw.
| Drill Bit Size | Use For |
| 1/16 inch | Small screws |
| 1/8 inch | Medium screws |
| 3/16 inch | Large screws |
Choose the drill bit size based on the screw size. Drill slowly to avoid damaging the material.
Tapping With Pliers Or Vise Grips
If part of the screw is exposed, use pliers or vise grips to turn it out. This method works well if the screw head is accessible.
- Firmly grip the exposed screw with pliers or vise grips.
- Turn counterclockwise slowly to loosen the screw.
- Keep steady pressure to avoid slipping.
- Remove the screw once it moves freely.
Alternative Methods
Removing a sheared off screw can be tricky. Using alternative methods can help you get the job done without damage.
Try different tools and techniques to find what works best for your situation.
Welding A Nut Onto The Screw
Welding a nut to the broken screw gives you a new grip point. Use a welder to attach the nut firmly. Then turn the nut with a wrench to remove the screw.
This method works best with metal screws and requires welding skills and equipment.
Using Rubber Bands For Grip
A rubber band can fill the gaps and improve grip on the screw head. Place a wide rubber band over the screw, then press the screwdriver firmly into it.
- Choose a thick rubber band for better grip
- Press the screwdriver hard into the rubber band
- Turn slowly to avoid slipping
- Replace the rubber band if it tears
Heat Application To Loosen Screws
Heat can expand the metal and break the bond holding the screw. Use a heat gun or soldering iron to warm the screw area carefully. Avoid overheating nearby parts.
| Tool | Use | Safety Tip |
|---|---|---|
| Heat Gun | Apply heat around screw | Keep moving to avoid damage |
| Soldering Iron | Heat screw head directly | Wear gloves and eye protection |
| Butane Torch | Use for heavy rusted screws | Use with caution and ventilation |

Credit: dengarden.com
Preventing Future Screw Shearing
Sheared screws can cause delays and damage during projects. Preventing this problem saves time and effort.
Using the right tools and methods reduces the risk of screws breaking off. Follow these tips to keep screws intact.
Choosing The Right Screwdriver
Select a screwdriver that fits the screw head exactly. A loose fit can slip and cause the screw to shear.
- Match the screwdriver tip to the screw head type (Phillips, flat, Torx, etc.)
- Use screwdrivers with good grip handles for better control
- Replace worn or damaged screwdriver tips promptly
- Use magnetic screwdrivers to hold screws firmly in place
Proper Torque Application
Applying the right amount of force avoids bending or breaking screws. Too much force causes shearing.
| Torque Level | When to Use |
| Low | Soft materials like plastic or drywall |
| Medium | Wood and general household projects |
| High | Metal and heavy-duty construction |
Use a torque screwdriver or drill with adjustable settings. This helps control the force applied.
Regular Maintenance And Inspection
Check your tools and screws often to catch problems early. Damaged tools can increase screw damage risk.
- Clean screwdrivers and bits after use
- Inspect screwdriver tips for wear and replace if needed
- Store tools in a dry place to prevent rust
- Examine screws before use for defects or corrosion
Frequently Asked Questions
How Do I Remove A Sheared Off Screw Without Damage?
Use a screw extractor kit designed for sheared screws. Drill a small hole in the screw. Insert the extractor and turn counterclockwise. This grips the screw and helps remove it safely without harming surrounding material.
What Tools Are Best For Removing Broken Screws?
A screw extractor, drill, pliers, and penetrating oil work best. The extractor grips and turns the screw. Penetrating oil loosens rust or debris. Pliers help if the screw head is partially exposed.
Can I Remove A Sheared Screw With Household Items?
Yes, use a rubber band and screwdriver. Place the rubber band over the screw head. Press the screwdriver firmly into the band. Turn slowly to grip and remove the screw carefully.
How To Prevent Screws From Shearing Off In Future?
Use quality screws and the right size screwdriver. Apply steady, moderate pressure when driving screws. Avoid over-tightening and use lubricant if necessary for smoother insertion.
Conclusion
Removing a sheared off screw can seem tough but is doable. Use the right tools and stay patient. Small steps often lead to success. Avoid rushing to prevent damage to your project. Practice careful handling to save time and effort.
Keep these tips in mind for future fixes. You will gain confidence with each attempt. Simple methods often work best in tricky situations. Don’t give up—persistence pays off.