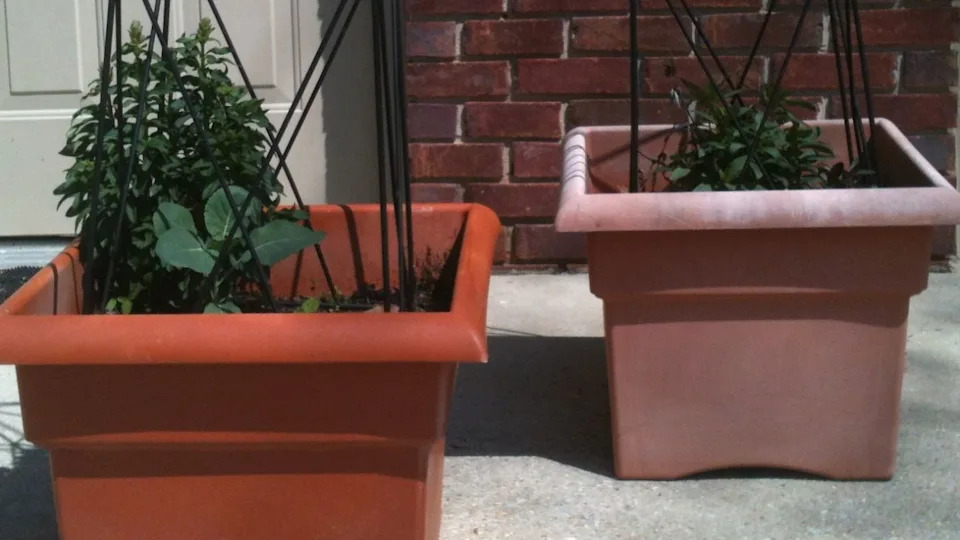
Are your plastic planters looking dull or out of style? You might be wondering if you can simply paint them to give your garden a fresh, vibrant look.
The good news is—you absolutely can! But there’s more to it than just grabbing a brush and some paint. If you want your planters to look great and last longer, you need to know the right way to do it.
Keep reading, and you’ll discover easy tips and tricks to transform your plastic planters into eye-catching garden highlights.

Credit: craftivitydesigns.com
Choosing The Right Paint
Painting plastic planters can brighten up your garden space. Picking the right paint is important for lasting results. Not all paints stick well to plastic surfaces.
To get the best finish, you need paint that bonds with plastic and withstands outdoor conditions. This guide covers the types of paint, top brands, and paint finishes to choose.
Types Of Paint For Plastic
Some paints work better on plastic than others. Look for paint that says it is made for plastic or multi-surface. Acrylic spray paint is popular for plastic planters because it sticks well and dries fast.
- Acrylic spray paint: fast drying, good adhesion, water-resistant
- Enamel paint: durable finish, good for outdoor use
- Chalk paint: matte finish, requires sealing for durability
- Oil-based paint: strong adhesion, longer drying time
Best Brands To Consider
| Brand | Type | Why Choose |
| Krylon | Acrylic spray | Good plastic adhesion, wide color range |
| Rust-Oleum | Enamel and acrylic | Durable finish, outdoor use |
| Montana Gold | Acrylic spray | High coverage, fast drying |
| Annie Sloan | Chalk paint | Matte finish, easy to distress |
Paint Finishes And Effects
Choosing the right finish changes the look and feel of your planter. Glossy finishes shine and highlight colors. Matte finishes give a soft, modern look. Satin finishes fall between gloss and matte.
- Glossy: shiny, bright colors, shows scratches
- Satin: smooth, slight shine, hides imperfections
- Matte: flat, no shine, hides surface flaws
- Textured: adds grip and visual interest
Preparing Plastic Planters
Painting plastic planters can refresh their look. Proper preparation ensures long-lasting results.
Follow these steps to prepare your planters before painting. This will help the paint adhere better.
Cleaning And Drying
Clean your plastic planters thoroughly. Dirt and grease can prevent paint from sticking.
- Rinse the planter with water to remove loose dirt.
- Use mild soap and a soft brush to scrub the surface.
- Rinse again to remove soap residue.
- Dry completely with a towel or let it air dry.
Sanding For Better Adhesion
Sanding roughens the surface of the planter. This helps paint stick better.
Priming Tips
Applying primer is crucial for paint adhesion. It forms a base that helps paint stay on.
| Primer Type | Benefits |
| Spray Primer | Even coverage, easy to apply |
| Brush-On Primer | Thicker coat, great for larger planters |
Painting Techniques
Painting plastic planters can change their look and protect them. Using the right techniques helps paint last longer.
This guide covers how to use brushes and spray paint, apply multiple coats, and avoid drips and streaks.
Using Brushes Vs. Spray Paint
Brushes give more control but may show brush marks. Spray paint covers evenly and dries fast.
- Brushes work well for small or detailed areas.
- Spray paint is better for large surfaces.
- Use smooth strokes with brushes to reduce marks.
- Hold spray cans about 8-12 inches from the planter.
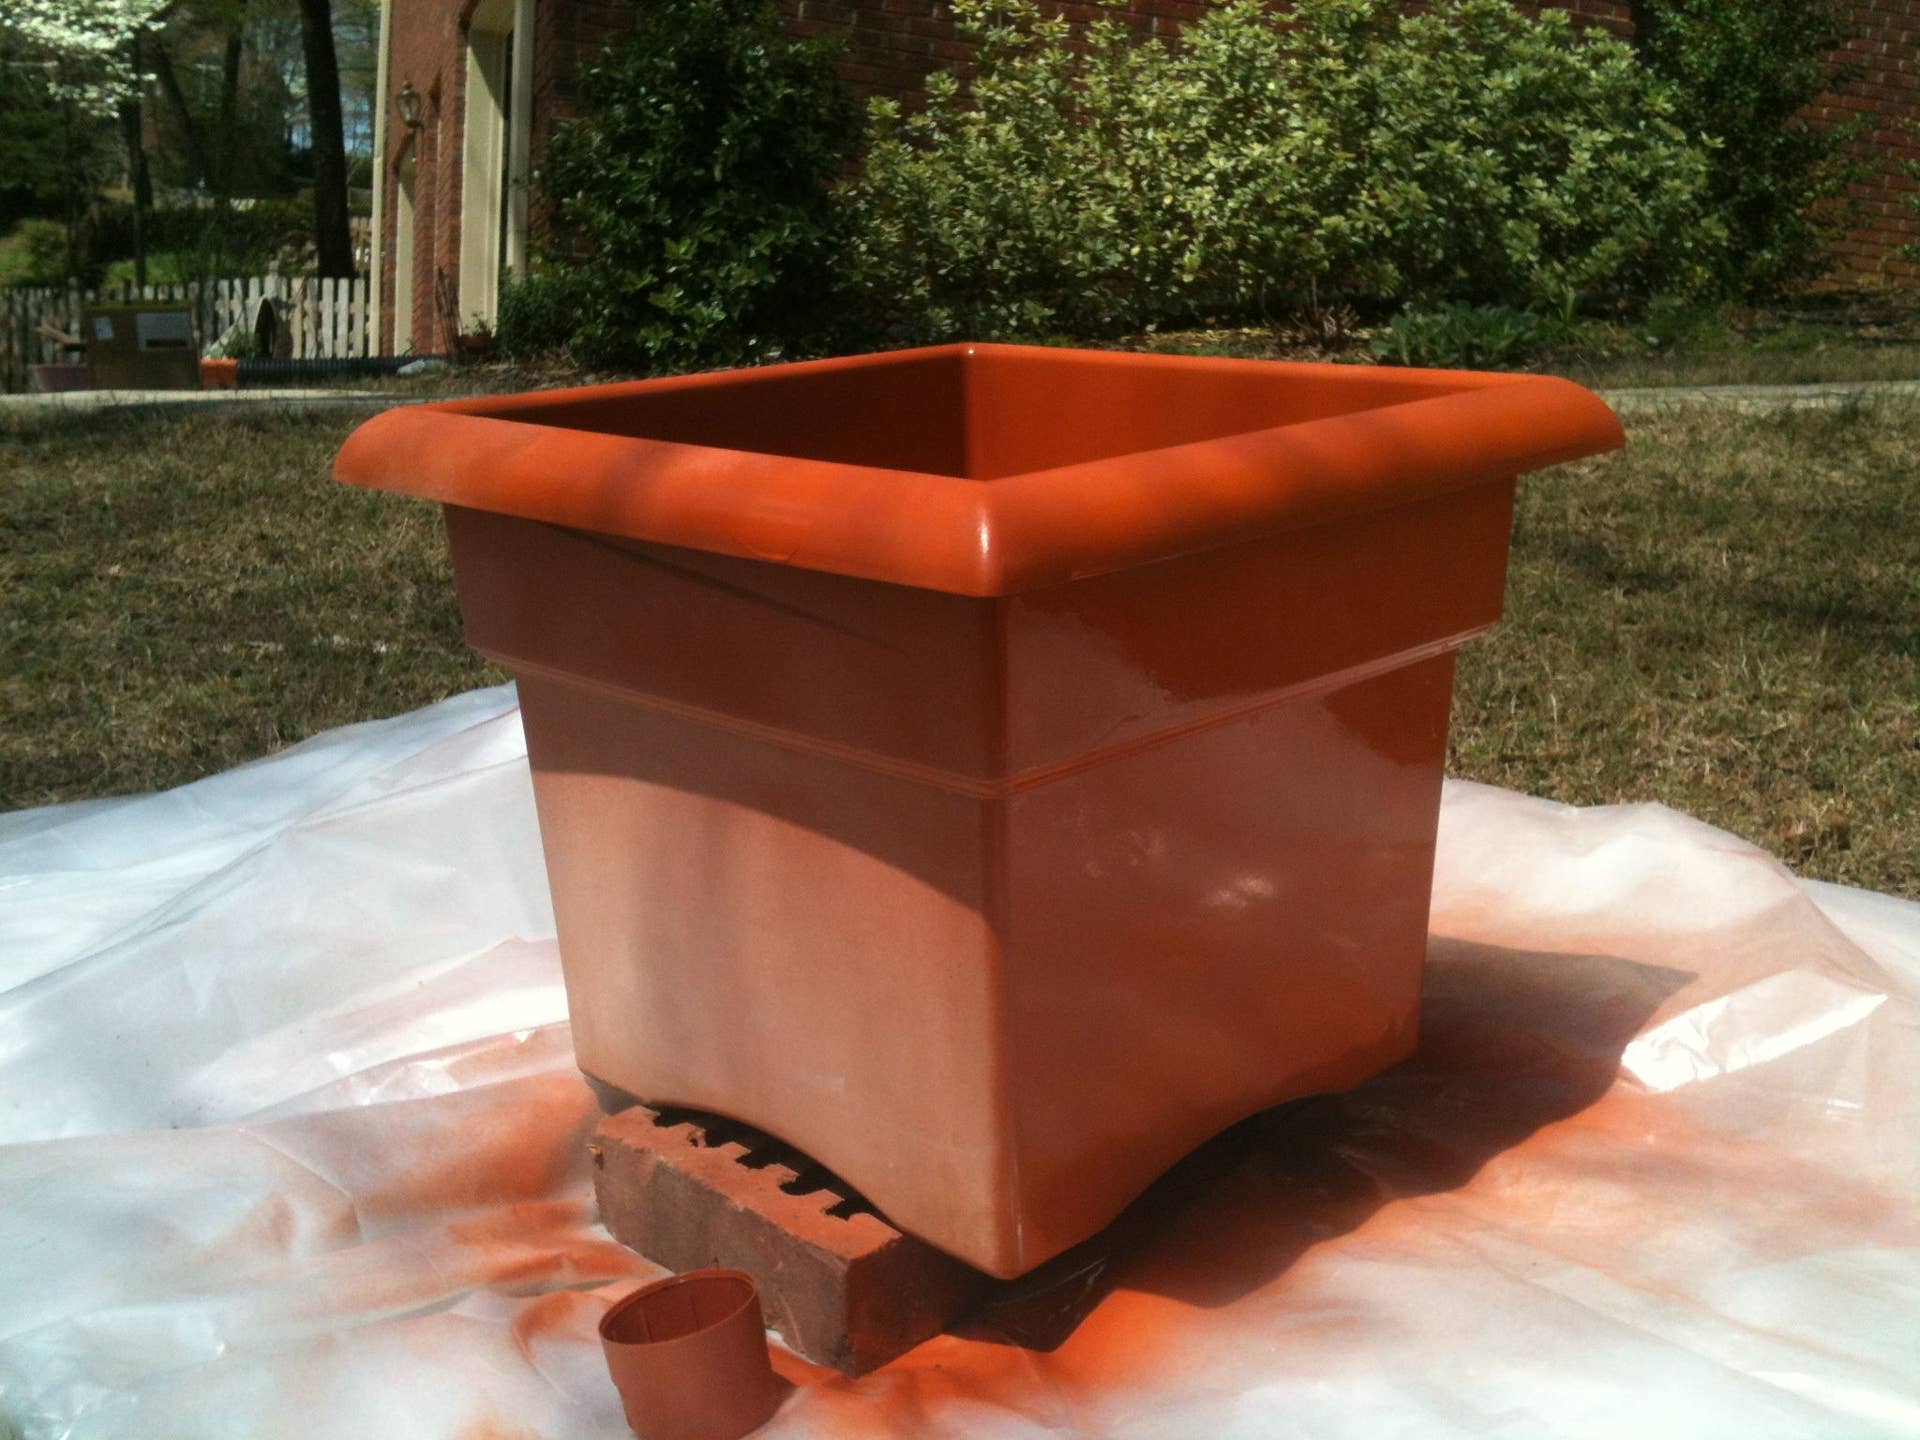
- Spray in light, even layers to avoid drips.
Applying Multiple Coats
Multiple coats create a strong, even finish. Thin coats dry faster and look better than thick ones.
| Coat Number | Drying Time | Tips |
| First | 15-30 minutes | Apply thin, smooth layer |
| Second | 20-40 minutes | Cover missed spots |
| Third | 30-60 minutes | Check for full coverage |
Avoiding Drips And Streaks
Drips and streaks make the paint look messy. Use these tips to keep your finish smooth.
- Do not overload your brush or spray can.
- Paint in thin layers and let each dry fully.
- Keep your brush or spray can moving steadily.
- Hold the spray can at the right distance to avoid pooling.
- If drips appear, lightly sand after drying and repaint.
Credit: dengarden.com
Drying And Curing
Painting plastic planters needs careful drying and curing. These steps ensure the paint sticks well and lasts longer.
Drying is the time paint takes to feel dry. Curing is when the paint fully hardens and bonds to the plastic.
Optimal Drying Times
Drying times depend on the paint type and environment. Most spray paints for plastic dry to touch in 15 to 30 minutes.
- Allow at least 1 hour before handling the planter.
- Wait 24 hours for full drying before applying a second coat.
- Longer drying times may be needed in humid or cold places.
Indoor Vs. Outdoor Curing
Curing helps paint reach full strength. Indoor curing protects the paint from dust and moisture.
Outdoor curing works if the weather is dry and warm. Avoid curing in direct sunlight or windy areas.
| Condition | Recommended Curing Time |
| Indoor, controlled air | 3-7 days |
| Outdoor, dry and warm | 5-10 days |
| Outdoor, humid or cold | 10+ days |
Handling Painted Planters Safely
Handle planters gently during drying and curing. Paint can still scratch or peel if touched too soon.
- Place planters on soft surfaces while drying.
- Wear gloves to avoid skin oils on fresh paint.
- Keep planters away from pets and children during curing.
- Wait until paint is fully cured before using planters outdoors.
Sealing And Protection
Painting plastic planters can brighten your garden. Sealing is key for lasting results.
A good sealant protects paint from water, sun, and dirt. It keeps colors fresh and prevents peeling.
Choosing A Clear Sealant
Select a clear sealant made for plastic surfaces. It should be waterproof and UV resistant.
- Acrylic spray sealants dry fast and are easy to apply.
- Polyurethane sealants offer strong protection but take longer to dry.
- Epoxy sealants provide a tough, glossy finish for heavy use planters.
Benefits Of Sealing
| Benefit | Why It Matters |
| Water Resistance | Keeps paint from washing away |
| UV Protection | Prevents colors from fading in sunlight |
| Durability | Stops cracks and peeling on the surface |
| Easy Cleaning | Allows dirt to wash off smoothly |
Reapplying Sealant Over Time
Sealant wears down with weather and use. Reapply every year for best protection.
- Clean the planter to remove dirt and dust.
- Lightly sand the surface if the sealant peels.
- Apply a thin, even layer of sealant.
- Let it dry fully before using the planter again.

Credit: blog.dixiebellepaint.com
Creative Ideas For Design
Painting plastic planters is a fun way to give them a fresh look. You can use many simple ideas to create unique designs.
With a bit of paint and creativity, your planters can become colorful decorations for your home or garden.
Adding Patterns And Stencils
Patterns and stencils help you paint neat and creative shapes on plastic planters. You can choose flowers, leaves, or geometric shapes.
Use a stencil to trace the design, then fill it with paint. This makes your planter look professional and stylish.
- Use foam brushes for smooth edges
- Choose waterproof paint for durability
- Let each layer dry before adding more
Using Tape For Clean Lines
Tape can help you create sharp, clean lines on your plastic planter. Painter’s tape or masking tape works best.
Apply tape in the pattern you want, then paint over the exposed areas. Remove the tape carefully once the paint is dry.
- Make sure the tape sticks well to avoid paint bleed
- Use contrasting colors for a bold look
- Try stripes, chevrons, or blocks of color
Mixing Colors And Textures
Mixing different colors and textures adds interest to plastic planters. You can use matte, glossy, or metallic paints together.
Try layering colors or adding texture with sponges and brushes to make your planter stand out.
- Combine light and dark colors for contrast
- Use sponges to dab paint for a textured look
- Mix glossy and matte finishes for depth
Common Mistakes To Avoid
Painting plastic planters is a fun way to brighten your garden. It can also protect the plastic from sun damage. But many people make mistakes that cause the paint to peel or fade fast.
Knowing what to avoid helps you get better results. Here are common mistakes to watch out for when painting plastic planters.
Skipping Surface Prep
Many skip cleaning and sanding the planter before painting. This makes the paint stick poorly. Dirt and oils block the paint from bonding to the plastic.
Always wash the planter with soap and water. Let it dry completely. Lightly sand the surface to create rough spots. These help the paint hold better.
- Clean with mild soap and water
- Dry the planter fully
- Sand lightly with fine-grit sandpaper
- Remove dust before painting
Using The Wrong Paint
Not all paints work well on plastic. Some paints peel or crack quickly. Use paint made for plastic surfaces or spray paint labeled for plastic.
Acrylic paints need a special primer to stick well. Avoid regular house paints that do not bond to plastic. Using the right paint improves durability and appearance.
- Choose paint labeled for plastic
- Use plastic primer if needed
- Avoid regular wall or wood paint
- Test paint on a small area first
Painting In Poor Weather
Painting outside in bad weather hurts the finish. Rain or high humidity stops paint from drying well. Extreme heat causes paint to dry too fast and crack.
Paint in mild, dry weather for best results. Keep planters in a shaded spot while drying. This keeps the paint smooth and long-lasting.
- Check weather for dry conditions
- Avoid painting in direct sunlight
- Keep humidity low if possible
- Let paint dry fully before handling
Frequently Asked Questions
Can You Paint Plastic Planters Safely?
Yes, you can safely paint plastic planters by using spray paint designed for plastic surfaces. Clean and dry the planter first, then apply a primer for better adhesion. This ensures long-lasting, vibrant color without damaging the planter.
What Type Of Paint Works Best On Plastic Planters?
Acrylic spray paint or specially formulated plastic spray paint works best. These paints bond well and resist peeling. Using a primer before painting improves durability and finish quality for your plastic planter.
How Long Does Paint Last On Plastic Planters Outdoors?
Paint on plastic planters typically lasts 1-2 years outdoors. Weather exposure can cause fading or chipping. Applying a clear sealant prolongs paint life and protects against sun and rain.
Do You Need To Prime Plastic Planters Before Painting?
Priming plastic planters before painting is highly recommended. Primer improves paint adhesion and prevents peeling. Use a plastic primer for the best results and a smooth finish on your planter.
Conclusion
Painting plastic planters is simple and can refresh their look. Choose the right paint and clean the surface well first. Use light coats to avoid drips and allow drying time. Painted planters add color and style to any space. This small effort gives old plastic new life.
Try it yourself and enjoy a brighter garden or patio. The process is easy and the results can surprise you. Give your plastic planters a fresh, personal touch today.