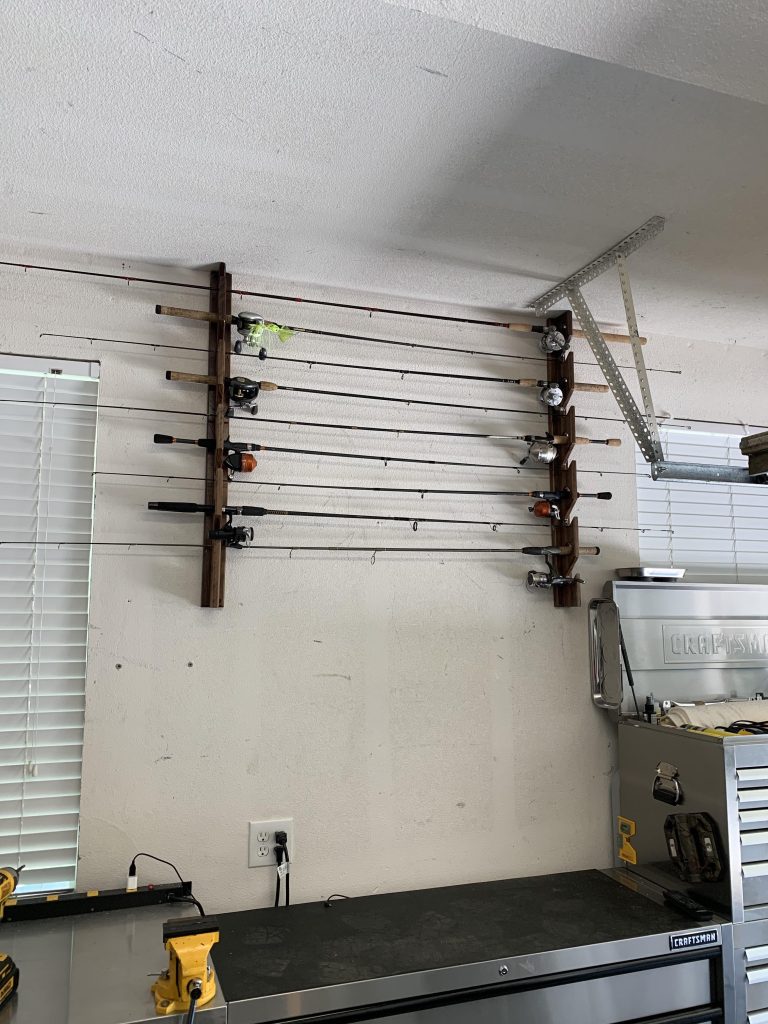
If you love fishing, you know how important it is to keep your rod steady and hands-free. Imagine having a simple, sturdy fishing rod holder that you made yourself—saving you money and making your fishing trips more relaxing.
In this guide, you’ll learn easy steps to create your own fishing rod holder using common materials. By the end, you’ll have a reliable tool that keeps your rod secure and lets you focus on the thrill of the catch.
Ready to build something useful that makes your fishing experience better? Let’s get started!

Credit: www.reddit.com
Materials Needed
Making a fishing rod holder needs some basic materials. Choosing the right items helps create a strong holder.
This guide covers wood, tools, and extra supplies for your project.
Choosing The Right Wood
Wood must be strong and resist water. Cedar and oak are great choices. They last long and do not rot easily.
Pick wood that is smooth and thick enough to hold the fishing rods safely.
- Cedar wood: light and weather-resistant
- Oak wood: very strong and durable
- Pressure-treated wood: good for outdoor use
Essential Tools
Use the right tools to cut and join the wood pieces. This makes the holder safe and neat.
You will need tools for measuring, cutting, and fixing the wood parts together.
- Measuring tape to get exact sizes
- Hand saw or power saw to cut wood
- Drill for making holes
- Screwdriver to drive screws
- Sandpaper to smooth edges
Additional Supplies
Besides wood and tools, you need supplies to join and protect the holder. These keep it strong and safe.
Choose supplies that suit outdoor use and hold the parts firmly.
- Wood screws to join pieces tightly
- Wood glue for extra strength
- Waterproof sealant to protect wood
- Clamps to hold pieces while drying
- Paint or stain (optional) for finish
Designing Your Holder
Creating a fishing rod holder is a fun project. It keeps your fishing rods organized and safe. You can design it to fit your needs and space.
Consider the type of holder and how many rods you have. Designing involves choosing materials and planning your measurements.
Selecting The Holder Type
Decide what kind of holder you want. There are wall-mounted holders and floor stands. Some are portable for easy transport.
Think about where you will use the holder. Indoors or outdoors? This affects the material you choose.
- Wall-mounted holders save floor space
- Floor stands can hold more rods
- Portable holders are easy to move
Measuring And Planning
Measure the area where you will place the holder. This helps in making sure it fits well. Plan the number of rods it will hold.
Consider the height and width of the holder. Make sure it is easy to reach and use.
| Area | Measurement |
| Height | Fit your tallest rod |
| Width | Fit all rods side by side |
Cutting And Shaping
Cutting and shaping wood are key steps to make a fishing rod holder. You need to be precise to get the right shape and size. Careful cutting also keeps the wood strong and safe to use.
In this guide, you will learn how to mark the wood, cut it safely, and sand the edges for a smooth finish. Each step helps you build a sturdy and neat holder.
Marking The Wood
Start by marking the wood to guide your cuts. Use a pencil and ruler to draw straight lines where you want to cut. Mark all parts clearly before you begin cutting.
Double-check your measurements. Marking well saves time and prevents mistakes during cutting.
Safe Cutting Techniques
Use the right tools like a handsaw or jigsaw for cutting wood. Wear safety goggles and gloves to protect yourself. Work on a stable surface to keep the wood steady.
- Clamp the wood securely before cutting.
- Follow the marked lines slowly and steadily.
- Keep your fingers away from the blade at all times.
- Check the blade condition; use a sharp blade for clean cuts.
- Take breaks if you feel tired to avoid accidents.
Sanding For Smooth Edges
Sanding removes rough spots and splinters after cutting. Use sandpaper with medium grit first, then fine grit for a smooth finish. Sand all edges until you can run your hand over them without feeling sharpness.
| Sandpaper Grit | Purpose |
|---|---|
| 80-100 | Remove large rough spots and shape edges |
| 150-180 | Smooth surface and prepare for finish |
| 220 or higher | Final smoothing for a soft touch |
Credit: www.windycityfishing.com
Assembly Steps
Building a fishing rod holder needs clear steps for a strong result.
Follow each part carefully to make sure the holder lasts long.
Joining The Pieces
Start by fitting the wooden parts together to form the frame. Use wood glue on the contact surfaces for a tight bond. Hold the pieces in place until the glue sets.
- Apply glue on edges to be joined.
- Press the pieces together firmly.
- Clamp or hold the parts until dry.
Securing With Screws Or Nails
After the glue dries, add screws or nails for extra strength. This keeps the holder sturdy and safe for your rods. Use a drill to make pilot holes if needed.
| Tool | Purpose |
| Screwdriver | Insert screws securely |
| Hammer | Drive nails into wood |
| Drill | Make pilot holes |
Adding Support Brackets
Support brackets keep the rod holder balanced and strong. Attach brackets where the frame has joints. Use screws to fasten brackets tightly to wood.
- Place brackets at corners and stress points.
- Align brackets flush with the wood edges.
- Screw brackets firmly using a screwdriver.
Finishing Touches
Finishing touches make your fishing rod holder last longer. They also improve its look and function.
These final steps protect your holder and make it easier to use on fishing trips.
Applying Paint Or Sealant
Paint or sealant protects the wood from water and sun damage. It also stops the wood from rotting.
Choose a paint or sealant made for outdoor use. Apply thin coats and let each dry fully before the next.
- Use waterproof paint or clear sealant
- Apply 2-3 coats for best protection
- Let the holder dry in a well-ventilated area
- Sand lightly between coats for smooth finish
Adding Padding For Protection
Add padding to protect your fishing rods from scratches. Soft foam or rubber works well for this.
Attach padding where the rod rests. This keeps your rods safe during transport and storage.
- Cut foam strips to fit the rod holder
- Use strong glue or tape to fix padding
- Cover padding with waterproof tape for durability
- Check padding regularly and replace if worn
Customizing With Accessories
You can add accessories to make the holder more useful. Hooks, clips, and holders keep gear organized.
Think about what you need on your fishing trips and add items to match your style and needs.
- Attach small hooks for keys or tools
- Add clips to hold nets or bait containers
- Install a cup holder for drinks
- Use waterproof labels to mark sections
Mounting Options
Choosing the right mounting option is key for your fishing rod holder. It affects how stable and easy to use your holder will be.
You can select between portable mounts and fixed mounts. Each has its own benefits depending on where you fish.
Portable Vs Fixed Mounts
Portable mounts are light and easy to move. You can take them anywhere and set them up quickly.
Fixed mounts stay in one place. They give more stability but need tools to install and remove.
- Portable mounts work well for fishing trips to different spots.
- Fixed mounts suit long-term fishing spots like docks or boats.
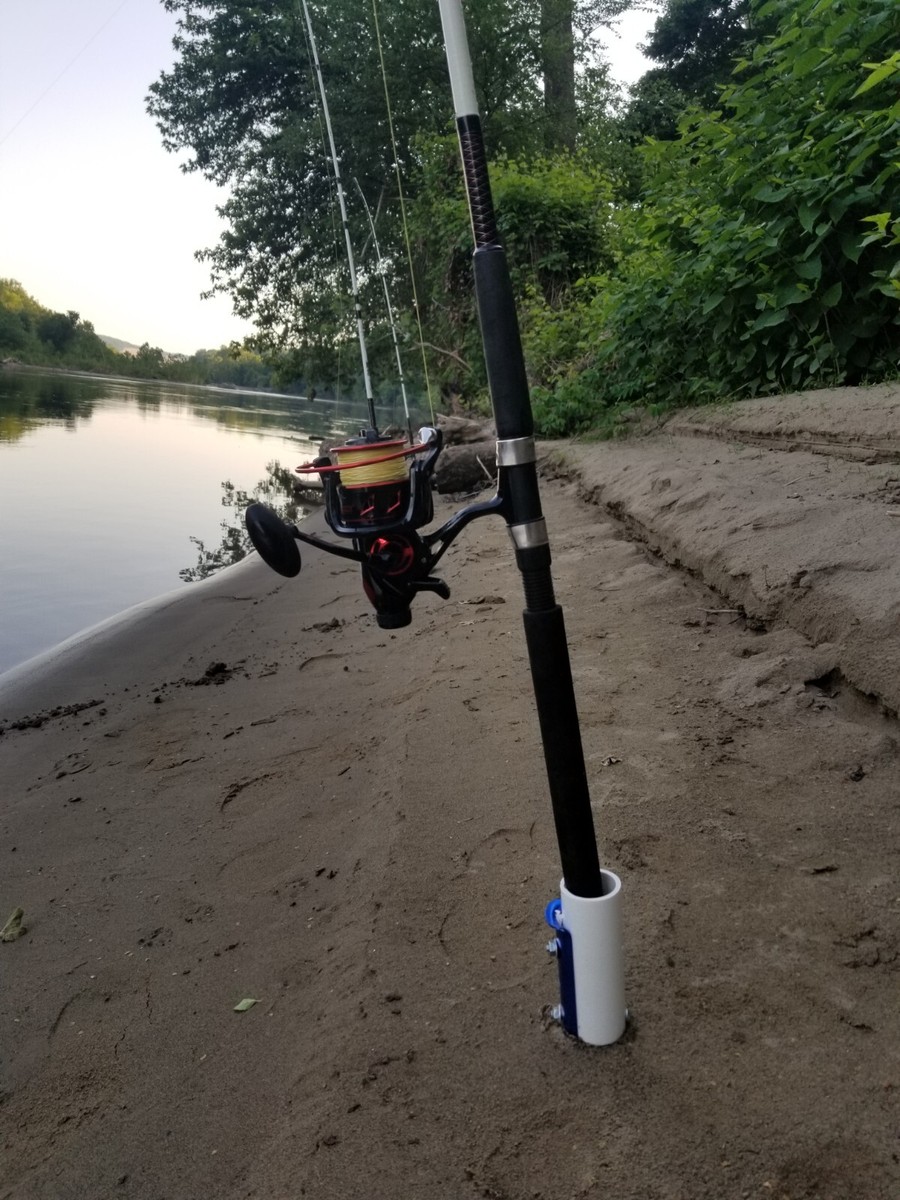
- Portable holders often use clamps or stakes for easy setup.
- Fixed holders require screws or bolts for strong attachment.
Installing On Boats Or Shorelines
Mounting a fishing rod holder on a boat needs secure fittings. The holder must stay steady in waves and movement.
On shorelines, you can use ground stakes or fixed posts. The holder must handle wind and uneven ground.
- Boat mounts often use clamps or screw-in bases on railings.
- Shoreline mounts can use stakes pushed into the soil.
- Fixed mounts on boats need rust-resistant materials.
- Portable mounts are easier to move between shore spots.
Tips For Use And Maintenance
Making a fishing rod holder is only the first step. Keeping it clean and stored well helps it last longer.
Good care prevents damage and keeps your fishing trips smooth and safe.
Proper Cleaning Techniques
Clean your fishing rod holder after each use. Dirt and salt can cause it to wear out fast.
Use mild soap and water to wash it gently. Avoid harsh chemicals that can damage the material.
- Rinse off mud and debris with water
- Use a soft brush to remove stuck dirt
- Dry completely before storing
- Check for rust on metal parts and clean it off
Storage Recommendations
Store your fishing rod holder in a dry place away from sunlight. This stops fading and weakening.
Keep it in a spot where it won’t get crushed or bent. Proper storage keeps it strong and ready to use.
- Use wall hooks or shelves for storage
- Keep it away from heat sources
- Cover it with a cloth to avoid dust
- Store rods separately to avoid tangling
Troubleshooting Common Issues
If your fishing rod holder feels loose or unstable, check the screws or attachments. Tighten them carefully.
Look for cracks or breaks in the material. Small problems can get worse if not fixed early.
- Loose parts: tighten screws or bolts
- Rust: clean and apply rust protection
- Cracks: use waterproof glue or replace parts
- Rod slipping: add non-slip pads or adjust holder size
Credit: www.ssuoruro.gob.bo
Frequently Asked Questions
What Materials Are Needed For A Fishing Rod Holder?
You need PVC pipes, connectors, screws, and a drill. These materials are affordable, durable, and easy to work with. PVC is lightweight and weather-resistant, making it perfect for outdoor use. Additionally, you may want sandpaper and paint for finishing touches.
How Do I Build A Simple Fishing Rod Holder?
Cut PVC pipes to desired lengths and assemble with connectors. Secure joints using screws or PVC cement for stability. Customize the holder to fit your fishing rods. Finally, test it by placing rods to ensure proper fit and balance.
Can I Make A Portable Fishing Rod Holder?
Yes, use lightweight materials like PVC and detachable parts. Design it to collapse or disassemble easily for transport. Adding a handle or strap improves portability. This makes it convenient for travel and various fishing locations.
How Do I Secure A Fishing Rod Holder Outdoors?
Anchor the holder into the ground using stakes or weights. Ensure it is stable against wind or water currents. Using zip ties or clamps can add extra security. Proper anchoring prevents rods from falling or getting damaged.
Conclusion
Making your own fishing rod holder saves money and adds fun to fishing trips. You can customize it to fit your needs and style. It keeps your rods safe and organized while you relax. The steps are simple and use common materials you can find easily.
Try building one yourself to enjoy a better fishing experience. It’s a small project with big benefits. Give it a try and see how it improves your fishing time. Enjoy the outdoors with your new homemade rod holder!