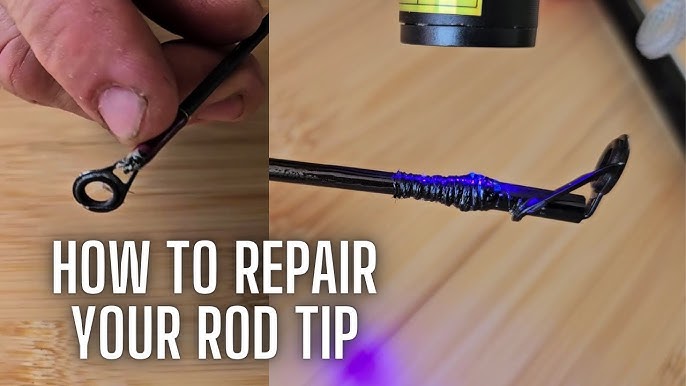
Have you ever felt the frustration of a fishing trip cut short because your rod broke? It’s a common problem that can leave you wondering if your favorite fishing rod is ruined for good.
But what if you could fix it yourself and get back to casting in no time? You’ll discover simple, effective ways to repair a broken fishing rod. Whether it’s a small crack or a snapped tip, you don’t have to throw your rod away just yet.
Keep reading to find out how you can save your gear and enjoy your next fishing adventure without missing a beat.

Credit: www.ebay.ca
Common Rod Breaks
Fishing rods can break in many ways. Knowing the common breaks helps you fix them better.
Some breaks are easy to spot, while others need close inspection. This guide covers the most usual types.
Types Of Breaks
Fishing rods often break in these ways. Each type needs a different repair method.
- Tip Break:The thin tip snaps off, often from a hard strike or pressure.
- Blank Break:The main rod body cracks or splits, usually from bending too hard.
- Guide Break:The rings that hold the line break or fall off.
- Handle Damage:The grip or reel seat cracks or loosens.
Identifying Damage
Look carefully to find all damage on your rod. Missing small cracks can cause bigger breaks later.
| Damage Type | Signs to Look For | Effect on Rod |
|---|---|---|
| Tip Break | Missing or bent tip, sharp edges | Line guides may not hold line well |
| Blank Break | Visible cracks, splinters, or bends | Rod loses strength and may snap |
| Guide Break | Missing or loose rings, rough spots | Line can snag or cut easily |
| Handle Damage | Loose grip, cracks, or missing parts | Hard to hold rod securely |
Tools Needed
Fixing a broken fishing rod is possible with the right tools. You can save your favorite rod with some simple repairs.
Gather the necessary tools and supplies before starting. This will make the repair process easier and quicker.
Essential Repair Tools
These tools are necessary to fix most types of fishing rod breaks. Ensure you have these before starting your repair.
- Super glue or epoxy
- Sandpaper
- Rod wrapping thread
- Rod guides
- Utility knife
Optional Supplies
These supplies can help make the repair process smoother. They are not necessary, but they can be helpful.
| Supply | Use |
| Heat shrink tubing | Secures rod guides |
| Paint or varnish | Protects repaired sections |
| Alcohol wipes | Cleans rod surfaces |
Quick Fixes
Fixing a broken fishing rod can save your gear in a pinch. Quick fixes let you keep fishing without waiting for a full repair.
Some repairs are simple and use common items. These temporary fixes help hold your rod together until you get a proper fix.
Temporary Repairs
Temporary repairs stop damage from getting worse. They can hold the rod parts in place and keep it usable for a while.
- Align the broken parts carefully before fixing
- Use strong tape or glue designed for fishing rods
- Wrap tape tightly around the break for support
- Allow glue to dry fully before using the rod
- Check the repair often to avoid further damage
Using Tape And Glue
Tape and glue are the most common quick fixes. They can hold cracks or breaks together until you get a professional repair.
| Material | Use | Tip |
| Electrical Tape | Wrap around break for strong hold | Apply tightly and overlap layers |
| Super Glue | Bond small cracks or splits | Use sparingly and keep parts aligned |
| Duct Tape | Temporary wrap for bigger breaks | Cover entire break area and press firmly |
| Epoxy | Stronger bond for serious cracks | Mix properly and wait for full cure |
Permanent Repairs
Fixing a broken fishing rod takes care and patience. Permanent repairs help the rod last longer. Using the right tools and techniques is important.
This guide covers aligning broken sections, using rod sleeves, and tips for applying epoxy.
Aligning Broken Sections
Start by matching the broken pieces carefully. Make sure the rod parts line up straight. This ensures the rod bends correctly after repair.
- Check the rod’s natural curve.
- Hold the pieces gently but firmly.
- Rotate the parts to find the best fit.
- Mark the alignment with a pencil or tape.
- Dry-fit before gluing to avoid mistakes.
Using Rod Sleeves
Rod sleeves add strength to the broken area. They cover the break and hold the parts tightly together. Use sleeves made for fishing rods for best results.
| Material | Size Range | Use |
| Fiberglass | Small to medium | Flexible and strong |
| Carbon Fiber | Medium to large | Lightweight and stiff |
| Aluminum | Large | Extra strong but heavy |
Epoxy Application Tips
Epoxy glues the rod and sleeve firmly. Follow these tips to get the best bond and a neat finish.
- Clean the broken surfaces well to remove dirt or oil.
- Mix epoxy thoroughly as per instructions.
- Apply a thin, even coat on both surfaces.
- Slide the sleeve over the break quickly before epoxy sets.
- Rotate the rod slowly to spread epoxy evenly inside the sleeve.
- Wipe off extra epoxy before it hardens.
- Let the repair cure for at least 24 hours without moving.
Repairing Guides And Wraps
A fishing rod guide is a small ring that helps the line run smoothly. Wraps hold these guides in place on the rod.
If a guide breaks or the wraps come loose, you can fix them. Repairing these parts saves money and keeps your rod usable.
Fixing Or Replacing Guides
Start by checking if the guide is cracked or bent. A broken guide needs to be replaced to avoid line damage.
Remove the old guide by cutting the thread wraps carefully. Clean the rod surface before adding a new guide.
- Use needle-nose pliers to hold the guide firmly.
- Apply rod glue to the foot of the new guide.
- Place the guide in the right position on the rod.
- Wrap thread tightly around the guide foot to secure it.
- Finish with epoxy to protect the wraps and glue.
Re-wrapping Techniques
Re-wrapping means wrapping thread around the guide foot and rod. This holds the guide in place and looks neat.
Use thin nylon or polyester thread for the wraps. Keep tension tight and even while wrapping.
- Start by anchoring the thread with a few tight wraps.
- Wrap evenly around the guide foot without gaps.
- Overlap slightly for strong coverage.
- Tie off the thread with a secure knot.
- Coat the wraps with epoxy for durability and shine.

Credit: www.reddit.com
Drying And Curing
Fixing a broken fishing rod needs careful drying and curing. These steps help the repair become strong and last longer.
Proper drying and curing stop the glue or epoxy from weakening. Take your time to get it right.
Proper Curing Time
Give the repair enough time to dry and cure fully. Rushing this can make the fix weak.
Most adhesives need at least 24 hours to cure. Some might require up to 48 hours depending on the product.
- Check the instructions on the glue or epoxy package
- Keep the rod still during the curing process
- Avoid using the rod until curing is complete
Avoiding Common Mistakes
Do not dry the rod in direct sunlight or near heat sources. This can cause cracks or weak bonds.
Do not move or bend the rod while it cures. Movement can cause the repair to fail.
- Do not rush the curing process
- Do not expose the rod to moisture before curing ends
- Do not apply too much glue or epoxy
Testing Your Repair
After fixing a broken fishing rod, testing the repair is important. This helps make sure the rod works well and is safe.
Testing involves checking the rod’s strength and trying out casting. These steps show if the fix will hold up during fishing.
Strength Checks
Check the repaired area by gently bending the rod. Look for any cracks or weak spots. The rod should feel firm and stable.
- Apply light pressure near the repair
- Gradually increase the force to test durability
- Watch for any signs of bending or cracking
- Repeat the test a few times to confirm strength
Casting Practice
Practice casting in an open area to test rod performance. Use soft casts at first to avoid stress on the repair.
| Cast Type | Purpose | Notes |
| Soft Cast | Check rod response | Use light force |
| Medium Cast | Test strength | Watch for flexing |
| Full Cast | Simulate fishing | Only if previous tests pass |
When To Replace
Knowing when to replace a broken fishing rod can save you time and money. Some rods can be fixed easily, but others may need a new one.
This guide helps you decide if repair is possible or if it is better to upgrade your fishing rod.
Assessing Repair Feasibility
First, check the damage on your fishing rod. Small cracks or loose guides can often be repaired. Deep breaks or bent rods might not be fixable.
- Look for cracks in the rod blank
- Check if the guides are bent or missing
- Test if the rod still bends correctly
- Consider if parts are available for repair
- Estimate the cost of repair versus replacement
Knowing When To Upgrade
Some fishing rods are old or damaged beyond repair. Upgrading might give you better performance and durability.
| Condition | Action |
| Small cracks or loose parts | Repair possible |
| Severe breaks or bent rod | Replace recommended |
| Rod over 10 years old | Consider upgrading |
| Expensive repair cost | Better to buy new |

Credit: www.youtube.com
Frequently Asked Questions
Can A Broken Fishing Rod Be Repaired At Home?
Yes, many broken fishing rods can be fixed at home using repair kits. Minor cracks or broken guides are usually repairable with proper tools and materials.
What Tools Do I Need To Fix A Fishing Rod?
You need epoxy glue, replacement guides, thread wrap, sandpaper, and a rod repair kit. These tools help restore the rod’s strength and functionality effectively.
How Much Does Professional Fishing Rod Repair Cost?
Professional repair costs typically range from $20 to $60. The price depends on damage severity and parts needed for replacement or restoration.
When Is It Better To Replace A Broken Fishing Rod?
Replace the rod if the main shaft is severely cracked or broken. Extensive damage often compromises performance and safety, making repair impractical.
Conclusion
Broken fishing rods can often be fixed with the right tools and care. Small cracks or loose guides usually need simple repairs. Some damages may require new parts or professional help. Fixing your rod saves money and keeps your gear ready.
Trying repairs yourself can be rewarding and improve your skills. Always check the rod carefully before each fishing trip. A well-maintained rod makes fishing more enjoyable. Don’t give up on a broken rod too quickly. Many problems have easy solutions.
Keep fishing and keep your gear in good shape.