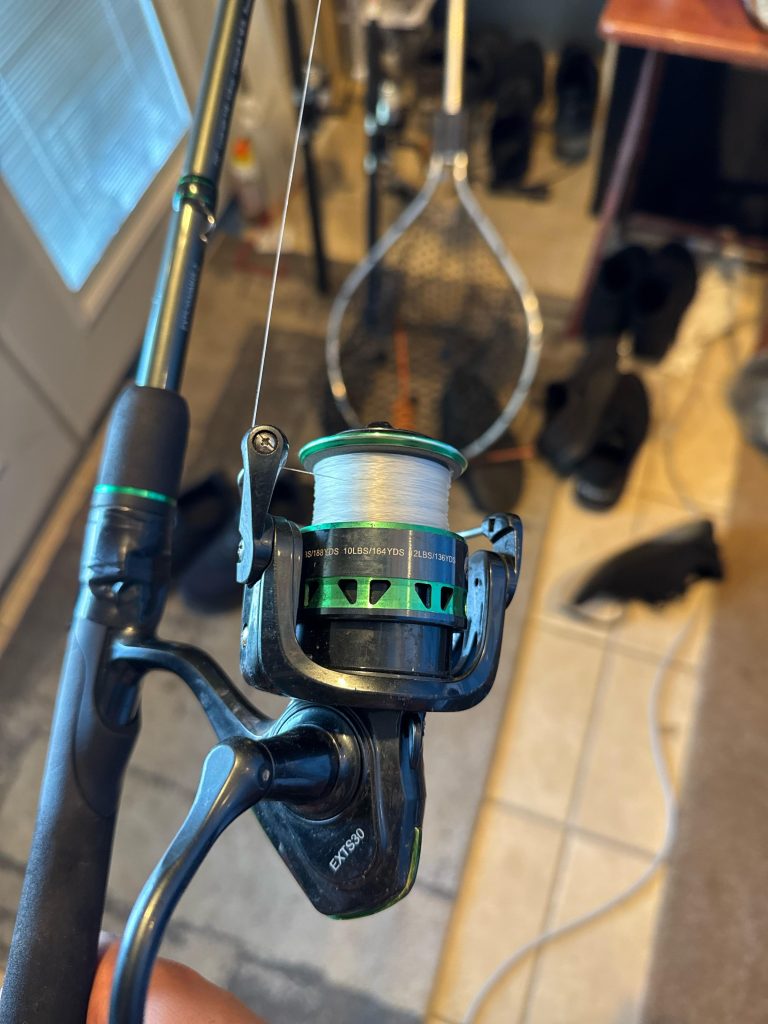
Changing your fishing line might seem tricky at first, but it’s a simple skill that can make a huge difference in your fishing experience. If your line is old, tangled, or just not right for the fish you’re after, knowing how to replace it quickly will save you time and frustration.
In this guide, you’ll learn easy steps to change your fishing line like a pro. By the end, you’ll feel confident and ready to get back on the water with a fresh, strong line that improves your chances of a great catch.
Keep reading—your next fishing trip depends on it!
Choosing The Right Line
Choosing the right fishing line is important for a good fishing experience. The right line helps you catch fish without breaking or losing your catch. You need to know the types of lines, their strength, and what fits your target fish.
This guide explains how to pick the best fishing line by looking at different types, strength, and fish species.
Types Of Fishing Lines
There are three main types of fishing lines: monofilament, fluorocarbon, and braided. Each has its own use and benefits.
- Monofilament:Soft and easy to handle. Good for beginners and light fishing.
- Fluorocarbon:Harder to see underwater. Good for clear water fishing.
- Braided:Very strong and thin. Best for heavy fishing and long casts.
Line Strength And Thickness
Fishing line strength is called “test” and is measured in pounds. It shows how much weight the line can hold before breaking. Thickness matters because thicker lines are stronger but less sensitive.
| Line Type | Test Strength (lbs) | Diameter (inches) |
| Monofilament | 4 to 20 | 0.008 to 0.018 |
| Fluorocarbon | 6 to 30 | 0.007 to 0.016 |
| Braided | 10 to 80 | 0.006 to 0.020 |
Selecting Line Based On Fish Species
Different fish need different line types and strengths. You should match the line to the size and fight style of the fish.
- Small fish:Use light monofilament lines around 4-8 lbs test.
- Medium fish:Use fluorocarbon or braided lines between 10-20 lbs test.
- Large fish:Use strong braided lines above 30 lbs test for safety.

Credit: nightgalaxy.com
Gathering Necessary Tools
Changing a fishing line is a simple task. First, gather all the tools you need. Having everything ready makes the job easier and quicker.
You’ll need some essential tools and optional accessories. These items help you remove the old line and add a new one smoothly.
Essential Tools For Line Change
Here are the main tools you need to change a fishing line. Make sure you have them before you start.
- Fishing Line:Choose the right type and strength for your fishing needs.
- Scissors or Line Cutter:Use them to cut the old line and trim the new line.
- Fishing Reel:The reel holds the line and helps you cast your bait.
Optional Accessories For Efficiency
These accessories are not essential but can make the process easier. Consider using them for a more efficient line change.
- Line Spooler:Keeps the line tight and tangle-free while you spool it onto the reel.
- Line Conditioner:Helps protect the line from wear and tear, making it last longer.
- Gloves:Protect your hands while handling sharp tools and the fishing line.
Removing Old Fishing Line
Changing your fishing line starts with removing the old one. This keeps your reel working well and prevents tangles. Take your time to do it carefully.
Old line can get weak and dirty. Removing it properly helps you prepare for fresh line on your reel.
Loosening The Line
First, release the drag on your reel. This makes it easier to turn the spool. Hold the rod firmly to avoid slips. Then, gently pull the line to check if it moves freely.
Unwinding The Spool
Turn the spool by hand to unwind the line. Keep the line taut to avoid tangles. If the line is stuck, use scissors to cut it in small sections. Remove each piece carefully.
- Release the drag on the reel
- Hold the rod steady
- Turn the spool slowly
- Keep the line tight
- Cut stuck line into smaller parts
Disposing Of The Old Line Safely
Old fishing line can harm wildlife if thrown away carelessly. Wrap it tightly before disposal. Use a container or bag to keep it secure.
| Disposal Method | Details |
|---|---|
| Recycle | Check local centers that accept fishing line |
| Trash | Place in a sealed bag to prevent tangling |
| Reuse | Use for crafts or gardening ties if clean |

Credit: anglersresource.net
Preparing The Reel
Changing a fishing line starts with preparing the reel. This step helps the new line work well.
Take time to clean and check the reel before adding the new line. It keeps your gear in good shape.
Cleaning The Spool
Remove the old fishing line from the spool. Use a soft cloth to wipe away dirt and dust.
Cleaning the spool stops dirt from damaging the new line. It also helps the line spool smoothly.
- Take off any leftover line pieces
- Wipe the spool with a dry cloth
- Use mild soap and water for sticky spots
- Dry the spool completely before use
Inspecting For Damage
Look closely at the spool for cracks or dents. Damage can cause the line to break or tangle.
Check the reel’s parts too. Make sure the drag system and bail arm work well.
- Find cracks or chips on the spool
- Spin the spool to hear any rough sounds
- Test the drag system for smooth resistance
- Check the bail arm for proper movement
Attaching The New Line
Changing a fishing line starts with attaching the new line to the reel spool. This step is important to keep the line secure and prevent slippage. Careful attachment helps the line wind evenly and smoothly.
Follow the correct method to fix the line before you start winding it onto the spool. This guide covers how to secure the line and begin winding it properly.
Securing The Line To The Spool
Begin by threading the new line through the rod guides. Then, wrap the line around the spool once or twice. Tie a strong knot to hold the line in place. The knot type depends on your reel model, but an Arbor knot works well for most.
- Pass the line through the spool lip.
- Wrap the line around the spool once.
- Tie an Arbor knot firmly.
- Trim the tag end close to the knot.
- Pull the main line tight to secure.
Starting The Wind
Hold the line with slight tension and start turning the reel handle slowly. This keeps the line tight and prevents loose coils. Wind the line evenly across the spool. Keep the line tight but avoid over-tensioning, which can damage the line.
| Tip | Reason |
|---|---|
| Keep line tight with fingers | Prevents loose loops and tangles |
| Wind slowly and evenly | Distributes line across spool |
| Fill spool about 1/8 inch from edge | Avoids line slipping off spool |
| Check line tension often | Protects line from damage |
Spooling The New Line
Changing your fishing line starts with spooling the new line correctly. This process helps avoid tangles and keeps your setup ready for fishing.
Pay close attention to how you load the line onto the reel. Proper tension and filling are key to good performance on the water.
Maintaining Tension
Keeping steady tension on the line while spooling is essential. It prevents loose coils that cause tangling and line twists later on.
- Hold the line tightly between your fingers as it feeds onto the spool.
- Ask a friend to help by holding the spool with some pressure.
- Use a cloth to add friction if the spool spins too freely.
- Check tension frequently during the process to keep it consistent.
Filling The Spool Correctly
Fill the spool evenly without overfilling or leaving too much empty space. This helps the line release smoothly when casting.
| Spool Condition | Effect |
| Too Full | Line may slip off or tangle easily |
| Too Empty | Reduced casting distance and poor line lay |
| Evenly Filled | Better casting and less chance of line damage |
Finishing Touches
Changing a fishing line is not done until you complete the final steps. These steps ensure your setup works well and lasts on the water.
Pay close attention to cutting the line, tying strong knots, and testing your setup. These actions keep your fishing gear safe and ready to catch fish.
Cutting The Line
Cut the fishing line cleanly using sharp scissors or a line cutter. Avoid frayed ends that can weaken the line.
- Hold the line tight before cutting
- Make a straight cut close to the knot
- Remove any damaged or twisted parts
- Keep the cut end smooth to prevent snagging
Tying Knots
Choose a strong knot type for your fishing line. The knot must hold tight under tension without slipping.
| Knot Type | Use | Strength |
|---|---|---|
| Improved Clinch Knot | Attaching hook or lure | High |
| Palomar Knot | Strong loop for lure | Very High |
| Uni Knot | Line to line or hook | High |
Wet the knot before tightening. This reduces friction and prevents line damage.
Testing The Setup
Always test your fishing line setup before fishing. This helps avoid losing fish due to weak knots or line breaks.
- Pull on the line firmly to check knot strength
- Check reel tension and drag settings
- Look for any twists or weak spots on the line
- Make adjustments if you notice any problems

Credit: www.reddit.com
Tips For Longevity
Taking care of your fishing line helps it last longer and perform better. Proper storage and regular maintenance keep the line strong and ready to use.
Follow simple tips to protect your fishing line from damage and wear. This guide covers how to store your line and maintain it regularly.
Storing Your Fishing Line
Store your fishing line in a cool, dry place away from sunlight. Avoid places with heat or moisture to prevent weakening the line.
- Keep the line in its original spool or a sealed container.
- Avoid tight bends or knots that can cause damage.
- Do not store the line near chemicals or solvents.
- Use a line conditioner to keep the line flexible.
Regular Maintenance
Check your fishing line often for signs of wear or damage. Cleaning and replacing old line improves your fishing experience.
| Maintenance Task | Frequency | Purpose |
|---|---|---|
| Inspect for nicks and frays | Before every use | Prevent line breakage |
| Clean with fresh water | After each fishing trip | Remove dirt and salt |
| Replace line | Every 3-6 months | Maintain strength and performance |
| Apply line conditioner | Monthly | Keep flexibility and reduce wear |
Frequently Asked Questions
How Often Should I Change My Fishing Line?
Change your fishing line every 3-6 months or after heavy use. Frequent replacement ensures better casting, strength, and prevents line breakage. Inspect for frays or damage regularly to maintain optimal performance during fishing trips.
What Tools Do I Need To Change Fishing Line?
You need scissors or line cutters, a new fishing line, and a fishing reel. A spooler helps for even winding. Basic tools make the process easier and faster, ensuring a smooth line change.
How Do I Remove Old Fishing Line From The Reel?
Cut the old line near the spool and unwind it completely. Dispose of it properly to avoid tangles. This prepares your reel for the new line, ensuring no leftover tangles or knots.
Can I Reuse Old Fishing Line When Changing?
It’s not recommended to reuse old fishing line. Old lines lose strength and flexibility, increasing the risk of breaks. Always use fresh line for better durability and fishing success.
Conclusion
Changing a fishing line does not have to be hard. Follow the steps carefully and take your time. A fresh line improves your fishing experience and helps catch more fish. Keep your tools ready and check the line often. Practice makes it easier each time you do it.
Now, you are ready to enjoy fishing with confidence and success.