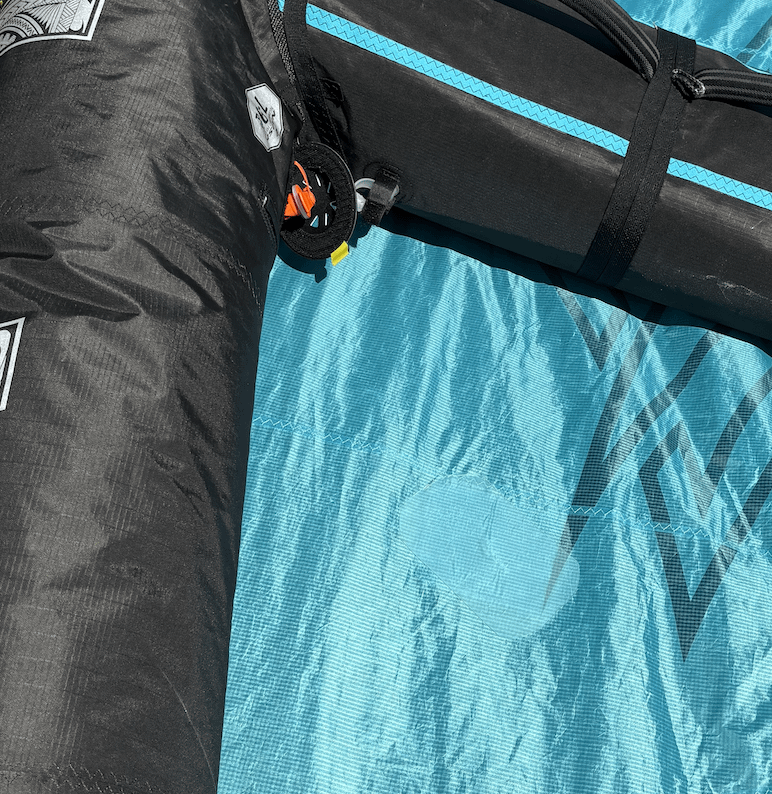
Have you ever unzipped your sleeping bag only to find a rip that threatens to ruin your next outdoor adventure? A tear in your sleeping bag can feel like a disaster, but it doesn’t have to be.
You can fix it quickly and easily, saving your gear and keeping your nights cozy. In this guide, you’ll learn simple, effective ways to repair your sleeping bag rip—no special skills needed. Keep reading, and you’ll be ready to tackle any tear and get back to enjoying your trips without worry.
Identify The Rip Type
Before fixing a sleeping bag rip, you must find out what kind of tear it is. Different rips need different repair methods. Understanding the damage helps you choose the right tools and materials.
Look closely at the rip. Check its size, shape, and the fabric around it. This will guide you on how to patch or sew it properly.
Pinpointing Small Tears
Small tears are usually less than two inches long. They often occur along seams or where the fabric gets thin. These tears do not show much fabric damage around the rip.
- Look for a clean tear with no fraying edges.
- Check if the insulation inside is still intact.
- See if the tear is near a zipper or stitching line.
Handling Large Holes
Large holes are bigger than two inches. They may have frayed fabric or loose threads around the edges. These holes sometimes show missing insulation or fabric.
| Feature | Small Tear | Large Hole |
|---|---|---|
| Size | Under 2 inches | Over 2 inches |
| Edges | Clean or slight fray | Frayed or ragged |
| Insulation | Usually intact | Often exposed or missing |
| Location | Near seams or fabric stress points | Anywhere, often stressed areas |
Assessing Fabric Damage
Fabric damage means the material is weak or torn in many places. You may see thin spots, holes, or worn patches. The damage can affect how well the sleeping bag keeps you warm.
Check the fabric damage by:
- Pressing gently on different parts of the bag to feel for thin spots.
- Holding the fabric up to light to find holes or weak areas.
- Looking for color changes or worn spots that show wear.

Credit: www.apidura.com
Gather Repair Materials
Repairing a sleeping bag rip can be simple if you have the right materials. This guide will help you gather essential tools and choose the right patch and adhesive.
With proper materials, your sleeping bag will be as good as new. Read on to learn about the necessary items you will need.
Essential Tools
Having the right tools makes the repair process easy. Here are the essential tools you need:
- Scissors for cutting patches
- Needle and thread for sewing
- Clean cloth for wiping the area
- Safety pins to hold fabric in place
Choosing The Right Patch
Picking the correct patch is important for a lasting repair. The patch should be durable and match the fabric of your sleeping bag.
Patches can be self-adhesive or require sewing. Choose a patch that best fits the size and location of the rip.
Selecting Suitable Adhesives
Adhesives are crucial for securing patches. Use a waterproof adhesive if the sleeping bag will be exposed to moisture.
Check that the adhesive is compatible with the fabric type. Some adhesives work better with synthetic materials, while others are suited for natural fibers.
Prepare The Sleeping Bag
Before fixing a rip in your sleeping bag, prepare it carefully. This helps the repair last longer.
Focus on cleaning and handling the fabric gently. These steps make the patch stick better.
Cleaning The Area
Cleaning the torn area removes dirt and oils. These can stop glue or patches from sticking well.
- Use a soft brush to remove loose dirt.
- Dab the area with a damp cloth and mild soap.
- Avoid soaking the fabric too much.
- Let the area air dry completely before repair.
Drying And Flattening Fabric
Dry the fabric fully to prevent mold and weak patches. Flatten it to avoid wrinkles under the patch.
| Drying Method | Notes |
| Air dry flat | Best for delicate fabrics, prevents shrinking |
| Use fan | Speeds drying without heat damage |
| Avoid direct sunlight | Prevents fabric fading and damage |

Credit: www.thespruce.com
Simple Stitch Repairs
Fixing a rip in your sleeping bag is easier than you think. You only need some basic sewing skills and a few tools. Simple stitch repairs can make your sleeping bag last longer and keep you warm.
This guide covers easy hand sewing techniques, how to reinforce seams, and the benefits of using waterproof thread for repairs.
Basic Hand Sewing Techniques
Start by threading a needle with strong thread. Tie a knot at the end of the thread to keep it from slipping. Use small, even stitches to close the rip. Keep your stitches close together to make the repair strong.
- Thread the needle and knot the end
- Begin stitching about half an inch before the rip
- Use a simple running stitch or backstitch
- Keep stitches small and close
- Finish with a secure knot
Reinforcing Seams
Reinforcing seams helps your sleeping bag hold together longer. Sew over the existing seam area with extra thread. This adds strength and prevents the rip from growing. Use a backstitch for the best hold.
| Technique | Description | Purpose |
|---|---|---|
| Backstitch | Stitch backward and forward along the seam | Creates a strong, tight seam |
| Double Stitch | Sew two parallel lines of stitching | Adds extra strength |
| Patching | Attach fabric patch over the rip | Covers large holes and reinforces weak spots |
Using Waterproof Thread
Waterproof thread keeps your repair dry and durable. It resists moisture and lasts longer than regular thread. Use it especially for outdoor gear like sleeping bags.
Tips for using waterproof thread:
- Choose thread labeled as waterproof or marine grade
- Wax the thread lightly for easier stitching
- Tie strong knots to prevent slipping
- Store thread in a dry place
Applying Patches
Patching a rip in your sleeping bag helps keep it warm and usable. You can fix tears with different methods. Each method works well for certain fabrics and rip sizes.
Choose the method that fits your sleeping bag and tools. The most common ways are iron-on patches, sewing patches, or using fabric glue.
Iron-on Patch Method
Iron-on patches stick to fabric using heat. They work best on nylon and polyester sleeping bags. You will need an iron and a patch that matches your bag.
- Clean and dry the ripped area before patching.
- Cut the patch so it is slightly larger than the rip.
- Place the patch over the rip with the sticky side down.
- Cover the patch with a thin cloth to protect it.
- Press the iron on medium heat over the patch for about 30 seconds.
- Let it cool and check if the patch is firmly attached.
Sew-on Patch Method
Sewing a patch is very strong and lasts long. This method suits all fabrics and large rips. You will need a needle, strong thread, and a patch.
Follow these tips to sew the patch correctly:
- Choose a patch made from similar fabric and color.
- Pin the patch over the rip to hold it in place.
- Use a strong thread, like nylon or polyester thread.
- Sew around the edges with small, tight stitches.
- Check that the patch is secure and no gaps remain.
Using Fabric Glue For Patches
Fabric glue is easy and fast. It works well for small rips or temporary fixes. Use glue made for outdoor fabrics to keep the patch strong.
| Glue Type | Drying Time | Water Resistance |
|---|---|---|
| Permanent Fabric Glue | 24 hours | High |
| Temporary Fabric Glue | 1 hour | Low |
| Outdoor Fabric Glue | 12 hours | Medium |
To apply fabric glue:
- Clean and dry the area around the rip.
- Apply glue evenly on the patch back.
- Press the patch firmly on the rip.
- Let it dry fully before using the sleeping bag.
Temporary Fixes For Emergencies
A rip in your sleeping bag can be a big problem during a trip. Fixing it quickly helps keep you warm and dry.
These temporary fixes can hold your sleeping bag until you can make a permanent repair.
Using Tape Solutions
Tape is a fast way to fix small rips. Use strong tape that sticks well to fabric.
Clean the area first. Cut a piece of tape bigger than the rip. Press it firmly on the tear.
- Clear packing tape works for small holes
- Duct tape is strong but may leave residue
- Special fabric tapes stick better and are softer
Quick Fabric Adhesives
Fabric glue can seal a rip fast. It works well when you don’t have a needle or thread.
Apply a small amount around the tear and press the edges together. Let it dry for the time suggested.
- Choose glue made for fabric to avoid stiffness
- Use it on clean, dry fabric for best hold
- Check drying time before packing your sleeping bag
Diy Patch Alternatives
You can make a quick patch from materials on hand. Use cloth, plastic, or even duct tape as a patch.
Cut a patch bigger than the rip and attach it securely. This helps stop the rip from getting worse.
- Cut fabric from old clothes or bags
- Use double-sided tape or glue to hold patch in place
- Apply tape over the edges for extra strength
Maintaining Repaired Areas
Fixing a rip in your sleeping bag is only the first step. Keeping the repaired part strong helps your bag last longer. This guide shows how to care for repaired spots.
Good maintenance stops small tears from turning into big problems. Follow easy tips to protect your sleeping bag after repair.
Preventing Further Damage
Avoid pulling or stressing the repaired area to keep the fix strong. Be careful when packing and unpacking your sleeping bag.
Use gentle movements and avoid sharp objects near the repair. Check the fixed spot regularly for signs of wear.
- Do not tug on the repaired area
- Keep sharp things away from the sleeping bag
- Inspect repair before and after each use
- Reinforce weak spots if needed
Proper Washing After Repair
Wash your sleeping bag gently after repairs to protect the fixed areas. Use cold water and a mild detergent made for delicate fabrics.
Hand washing is best, but use a gentle cycle if using a washing machine. Avoid bleach and fabric softeners because they can damage repair glue or stitches.
- Use cold water and mild soap
- Wash by hand or on gentle machine cycle
- Skip bleach and fabric softeners
- Air dry your sleeping bag flat
Storage Tips To Extend Lifespan
Store your sleeping bag in a dry, cool place to avoid damage to repaired areas. Avoid compressing it too much for long times.
Use a large storage sack or hang the sleeping bag to keep it fluffy and safe. Keep it away from direct sunlight and moisture.
- Store in a loose, breathable bag
- Keep in a dry, cool spot
- Hang or lay flat, don’t crush
- Avoid sunlight and damp areas
When To Seek Professional Help
Repairing a sleeping bag rip can be easy or hard. Some tears need expert care. Knowing when to call a professional saves time and keeps your bag safe.
Small holes you can fix at home. Big or complex damage may need special tools and skills. Let’s look at signs you need help.
Complex Damage Scenarios
Some rips are more than just a tear. Damage near zippers, seams, or insulation can be tricky. Professionals can properly fix these without hurting your bag.
- Rips along zipper lines
- Large holes or multiple tears
- Damage to insulation or inner lining
- Seam separations that affect bag shape
Choosing Repair Services
Not all repair shops handle sleeping bags well. Look for services with experience in outdoor gear. Ask about their repair methods and materials.
- Check for gear-specific repair experience
- Ask if they use waterproof and durable patches
- Inquire about repair turnaround time
- Read reviews or get referrals
Cost Vs. Replacement Considerations
Fixing a sleeping bag can be cheaper than buying new. But sometimes replacement makes more sense. Use this table to help decide.
| Factor | Repair | Replacement |
| Cost | Lower for small damage | Higher upfront |
| Time | May take days | Immediate use |
| Durability | Depends on repair quality | Brand new condition |
| Environmental Impact | Less waste | More waste |
| Complex Damage | May not be possible | Always possible |

Credit: www.campingworld.com
Frequently Asked Questions
How Do I Fix A Small Rip In My Sleeping Bag?
Use a fabric repair patch or adhesive tape designed for outdoor gear. Clean the area first. Apply the patch smoothly to avoid wrinkles. Let it dry fully before use. This quick fix prevents further tearing and keeps insulation intact.
What Materials Are Best For Repairing Sleeping Bags?
Nylon or polyester patches work best since most sleeping bags use these fabrics. Use waterproof, breathable adhesive tapes or patches for durability. Choose patches that match your sleeping bag’s thickness and color for a seamless repair.
Can I Sew A Sleeping Bag Rip Without Damaging Insulation?
Yes, use a fine needle and strong thread. Sew gently along the rip edges to avoid pushing insulation out. Use small stitches and avoid pulling too tight. This method effectively closes the rip while keeping the insulation intact.
How Long Does A Sleeping Bag Repair Last?
A well-done repair can last several seasons if done properly. Using quality patches or sewing carefully improves durability. However, avoid heavy stress on repaired areas to maintain repair strength over time.
Conclusion
Repairing a sleeping bag rip is easier than it seems. Small tears do not need a new bag. Use simple tools and fix the rip quickly. Keep your sleeping bag warm and safe for many trips. Regular care helps your gear last longer.
Try these tips next time your bag rips. Enjoy your outdoor adventures without worry. A little effort keeps your gear ready to go.