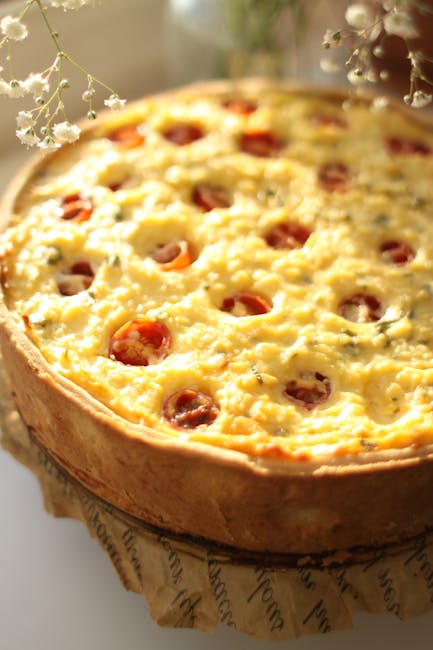
You’ve baked a beautiful pie, but now comes a crucial step: tenting it. Knowing how to tent a pie can make all the difference between a perfectly golden crust and one that’s burnt or soggy.
If you want your pie to look and taste amazing every time, this simple technique is your secret weapon. Keep reading, and you’ll discover exactly how to protect your pie while it bakes, so your dessert turns out just right—flaky, golden, and irresistible.
Credit: savorthebest.com
Why Tent A Pie
Tenting a pie means covering it loosely with foil while baking. This simple step helps make your pie turn out better. It protects the crust and improves the baking process.
By tenting a pie, you can avoid problems like burning or uneven cooking. This guide explains why tenting is important and how it helps your pie.
Protecting The Crust
The crust is the most delicate part of a pie. It can burn or dry out if left exposed to direct heat. Tenting with foil shields the crust from too much heat while baking.
- Stops the crust from burning
- Keeps the edges soft and flaky
- Prevents the crust from drying out
Preventing Over-browning
Over-browning happens when the pie crust or top gets too dark before the filling cooks fully. Tenting slows down the browning process so the pie cooks evenly.
| Without Tenting | With Tenting |
|---|---|
| Crust may become too dark quickly | Crust browns slowly and evenly |
| Filling might not cook through | Filling cooks fully without burning crust |
| Edges can harden or burn | Edges stay soft and golden |
Ensuring Even Baking
Tenting helps heat spread evenly over the pie. This prevents hot spots that can burn parts of the pie while leaving other parts undercooked.
- Place foil loosely over the pie
- Bake for the recommended time
- Remove foil near the end for browning

Credit: www.erinjeannemcdowell.com
Choosing Tent Materials
Tenting a pie keeps it from over-browning. Choose the right materials to protect your crust.
Different materials have unique benefits. Learn which is best for your pie.
Aluminum Foil Types
Aluminum foil is a popular choice. It is flexible and easy to shape over pies.
- Standard Foil: Good for general use.
- Heavy-Duty Foil: Best for longer baking times.
- Non-Stick Foil: Prevents sticking to the crust.
Using Parchment Paper
Parchment paper is a safe alternative. It is less likely to stick to the pie.
| Type | Feature |
| Bleached | White and smooth |
| Unbleached | Brown and eco-friendly |
Reusable Covers
Reusable covers are eco-friendly. They can be washed and used again.
Techniques For Tenting
Tenting a pie helps protect the crust from burning. It keeps the edges safe while the filling cooks fully.
There are simple ways to tent a pie using foil. These techniques help you get a perfect bake every time.
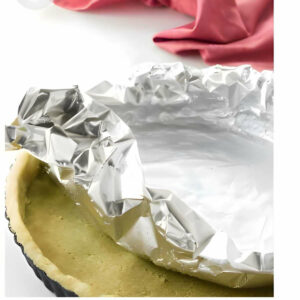
Simple Foil Shield
Use a piece of foil to cover the pie edges. This stops them from browning too fast during baking.
Cut a wide strip of foil and fold it to fit around the crust. Place it gently over the pie’s edge.
- Cut a 3-4 inch wide strip of foil
- Fold the strip lengthwise to fit the pie edge
- Place the foil over the crust edges
- Remove foil in the last 15 minutes to brown crust
Creating A Dome Shape
Make a dome shape with foil to cover the entire pie. This lets steam escape and stops the filling from drying out.
Take a large sheet of foil and gently form it over the pie, leaving space between the foil and filling.
- Use a large piece of foil to cover the whole pie
- Shape it like a dome without touching the filling
- Leave small gaps for steam to escape
- Check the pie and adjust the dome if needed
Securing The Tent
Keep the foil tent in place by folding the edges under the pie plate. This stops it from moving during baking.
You can also pinch the foil edges lightly to hold the tent shape better. Avoid pressing too hard to keep space above the pie.
- Fold foil edges under the pie plate rim
- Pinch foil edges gently to secure the tent
- Make sure tent does not touch the filling
- Remove or adjust tent as baking finishes
Timing For Tenting
Tenting a pie helps protect the crust while baking. It stops the edges from burning. Knowing when and how long to tent is important for a perfect pie.
Different pies need different timing for tenting. This guide explains when to cover your pie and how long to keep the tent on.
When To Cover The Pie
Cover the pie crust edges with foil or a pie shield when they start to brown too fast. Usually, this happens after the first 20 to 30 minutes of baking. Check often to avoid burning.
How Long To Tent
Keep the tent on until the crust is golden brown and the filling is cooked. This usually takes 15 to 40 minutes depending on the pie. Remove the tent for the last 10 minutes to let the crust crisp up.
- Start baking the pie uncovered.
- When edges brown, cover with foil or a shield.
- Bake with tent until filling is set.
- Remove tent for the last 10 minutes to crisp crust.
Adjusting For Different Pies
| Pie Type | Tent Timing | Notes |
|---|---|---|
| Fruit Pies | Cover after 20-25 minutes | Protects edges, lets filling bubble |
| Custard Pies | Cover if crust browns too fast | Usually tent not needed early |
| Pecan or Nut Pies | Cover after 15-20 minutes | Prevents over-browning of nuts |
| Double Crust Pies | Cover edges after 25 minutes | Ensures even baking of top and bottom |
Troubleshooting Common Issues
Tenting a pie helps bake it evenly and protects the crust. Sometimes problems happen during this process. Knowing how to fix them keeps your pie looking and tasting great.
This guide covers three common issues: soggy crust, foil touching the pie, and uneven browning. Each section gives simple tips to solve these problems.
Soggy Crust Solutions
A soggy crust ruins the pie’s texture. It usually happens when steam gets trapped under the foil tent. To avoid this, create space between the pie and foil.
- Use toothpicks or small balls of foil to lift the foil above the pie.
- Make sure the foil is loose and not tightly wrapped.
- Bake the pie on a lower oven rack to help steam escape.
- Remove the foil tent in the last 10 minutes to let the crust crisp up.
Avoiding Foil Contact
Foil touching the pie can cause the crust to stick or burn. Avoid direct contact by shaping the foil carefully. Use a tent shape with air space.
| Common Foil Contact Problems | How to Fix |
|---|---|
| Foil sticks to crust | Place foil higher using supports like toothpicks |
| Crust burns where foil touches | Use non-stick foil or parchment paper under the foil |
| Foil collapses onto pie | Make a loose tent and avoid tight wrapping |
Handling Uneven Browning
Uneven browning happens if the foil blocks heat on some parts. Adjust the foil tent to expose darker areas. Rotate the pie during baking for even color.
- Check the pie halfway through baking and adjust foil if some areas brown more.
- Remove foil for the last few minutes to brown the whole crust evenly.
- Use a baking stone or lower oven rack to balance heat distribution.
Additional Tips For Perfect Crusts
Getting a perfect pie crust is not just about the recipe. Small details make a big difference. Below are tips that help you get a flaky and golden crust every time.
These tips cover chilling the dough, using egg wash, and setting the right oven temperature. Follow them to improve your pie crust results.
Chilling The Dough
Chilling your pie dough before baking helps keep the butter cold. This creates a flaky texture when baked. It also stops the dough from shrinking.
- Wrap the dough tightly in plastic wrap.
- Chill for at least 1 hour or overnight.
- Keep dough cold while working to prevent melting.
- Chilling helps relax gluten, making rolling easier.
Using Egg Wash
Egg wash gives your pie crust a shiny, golden look. It also helps seal edges and decorate the top crust.
| Egg Wash Type | Effect | How to Apply |
| Beaten whole egg | Glossy, rich color | Brush lightly before baking |
| Egg yolk + water | Deep golden color | Apply with a pastry brush |
| Egg white + water | Shiny, light color | Use for delicate crusts |
| Milk or cream | Soft shine, less color | Brush on for a subtle finish |
Proper Oven Temperature
Baking at the right temperature ensures the crust cooks evenly and browns well. Too hot or too cool ovens can ruin the crust.
- Preheat the oven fully before baking.
- Start baking at a high temperature (around 425°F or 220°C) for 15 minutes.
- Lower the heat to 350°F or 175°C to finish baking.
- Use an oven thermometer to check accuracy.
- If edges brown too fast, cover them with foil.
Credit: www.goodlifeeats.com
Frequently Asked Questions
What Does It Mean To Tent A Pie?
Tenting a pie means covering it loosely with foil. This protects the crust from burning while allowing steam to escape. It helps bake the pie evenly and keeps the filling moist.
Why Should You Tent A Pie During Baking?
Tenting prevents the crust from over-browning or burning. It also ensures the filling cooks without drying out. This technique improves the pie’s texture and appearance.
When Is The Best Time To Tent A Pie?
Tent the pie after it has baked for about two-thirds of the total time. This allows the crust to brown initially, then prevents burning for the remainder.
Can You Tent A Pie With Parchment Paper Instead?
Yes, parchment paper can be used to tent a pie. It also protects the crust while allowing steam to escape. Just loosely cover the pie to avoid sogginess.
Conclusion
Tenting a pie helps keep the crust from burning. It makes sure your pie bakes evenly. Use foil or a pie shield to cover the edges. Check the pie often while baking. Remove the tent near the end for a golden crust.
This simple step improves your pie’s look and taste. Try tenting next time you bake a pie. You will enjoy a perfectly baked dessert every time.