Have you ever wanted to draw a baseball and bat that look just right? Whether you’re a beginner or just need a quick guide, you’re in the right place.
This simple step-by-step guide will help you create a drawing that feels real and fun. Imagine holding your own artwork, showing off your skills, and feeling proud. Ready to start? Let’s make your drawing come to life!
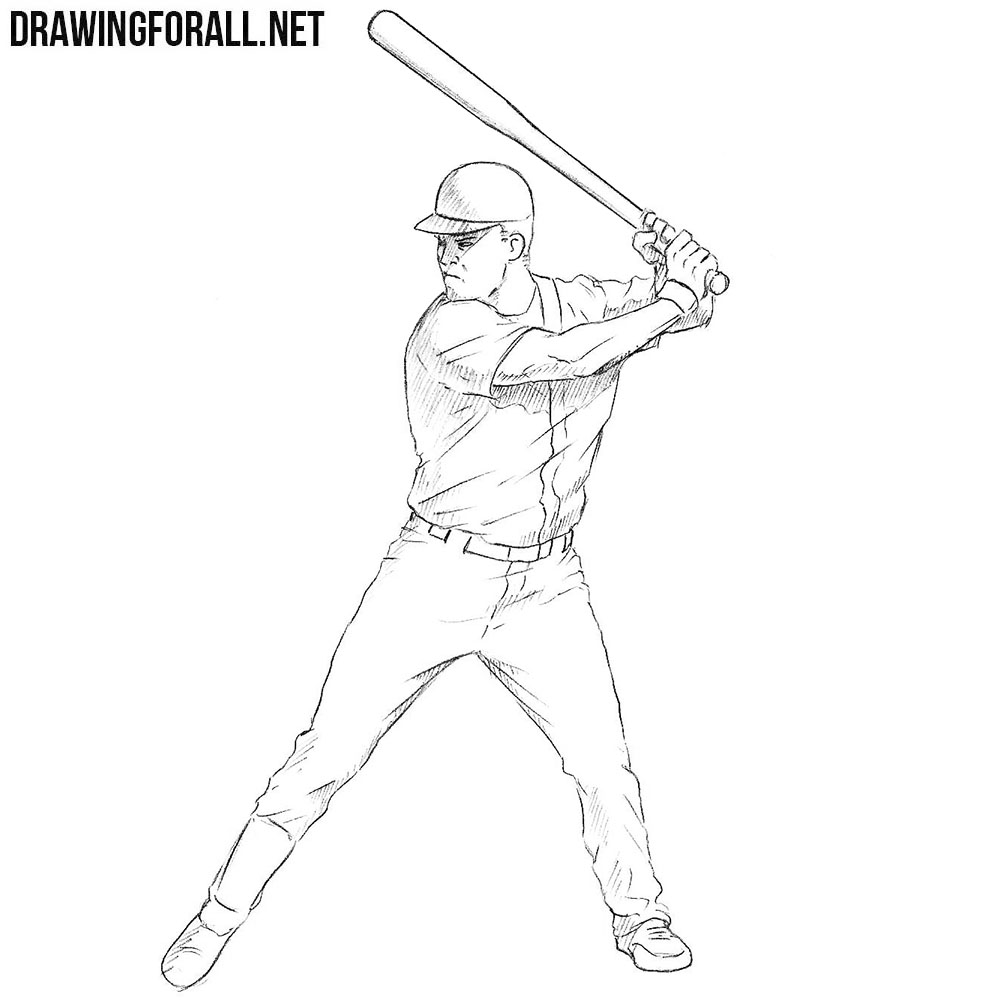
Credit: www.drawingforall.net
Materials Needed
Drawing a baseball and bat is fun and easy. You only need a few simple tools.
Gather your materials before you start. This will help your drawing look better.
Pencils
Pencils are the main tool for sketching your baseball and bat. Use a sharp pencil for clear lines.
- HB pencil for basic drawing
- 2B or 4B pencils for shading
- Eraser pencil for details
Paper
Choose smooth paper to draw on. It helps pencils glide easily and makes your drawing neat.
- Sketchbook paper
- Drawing pad
- Printer paper for practice
Eraser
An eraser fixes mistakes and cleans lines. Use a soft eraser to avoid tearing the paper.
- White vinyl eraser
- Kneaded eraser for gentle corrections
Ruler
A ruler helps draw straight lines on the bat. It keeps your shapes even and balanced.
- Standard 12-inch ruler
- Clear plastic ruler for easy measuring
Colored Pencils Or Markers
Color your baseball and bat to make them look real. Use colors that match the real items.
- Red for the baseball stitches
- Brown or tan for the bat
- Black or gray for shading
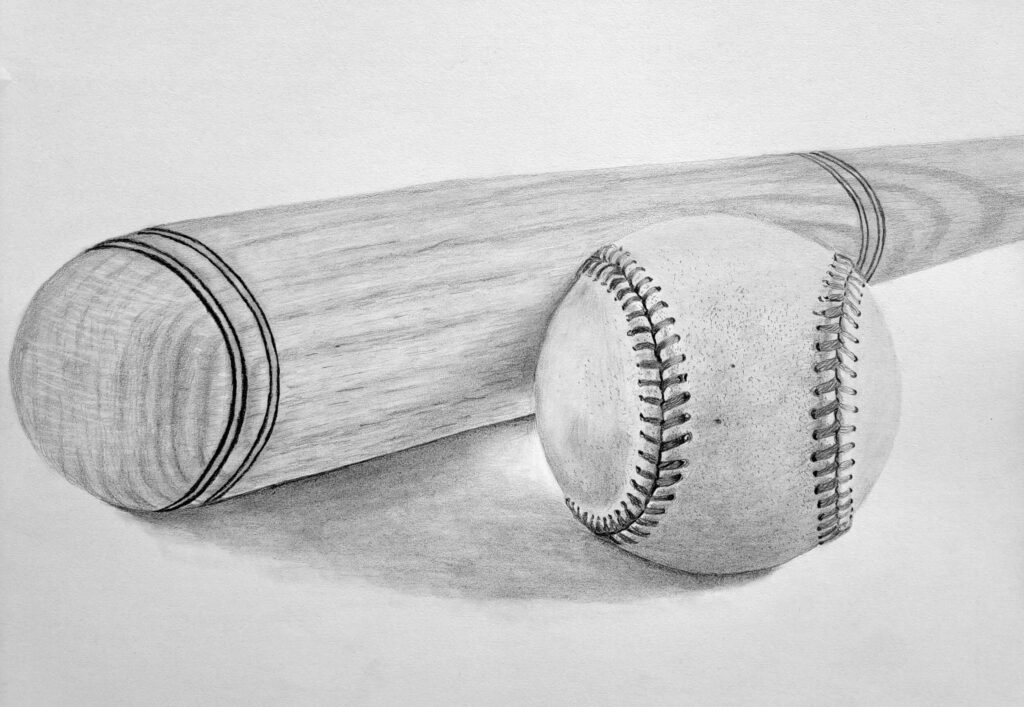
Credit: muusart.com
Sketching The Baseball Shape
Drawing a baseball and bat can be fun. Start by sketching the baseball shape. This guide will help you learn how to draw a circle and add details.
Focus on accuracy and neatness. The baseball’s shape and stitches are important details to capture.
Drawing The Circle
Begin by drawing a perfect circle. This will be the body of your baseball. Use a compass or a round object if you need help.
- Place your pencil at the center point.
- Draw the circle lightly to avoid harsh lines.
- Review the circle for smoothness and adjust as needed.
Adding Stitch Details
The stitches on a baseball are a key feature. Add them carefully to give your drawing realism.
Notice how the stitches curve. They should follow the contour of the circle. This adds depth to your drawing.
Drawing The Bat Outline
Drawing a baseball bat starts with a simple outline. Focus on the shape before adding details. This helps keep the bat proportional and balanced.
We will first draw the handle and then shape the barrel. Each part has its own unique form to capture.
Creating The Bat Handle
Start by sketching a long, thin rectangle for the handle. Keep the lines straight but slightly curved at the edges. The handle should be narrow enough to look like something you can grip.
- Draw two parallel lines about one inch apart.
- Connect the lines at the bottom with a small curve for the knob.
- Leave the top open to attach the barrel later.
Shaping The Bat Barrel
The barrel is the thickest part of the bat. It should be wider and rounded. Attach it to the top of the handle with smooth curves.
| Part | Shape | Tips |
|---|---|---|
| Handle | Long, thin rectangle | Keep edges slightly curved |
| Knob | Small rounded end | Draw at bottom of handle |
| Barrel | Wide, rounded oval | Attach smoothly to handle top |
Adding Details To The Bat
Adding details to the baseball bat makes your drawing more realistic. Details show the bat’s material and how it feels.
Focus on texture and the grip to bring your bat to life. These parts give your drawing character and depth.
Defining The Texture
Texture shows the type of wood or material the bat is made from. Use light lines to create a wood grain effect. Make sure lines follow the bat’s shape.
- Draw thin, curved lines along the bat’s length.
- Vary the line thickness for a natural look.
- Add small knots or marks to mimic wood.
- Keep the texture subtle to avoid clutter.
Highlighting The Grip
The grip is where the player holds the bat. It often has a different texture or wrap. Show this by drawing lines or patterns around the handle.
| Grip Type | Visual Detail |
| Leather Wrap | Crossed lines or stitches |
| Rubber Grip | Small dots or rough pattern |
| Plain Wood | Smooth texture with no extra lines |
Finalizing The Drawing
After sketching your baseball and bat, it is time to finalize the drawing. This stage makes your art clear and ready to show.
You will focus on inking the sketch and erasing any extra lines. These steps give your drawing a neat look.
Inking The Sketch
Use a fine-tip pen or marker to outline the pencil sketch. Ink over the main lines carefully and slowly.
Make sure to keep your hand steady. This will help your lines look smooth and clean.
- Start with the outer edges of the baseball and bat
- Ink the stitching details on the baseball
- Outline the bat’s shape and wood texture
- Wait for the ink to dry before erasing
Erasing Guidelines
After the ink dries, use a soft eraser to remove pencil marks. Erase gently to avoid tearing the paper.
Clear off all guidelines and light sketch lines. This leaves only the inked drawing visible.
- Use a kneaded or white eraser for best results
- Erase slowly to prevent smudging the ink
- Check for any leftover pencil marks and remove them
- Handle the paper carefully during this step
Coloring Tips
Adding color to your baseball and bat drawing brings it to life. Choosing the right colors and shading can make your artwork look realistic and fun.
Use simple techniques to add depth and texture. This guide will help you pick colors and apply them in the best way.
Choosing The Right Colors
Baseballs usually have a white surface with red stitches. Use bright white for the ball and vibrant red for the stitches to make them stand out.
The bat can be light brown, dark brown, or even gray if it is metal. Pick one base color and use shades of it for a natural look.
Shading And Highlights
Shading adds depth to your drawing. Imagine where the light hits your baseball and bat. Add lighter colors where the light touches and darker shades on the opposite side.
- Use a soft pencil or light gray color for shadows on the ball.
- Highlight the stitches with a thin white line to show light reflection.
- On the bat, add darker tones near the handle and lighter tones near the middle.
Adding Texture
Texture makes your drawing more interesting. For the baseball, use small, curved lines along the stitches to show the thread’s roughness.
- Baseball White: FFFFFF
- Stitch Red: D32F2F
- Bat Light Brown: A0522D
- Bat Dark Brown: 5D3A1A
- Shadow Gray: B0B0B0
Common Mistakes To Avoid
Drawing a baseball and bat can be fun but tricky. Many beginners make simple mistakes that affect the look.
Knowing these common errors helps you draw better and faster. Avoid these mistakes to improve your art.
Ignoring The Ball’s Round Shape
Some people draw the baseball as a flat circle. This makes it look fake and less realistic.
Remember, a baseball is a perfect sphere. Use smooth curves to show its roundness.
Drawing Incorrect Stitch Patterns
Many artists draw the stitches as straight lines or random curves. The stitches on a baseball have a special curve.
The stitches form two curved lines that almost look like an hourglass. Try to copy this shape carefully.
- Stitches curve inward toward the middle
- Each side has a row of short, even stitches
- Keep stitch spacing consistent
Making The Bat Too Thick Or Too Thin
Beginners often draw the bat with wrong thickness. A bat that is too thick looks heavy and clumsy.
A bat that is too thin looks weak and unrealistic. Draw the bat with a gentle taper from the handle to the barrel.
Forgetting The Bat’s Handle And Grip
Some drawings miss the grip area on the bat handle. This area is thinner and usually has texture or tape.
Adding a grip line or some detail makes the bat look real. Don’t skip this small but important part.
Placing The Bat And Ball In Odd Positions
Sometimes the bat and ball are drawn too close or too far apart. This makes the drawing look strange.
Keep a natural distance between them. Imagine the bat is about to hit the ball or resting nearby.
- Bat angled slightly toward the ball
- Ball near but not touching the bat
- Use reference photos for correct positioning
Practice Ideas
Drawing a baseball and bat can be fun and easy with some practice. Try simple exercises to improve your skills. Focus on shapes and details.
Using different methods will help you learn faster. Keep practicing regularly for better results.
Start With Basic Shapes
Begin by drawing circles for the baseball and rectangles for the bat. This helps you get the right size and form.
- Draw a circle for the baseball
- Sketch a long rectangle for the bat
- Add smaller details like stitches and handle
Practice Different Angles
Try drawing the baseball and bat from various views. This builds your understanding of their shape in space.
| Angle | Focus Area |
| Front View | Baseball stitches and bat tip |
| Side View | Bat length and ball roundness |
| Top View | Bat handle and ball shape |
Use Light And Shadow
Shading adds depth to your drawing. Practice shading the ball and bat to show light and shadow.
Shading Tips:
- Use soft pencil strokes for shadows
- Leave highlights white
- Shade along the ball’s curves
- Darken one side of the bat for contrast

Credit: www.shutterstock.com
Frequently Asked Questions
How Do You Start Drawing A Baseball?
Begin by sketching a perfect circle using a compass or freehand. This forms the basic shape of the baseball.
What Are The Key Details For Drawing A Baseball?
Add curved stitches evenly spaced along the ball’s surface. These stitches make the baseball look authentic and realistic.
How Can I Draw A Baseball Bat Accurately?
Start with a long, narrow oval for the bat’s handle. Then, widen it gradually toward the barrel end.
What Materials Are Best For Drawing A Baseball And Bat?
Use pencils for sketching and fine liners for details. Colored pencils or markers help add realistic shading.
Conclusion
Drawing a baseball and bat is fun and simple with practice. Start with basic shapes, then add details step by step. Take your time and enjoy each stroke. Keep practicing to improve your skills every day. Soon, your drawings will look more real and neat.
Remember, anyone can learn to draw with patience. Try different styles and have fun with your art. Drawing helps you relax and express creativity freely. So grab your pencil and keep creating!