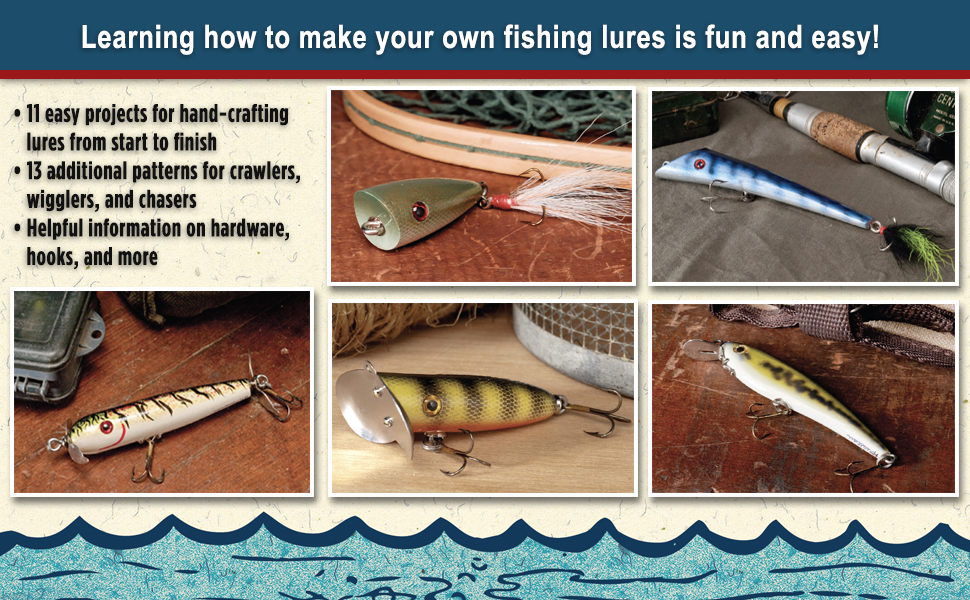
Have you ever wanted to catch more fish by using lures you made yourself? Making fishing lures out of wood can be a fun and rewarding way to improve your fishing game.
Imagine holding a lure crafted by your own hands, designed to attract the exact fish you want to catch. In this guide, you’ll discover simple steps to create wooden fishing lures that work. Whether you’re a beginner or looking to sharpen your skills, this article will give you the tools and tips you need to succeed.
Keep reading, and you’ll be ready to start making lures that stand out on any fishing trip.
Choosing Wood For Lures
Making fishing lures from wood needs the right material. The wood should be easy to shape and strong enough to last.
Choosing the right wood helps your lure float or sink well. It also affects how fish see and feel the lure.
Best Wood Types
Some woods are better for lures because of their weight and workability. These woods let you carve smooth, detailed shapes.
- Balsa: Very light and easy to carve. Good for floating lures.
- Cedar: Light with good water resistance. It floats and lasts well.
- Basswood: Soft and fine-grained. Easy to shape and paint.
- Poplar: Medium weight, holds paint well, and carves nicely.
- Mahogany: Harder wood, good for heavy lures that sink.
Wood Characteristics To Consider
Wood for lures needs certain traits. These traits affect how the lure moves and how long it lasts.
- Weight: Light wood helps lures float. Heavy wood makes them sink.
- Grain: Fine grain is easier to carve and paint smoothly.
- Durability: Wood should resist water and damage.
- Buoyancy: Wood must float or sink as you want the lure to behave.
- Workability: Easy-to-shape wood saves time and effort.

Credit: www.battlbox.com
Gathering Tools And Materials
Making fishing lures out of wood is a rewarding activity. You will need the right tools and materials to start.
This guide will help you gather everything you need for a successful project.
Essential Tools
Having the right tools is important for crafting wooden lures. Here are some essential tools you will need.
- Hand saw for cutting wood
- Carving knife for shaping
- Sandpaper for smoothing surfaces
- Drill for making holes
- Paintbrushes for applying finish
Additional Supplies
Besides tools, certain supplies are crucial for finishing your lures.
| Supply | Purpose |
| Wood blocks | For carving the lures |
| Paint | To add color |
| Varnish | To protect the wood |
| Hooks | For catching fish |
| Eye screws | To attach hooks |
Designing Your Lure
Designing a wooden fishing lure starts with a clear idea of shape and size. A good design helps attract fish effectively.
Think about the type of fish and water where you will use the lure. This guides your design choices.
Simple Shape Ideas
Simple shapes are easier to carve and often work well in water. Start with basic forms for your lure.
- Oval or egg shape for smooth swimming action
- Long and thin for mimicking small baitfish
- Flat and wide for surface lures that splash
- Curved or hooked shapes for wobbling movement
Drawing Templates
Using drawing templates helps keep your lure shapes consistent. Templates guide cutting and carving.
| Template Type | Purpose | Notes |
| Paper Outline | Basic shape guide | Easy to adjust size |
| Cardboard Stencil | Trace shape on wood | Durable for repeated use |
| Printed Grid | Measure proportions | Helps with symmetry |

Credit: www.amazon.com
Cutting And Shaping The Wood
Cutting and shaping wood is the first step in making fishing lures. You start with a small block of wood. Careful work helps create the right shape and size.
This part needs patience and safety. Using the right tools and methods will make your lure look great and last long in water.
Safe Cutting Techniques
Always wear safety glasses to protect your eyes. Use clamps to hold the wood steady. Keep your fingers away from blades and cutting edges.
- Select a sharp saw or knife for clean cuts.
- Cut slowly and follow marked lines.
- Use a workbench for better control.
- Check tools before each use to ensure safety.
- Keep your workspace clean from scraps and dust.
Sanding For Smoothness
Sanding removes rough edges and makes the lure smooth. Start with coarse sandpaper, then use finer grades to polish the wood.
| Sandpaper Grit | Use For |
| 80-100 | Shaping and removing big marks |
| 150-180 | Smoothing rough surfaces |
| 220-320 | Final polishing and fine smoothing |
Adding Details And Features
Adding details and features to wooden fishing lures makes them look more real. It also helps to attract fish better. Small touches can change the lure’s action in water.
Carving eyes and mouths and attaching hooks and hardware are key steps. These details improve the lure’s function and appearance.
Carving Eyes And Mouth
Start by marking where the eyes and mouth will go on your lure. Use small carving tools to shape these parts carefully. Rounded eyes and a slight mouth curve look natural.
- Use a fine knife or a rotary tool for carving
- Shape eyes as small rounded indentations
- Carve a shallow groove for the mouth
- Sand smooth to avoid rough edges
- Paint eyes with bright colors to attract fish
Attaching Hooks And Hardware
Choose the right hooks and hardware based on lure size and target fish. Secure the hooks tightly using eye screws and split rings. Check that all parts move freely without falling off.
| Hardware | Purpose | Tips |
|---|---|---|
| Eye screws | Attach hooks to lure body | Pre-drill holes to avoid splitting wood |
| Split rings | Connect hooks and swivels | Use pliers for easy opening and closing |
| Hooks | Catch fish | Pick size based on fish species |

Credit: www.amazon.com
Painting And Finishing
Painting and finishing are important steps for wooden fishing lures. They protect the wood and add color that attracts fish.
Good paint and finish help your lure last longer in water without damage.
Choosing Paints
Choose paints that stick well to wood and resist water. Acrylic paints work well because they dry fast and are easy to use.
Use bright colors or natural shades depending on the fish you want to catch. Avoid thick paints that can hide lure details.
- Acrylic paints dry quickly and stick well
- Use bright or natural colors for attraction
- Thin layers keep lure details visible
- Waterproof paint is better for durability
Sealing For Durability
Seal the painted lure to protect it from water and scratches. Use clear sealants like epoxy or polyurethane.
Apply two or three thin coats, letting each dry fully. This makes the lure strong and shiny.
- Use clear epoxy or polyurethane sealant
- Apply thin coats for best protection
- Let each coat dry before adding another
- Sealing increases lure life in water
Testing Your Lure
Testing your wooden fishing lure is an important step before using it in the water. It helps you see if the lure floats well and moves naturally.
Two main checks will ensure your lure works correctly: the floatation check and adjusting for action.
Floatation Check
Place your lure in a bucket or sink filled with water. Watch how it floats and sits in the water.
- If the lure sinks too fast, add small pieces of cork or foam inside it.
- If it floats too high, add weight with small metal strips or lead.
- The lure should float in a natural position, either level or slightly nose down.
- Make sure it does not tip over or spin in the water.
Adjusting For Action
Your lure’s action means how it moves when pulled through water. Adjusting it helps attract fish better.
| Adjustment | Effect |
| Bending the lip slightly down | Causes the lure to dive deeper |
| Bending the lip slightly up | Makes the lure stay near the surface |
| Adding small weights to the tail | Increases wobble or side-to-side movement |
| Adding weight to the front | Improves darting or twitching action |
Tips For Customization
Making fishing lures from wood allows you to add your own style. Customizing your lure can attract more fish.
Use colors, scents, and sounds to make your lure stand out in the water. Small details can make a big difference.
Color Patterns
Painting your wooden lure with bright or natural colors helps catch fish attention. Patterns like stripes or spots work well.
- Choose waterproof paint for durability
- Use multiple colors to mimic baitfish
- Try glow-in-the-dark paint for night fishing
- Seal paint with clear varnish to protect it
Adding Scent Or Rattles
Scent and sound can lure fish by appealing to their senses. Adding these features makes your lure more effective.
| Customization | How to Add | Benefits |
| Scent | Use scented oils or bait sprays on lure surface | Attracts fish by smell |
| Rattles | Insert small beads or capsules inside the lure | Creates noise to draw fish attention |
Frequently Asked Questions
What Type Of Wood Is Best For Making Fishing Lures?
Balsa wood is ideal for fishing lures due to its light weight and buoyancy. It allows easy shaping and floats well, attracting fish effectively.
How Do I Shape Wooden Fishing Lures Accurately?
Use a sharp knife or carving tools to shape the wood. Sand the lure smoothly to ensure a natural movement in water.
What Paint Is Best For Wooden Fishing Lures?
Use waterproof acrylic paint for durability and vibrant colors. Seal with a clear epoxy to protect paint and add shine.
How To Add Hooks To Wooden Fishing Lures Safely?
Drill small pilot holes for eye screws to avoid wood splitting. Attach treble hooks securely with split rings for strong hold.
Conclusion
Making wooden fishing lures takes patience and simple tools. Each step helps you create a unique lure that fish will notice. Enjoy shaping, sanding, and painting your lure with care. Try different designs to find what works best for you.
This craft brings fun and skill together by the water. Keep practicing and learning with every lure you make. Your fishing trips will feel more rewarding with handmade lures. Give it a try and see how wood can attract fish.