Have you ever wanted to create your own shelter while camping or just for fun? Making a homemade tent is easier than you think, and it gives you a chance to get creative with simple materials.
Imagine having a cozy space you built yourself, perfect for outdoor adventures or even backyard hangouts. In this guide, you’ll learn step-by-step how to make a sturdy, comfortable tent without spending a fortune. Ready to turn your ideas into a real shelter?
Let’s dive in and start building your very own homemade tent.
Materials Needed
Making a homemade tent requires careful choice of materials. The right supplies help build a strong and safe shelter. Gather everything before starting your project.
This guide covers fabrics, tools, and extra items you might want to use. Each part plays a role in the tent’s quality and ease of setup.
Choosing The Right Fabric
Select fabric that is durable and weather-resistant. Cotton canvas is strong but heavy. Polyester or nylon fabrics are lightweight and dry fast. Waterproof coatings add extra protection.
- Cotton canvas for strength and breathability
- Polyester or nylon for lightness and water resistance
- Waterproof spray or coating for better weather protection
- Fabric color for heat reflection or camouflage
Essential Tools
| Tool | Purpose |
|---|---|
| Measuring tape | To measure fabric and poles accurately |
| Scissors or fabric cutter | To cut fabric cleanly |
| Heavy-duty needle and strong thread | To sew fabric pieces together |
| Hammer or mallet | To secure stakes into the ground |
| Rope or paracord | To tie and support the tent structure |
| Marker or chalk | To mark cutting lines on fabric |
Optional Accessories
Extra items can make your tent more comfortable and functional. Consider adding these if you want better stability or convenience.
- Plastic groundsheet to keep moisture out
- Extra stakes for stronger hold in windy conditions
- Mesh fabric for insect protection
- Velcro strips or zippers for easy door closure
- Reflective tape for visibility at night
Planning Your Tent Design
Creating a homemade tent is a fun and rewarding project. Start by planning your design to ensure you build a sturdy and comfortable tent.
Consider the materials and style that suit your needs. Proper planning will make construction easier and more efficient.
Selecting Tent Style
Choosing the right tent style is crucial. Different styles serve various purposes. Think about where you will use your tent and how many people will sleep in it.
- Dome tents are easy to set up and stable in wind.
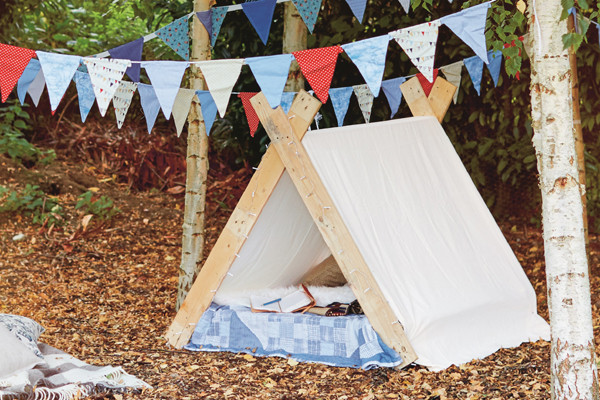
- A-frame tents provide more headroom and are lightweight.
- Cabin tents offer more space but require more materials.
Measuring And Cutting Fabric
Once you choose a style, measure and cut the fabric. This step is vital to ensure all parts fit together perfectly.
Use a measuring tape to get accurate dimensions. Mark the fabric before cutting to avoid mistakes.
| Part | Measurement | Quantity |
| Roof | 8×8 ft | 1 |
| Side Panel | 6×8 ft | 2 |
| Floor | 8×8 ft | 1 |
Assembling The Tent Frame
Building a homemade tent starts with making the frame. The frame holds the tent fabric tight and upright. It gives the tent its shape and strength.
Focus on using strong materials and creating a solid base. This keeps the tent safe and stable in wind or rain.
Using Poles And Supports
Poles are the main parts of the tent frame. Use poles that are light but strong. Common choices are wood, metal, or plastic.
Connect the poles with rope, string, or clips. Make sure all joints are tight. Loose connections can make the tent fall down.
- Use straight poles for the main frame
- Add angled supports for extra strength
- Secure all connections firmly
- Check pole lengths match the tent size
Creating A Stable Base
The base keeps the tent steady on the ground. Choose a flat spot free from rocks and debris. This helps the tent stand firm.
Use stakes or heavy objects to hold the tent frame down. This prevents it from moving or blowing away.
- Pick a flat, clear area for your tent
- Push stakes into the ground at frame corners
- Tie ropes from poles to stakes tightly
- Use rocks if stakes are not available
Sewing And Connecting Fabric
Making a homemade tent starts with sewing and joining fabric pieces. This step creates a strong and weatherproof shelter.
Good sewing helps the tent hold its shape and last longer outdoors.
Stitching Techniques
Use tight, even stitches to keep the fabric strong. Double stitching adds extra support to seams.
Backstitching at the ends prevents the thread from coming loose. Use waterproof thread for outdoor tents.
- Straight stitch for basic seams
- Backstitch to secure thread ends
- Double stitch for extra strength
- Use waterproof or nylon thread
Attaching Fabric To Frame
Connect the fabric to the frame using loops or sleeves sewn into the edges. These hold the tent tightly to the poles.
Velcro strips or snaps can also attach fabric to the frame. Make sure attachments are secure but easy to remove.
- Sew fabric sleeves to slide over poles
- Create loops to tie fabric to frame
- Add Velcro for quick attachment
- Use snaps for strong, removable holds
Adding Doors And Windows
Adding doors and windows makes your homemade tent more comfortable. It helps with air flow and easy access.
You can create openings and cover them with flaps or mesh. This keeps bugs out and lets fresh air in.
Cutting Openings
Choose where you want doors and windows on your tent fabric. Mark the size of each opening with chalk or a pencil.
Use sharp scissors or a craft knife to cut the marked areas. Cut carefully to avoid tearing the fabric.
- Mark openings before cutting
- Cut slowly for clean edges
- Leave extra fabric around edges for sewing
Installing Flaps And Mesh
Sew fabric flaps over your openings to cover doors and windows. Flaps can roll up or down for easy use.
Add mesh under the flaps to keep insects out. Mesh lets air flow while blocking bugs.
- Sew mesh inside the opening frame
- Attach flaps with Velcro or ties
- Make flaps easy to open and close

Credit: www.creativegreenliving.com
Waterproofing And Insulation
Making a homemade tent needs good waterproofing and insulation. These two help keep you dry and warm inside the tent. Without them, rain and cold can make camping uncomfortable.
This guide covers how to apply waterproof coating and add insulating layers for your tent. Follow these tips for a better shelter.
Applying Waterproof Coating
Waterproof coating stops water from soaking through your tent fabric. You can use special sprays or homemade mixtures. Make sure to cover all seams and edges well.
- Choose a waterproof spray made for fabrics.
- Lay your tent fabric flat on a clean surface.
- Spray evenly on both sides of the fabric.
- Let it dry completely before folding or using.
- Check and reapply coating every camping season.
Adding Insulating Layers
Insulating layers keep heat inside your tent. You can add blankets, foam, or special insulation sheets. Put these layers between the tent fabric and the inside space.
| Material | Insulation Quality | Ease of Use |
| Foam Sheets | High | Easy |
| Blankets | Medium | Very Easy |
| Reflective Insulation | High | Moderate |
| Bubble Wrap | Low | Easy |
Setting Up Your Tent Outdoors
Setting up a homemade tent outdoors is fun and easy. You need to prepare the area and secure your tent well.
Picking the right spot and making sure the tent stays stable will keep you comfortable and safe.
Choosing The Perfect Spot
Look for flat ground to set your tent. This will help your tent stay steady and make sleeping easier.
Avoid places near water or under dead branches. These spots can be unsafe or wet during rain.
- Find a level area without rocks or sharp objects
- Choose a place with some shade for cooler temperatures
- Stay away from low spots where water can collect
- Check for overhead branches that might fall
- Pick a spot with some wind protection if possible
Securing The Tent
Use stakes or heavy objects to hold your tent down. This stops it from moving or blowing away.
Tighten all ropes and check your tent often. Loose parts can cause the tent to fall or let in wind and rain.
- Push stakes deep into the ground at each corner
- Tie ropes tightly to the stakes for extra support
- Use rocks or logs to weigh down the tent if no stakes are available
- Make sure the tent fabric is pulled tight without wrinkles
- Check and adjust the setup if the wind picks up

Credit: www.creativegreenliving.com
Tips For Maintenance And Storage
Taking care of your homemade tent keeps it useful for many trips. Proper cleaning and storage protect the fabric and frame from damage.
Simple maintenance steps help your tent stay in good shape and ready to use whenever you need it.
Cleaning After Use
Clean your tent soon after each use to remove dirt, bugs, and moisture. This prevents mold and fabric wear.
- Shake off loose dirt and leaves outside the tent.
- Use a soft brush or sponge with mild soap and water.
- Rinse thoroughly and avoid harsh chemicals.
- Let the tent air dry completely before packing it away.
- Check zippers and seams for dirt and clean gently.
Proper Folding And Storage
How you fold and store your tent affects its lifespan. Avoid sharp bends and keep it in a dry place.
| Storage Tip | Reason |
| Fold loosely without tight creases | Prevents fabric damage and weak spots |
| Store in a breathable bag or container | Allows air circulation and stops mold |
| Keep away from direct sunlight | Protects fabric from UV damage |
| Store in a cool, dry place | Prevents mildew and material breakdown |
| Check tent periodically during storage | Catch issues early like pests or moisture |

Credit: parade.com
Frequently Asked Questions
What Materials Do I Need To Make A Homemade Tent?
You need durable fabric, sturdy poles, rope, stakes, and a groundsheet. These materials ensure your tent is strong and weather-resistant. Using waterproof fabric and reliable poles is essential for stability and protection during camping.
How Do I Choose The Best Location For My Homemade Tent?
Pick flat, dry ground away from hazards like falling branches or flooding. Ensure the spot offers some wind protection and good drainage. Clear the area of rocks and debris for a comfortable, safe setup.
Can I Make A Waterproof Homemade Tent?
Yes, use waterproof fabric or apply a waterproof spray. Seal seams with waterproof tape to prevent leaks. Properly securing the tent and using a rainfly enhances water resistance during rain.
How Do I Secure A Homemade Tent To The Ground?
Use sturdy stakes or pegs driven firmly into the ground. Attach guy lines from the tent to the stakes for extra stability. This prevents the tent from shifting or blowing away in strong wind.
Conclusion
Making a homemade tent can be fun and rewarding. It needs simple tools and materials. You can enjoy nature with your own shelter. Practice helps you build better tents each time. Remember to stay safe and check your work. Try different designs to find what fits best.
Building a tent teaches patience and creativity. This skill can help in many outdoor activities. Keep practicing, and you will get better fast. Enjoy your camping with a tent you made yourself!