Have you ever wished you had eyes in the back of your car? A backup camera can make parking and reversing much safer and easier.
But what if your car didn’t come with one? Can you add a backup camera to your car yourself? The good news is, yes—you can. You’ll discover simple options to upgrade your vehicle with a backup camera, how it can protect you and your loved ones, and what you need to know before making the switch.
Keep reading to find out how this small addition can make a big difference every time you hit the road.
Benefits Of A Backup Camera
Adding a backup camera to your car helps you see what is behind you. It makes driving safer and easier.
Many drivers find backup cameras useful for parking and avoiding accidents. These cameras give a clear view of blind spots.
Improved Safety
A backup camera reduces the risk of accidents when reversing. It shows objects or people behind your car.
This helps prevent hitting children, pets, or obstacles that are hard to see with mirrors alone.
- Clear view of blind spots
- Reduces accidents in parking lots
- Helps avoid collisions with pedestrians
Enhanced Parking Accuracy
Backup cameras make parking easier by giving a better view of the space behind you. You can park closer to curbs and other cars.
The camera shows distance lines or guides, helping you steer straight and avoid bumps.
- Better view of parking spots
- Helps align the car perfectly
- Reduces damage from parking mistakes
Increased Vehicle Value
Cars with backup cameras often sell for more money. Buyers see them as safer and more modern.
Adding a backup camera can make your car more attractive if you plan to sell it later.
- Boosts resale value
- Attracts more buyers
- Shows your car is well-equipped

Credit: www.amazon.com
Types Of Backup Cameras
Backup cameras help drivers see behind their cars. They make parking and reversing safer.
There are different types of backup cameras. Each type has its own features and installation process.
Wired Cameras
Wired backup cameras connect to the car’s display with cables. They usually offer a stable video signal.
These cameras require more work to install. The wires must be run through the car’s interior.
- Clear and consistent video quality
- Less interference from other devices
- Installation can take more time
- Wires can be hidden for a cleaner look
Wireless Cameras
Wireless backup cameras send video signals without cables. They use Wi-Fi or radio frequencies.
These cameras are easier to install but can have signal issues. They may face interference or delays.
| Feature | Wired Camera | Wireless Camera |
| Installation | Complex and time-consuming | Easy and quick |
| Signal Quality | Stable and clear | Can have interference |
| Maintenance | Less frequent | May need battery changes |
| Cost | Usually lower | Sometimes higher |
Integrated Vs. Aftermarket Options
Integrated cameras come built into the car by the manufacturer. Aftermarket cameras are added later.
Each option has pros and cons. Integrated systems fit perfectly but cost more. Aftermarket options are cheaper and flexible.
- Integrated:Fits car design, usually higher quality
- Aftermarket:More affordable, works with many cars
- Integrated:May need dealer for repairs
- Aftermarket:Easier to upgrade or replace
Tools And Materials Needed
Adding a backup camera to your car improves safety. You need the right tools and materials for a smooth installation.
This guide covers essential tools and how to choose the right camera kit for your vehicle.
Essential Installation Tools
Having the right tools helps you install the backup camera correctly. Prepare these before you start.
- Wire strippers for cutting and stripping wires
- Electric drill with drill bits for mounting
- Flathead and Phillips screwdrivers
- Multimeter to check electrical connections
- Electrical tape for securing wires
- Zip ties to organize cables
- Panel removal tool to access car panels safely
- Measuring tape for precise placement
These tools ensure a safe and clean installation without damage.
Choosing The Right Camera Kit
Select a backup camera kit that fits your car and needs. Consider video quality and power options.
- Camera type: wired or wireless
- Video resolution for clear images
- Night vision capability
- Screen type: built-in or separate monitor
- Power source compatibility with your car
- Waterproof rating for durability
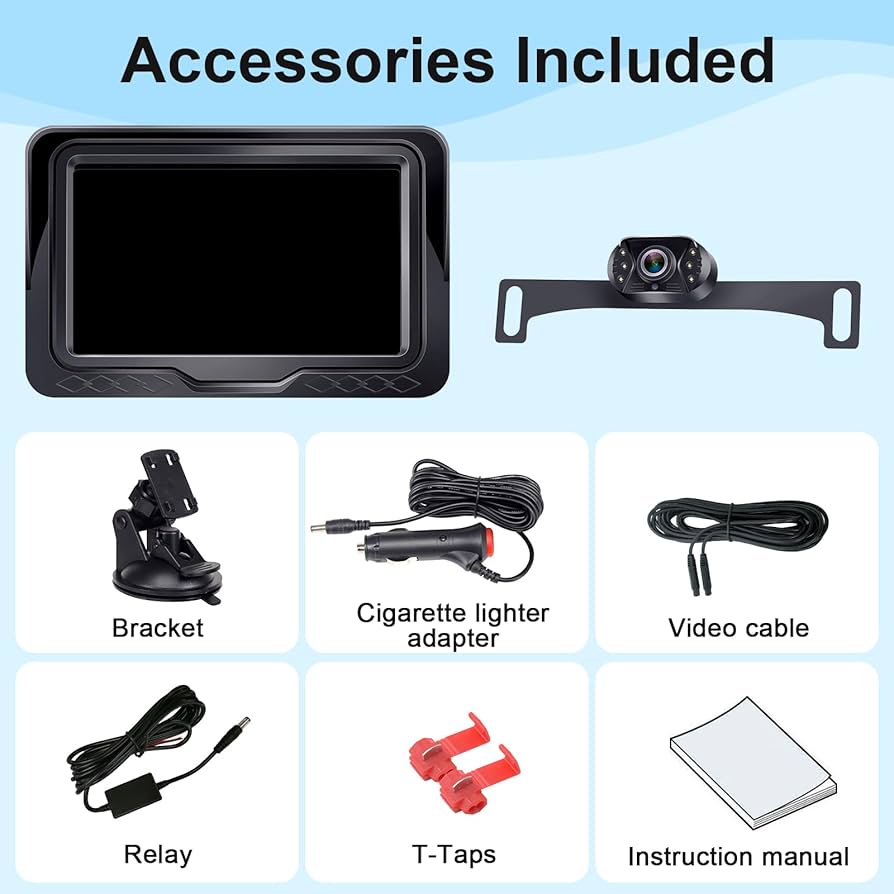
- Installation instructions and included accessories
Picking the right kit saves time and makes the system reliable.
Credit: www.12volt.tech
Step-by-step Installation Process
Adding a backup camera to your car improves safety while reversing. This guide shows how to install the camera properly.
Follow each step carefully to ensure the camera works well with your vehicle’s system.
Preparing Your Vehicle
Start by parking your car in a safe, well-lit place. Turn off the engine and disconnect the battery to avoid any electrical issues.
Clean the area where you will mount the camera. Remove dirt and dust for better adhesion and clear visibility.
Mounting The Camera
Choose the best spot for the camera. Most people mount it near the license plate or on the rear bumper.
- Use screws or adhesive tape to fix the camera securely.
- Make sure the camera lens is facing downward and centered.
- Adjust the angle so you get a clear view behind the car.
Running The Wiring
Route the camera wires from the back to the front of the car. Hide the cables under trim panels or carpets.
- Start at the camera and run the video cable toward the dashboard.
- Connect the power wire to the car’s reverse light power source.
- Secure cables with zip ties to avoid loose wires.
- Leave enough slack near connection points for easy adjustments.
Connecting To The Display
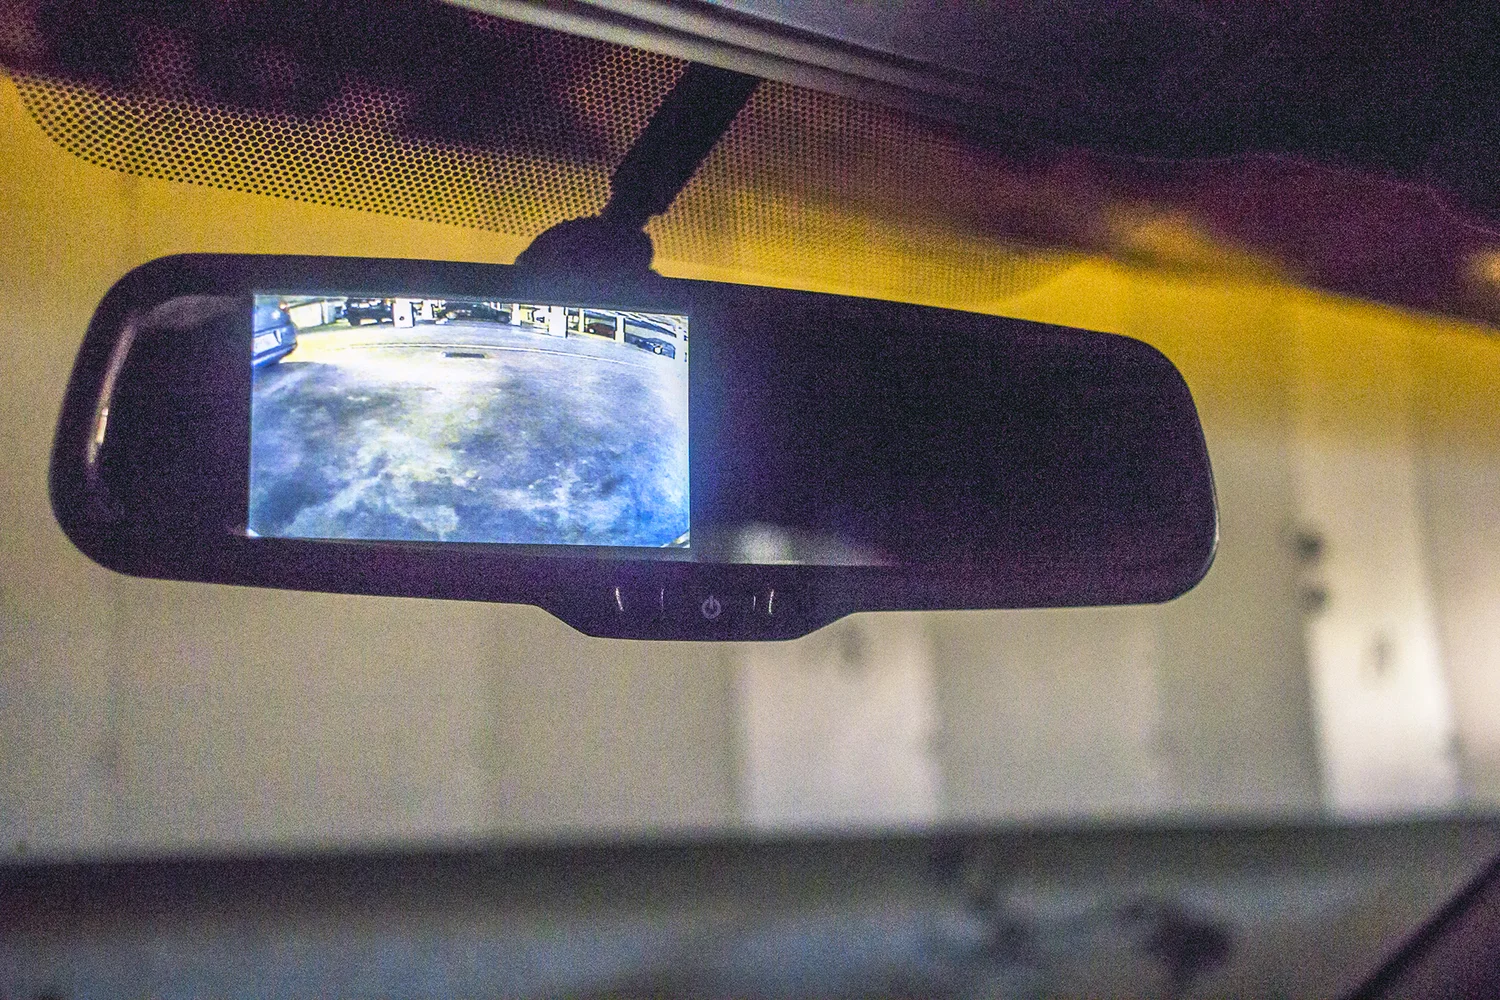
Connect the video cable to your car’s display or rearview mirror monitor. Attach the power wire to the display’s power input.
| Connection Point | Type of Cable | Notes |
| Camera Video Out | RCA Video Cable | Connects to display video input |
| Reverse Light Power | Red Power Wire | Supplies power when car is in reverse |
| Ground | Black Wire | Connect to car chassis for grounding |
Testing The System
Reconnect the car battery and turn on the ignition. Shift the gear to reverse to activate the camera.
Check these points during testing:
- Camera image appears on the display screen.
- The picture is clear and the angle covers the rear view.
- Wiring is secure with no loose connections.
- The system turns off when not in reverse gear.
Common Installation Challenges
Adding a backup camera to a car can improve safety. The installation is not always easy. Some problems can make the process tricky.
This guide covers common challenges like wiring, power, and signal interference. Understanding these helps you avoid mistakes.
Dealing With Wiring Issues
Wiring a backup camera needs care and patience. Cars have many wires, and finding the right ones is hard. Wrong connections can cause damage.
Wires may be hidden under panels or seats. You must remove parts carefully to avoid breaking clips or connectors. Use a wiring diagram if possible.
- Check wire colors to match camera cables
- Use a multimeter to test wires before connecting
- Secure wires to avoid loose or damaged connections
- Protect wires with electrical tape or conduit
Finding Power Sources
The backup camera needs power to work. You must find a power source that turns on with the car. This is usually the reverse light circuit.
Tap into the reverse light wire to power the camera only when backing up. Using the wrong power source can drain the battery or damage the system.
- Locate the reverse light wires using a wiring diagram
- Use a test light or multimeter to confirm power and ground
- Connect power wire with a fuse tap for safety
- Avoid tapping into constant power wires
Avoiding Signal Interference
Signal interference can make the camera image flicker or lose quality. It happens when wires run near power cables or electronic parts.
Use shielded cables and keep signal wires away from high-power wires. Proper grounding helps reduce noise and improves the image.
- Run video cables separate from power cables
- Use ferrite beads to reduce electromagnetic interference
- Ensure camera and monitor share a good ground connection
- Check connections for corrosion or looseness

Credit: www.ebay.com
Tips For Optimal Camera Performance
Adding a backup camera to your car can improve safety and ease parking. To get the best use, you need to maintain the camera well.
Here are some tips to help your backup camera work at its best every time you use it.
Proper Camera Angle
Set the camera at the right angle for a clear view behind your car. The angle affects what you see on the screen.
A good angle shows the ground close to the bumper and the area behind your car. Avoid pointing the camera too high or too low.
- Mount the camera near the center of the rear bumper.
- Adjust the camera to see the ground about 3 feet behind the car.
- Check the view on your screen before finalizing the angle.
Regular Cleaning
Keep the camera lens clean to avoid blurry or blocked images. Dirt, dust, or water drops can reduce picture quality.
Clean the lens often, especially after rain or driving on dusty roads. Use a soft cloth to prevent scratches.
- Wipe the lens gently with a microfiber cloth.
- Use mild soap and water if the lens is very dirty.
- Avoid using harsh chemicals or rough materials.
Firmware Updates
Some backup cameras have firmware that controls their functions. Updating this software can fix bugs and improve performance.
Check the camera or car manufacturer’s website for updates. Follow instructions carefully to install new firmware safely.
- Look for update notifications on your car’s display or app.
- Download updates only from official sources.
- Keep your car’s system powered during updates to avoid errors.
Cost And Time Estimates
Adding a backup camera to a car is a helpful upgrade. It improves safety and makes parking easier.
Knowing the cost and time needed helps you plan the project well. This guide gives you clear estimates.
Budgeting For Parts
Backup camera kits vary in price. Basic kits cost less but have fewer features.
High-quality cameras with night vision and wide angles cost more. You may also need extra parts.
- Basic backup camera kits: $50 to $100
- Mid-range kits with better video: $100 to $200
- High-end kits with advanced features: $200 to $400
- Extra parts like wiring or screens: $20 to $100
Estimated Installation Time
Installation time depends on your car model and your skills. It can take from one to several hours.
Simple plug-and-play cameras take less time. Custom installations need more work and tools.
- Plug-and-play kits: about 1 hour
- Wiring and mounting camera: 2 to 3 hours
- Installing a new display screen: 3 to 4 hours
- Complex wiring in older cars: up to 5 hours
When To Seek Professional Help
Adding a backup camera to your car can improve safety. Some situations need expert skills for installation.
Knowing when to call a professional helps avoid damage and ensures proper function.
Complex Electrical Systems
Modern cars have complex electrical systems. These systems connect many parts of your vehicle.
Installing a backup camera may require working with the car’s wiring and computer. Mistakes can cause problems.
- Experts know how to handle complex wiring safely
- They avoid interference with other car functions
- Professional tools help diagnose electrical issues
Warranty Considerations
Some car warranties can be affected by modifications. Adding a backup camera might void parts of your warranty.
Professionals understand warranty rules. They install equipment without breaking warranty terms.
- Certified installers follow manufacturer guidelines
- They use approved parts and techniques
- Professionals provide proof of proper installation
Frequently Asked Questions
Can I Install A Backup Camera Myself?
Yes, many backup cameras come with DIY kits. Basic tools and following instructions can help you install it at home. However, professional help ensures proper wiring and camera placement for best results.
Will A Backup Camera Work On Any Car Model?
Most backup cameras are compatible with a wide range of car models. However, compatibility depends on the camera type and your car’s electrical system. Check manufacturer specifications before purchasing to ensure proper fit and function.
How Much Does Adding A Backup Camera Cost?
Backup camera installation costs vary from $50 to $500. DIY kits are cheaper, while professional installation and high-end cameras increase the price. Costs depend on camera quality, features, and labor charges.
Are Wireless Backup Cameras Reliable?
Wireless backup cameras offer easy installation and less wiring. They are generally reliable but may face signal interference or connectivity issues in certain conditions. Choose high-quality brands for better performance.
Conclusion
Adding a backup camera to your car is a smart choice for safety. It helps you see blind spots while reversing. Many kits are easy to install and affordable. You don’t need to be a mechanic to do it yourself.
Choose a camera that fits your car model well. This small upgrade can give you peace of mind. Driving and parking become less stressful with clear rear views. A backup camera can protect you and others on the road. Consider this simple step to improve your car today.