Have you ever faced the frustration of a broken fishing rod just when you were ready to cast your line? It’s a common problem that can ruin your fishing plans in an instant.
But here’s the good news: you don’t always need to buy a new rod. You might be able to fix it yourself—and get back to fishing sooner than you think. You’ll discover simple and effective ways to repair your fishing rod, save money, and keep your favorite gear in top shape.
Keep reading to find out how easy it can be to bring your broken rod back to life.
Common Rod Breaks
Fishing rods can break in different ways. Knowing the common breaks helps you fix them better.
Some breaks are easy to spot, while others need careful checking. Let’s look at the types of damage and how to find the break point.
Types Of Damage
Fishing rods usually break in a few common ways. The damage depends on how you use the rod and the materials.
- Tip Break:The thin top part breaks from hitting hard surfaces or bending too much.
- Mid-Section Break:The middle part cracks from strong pressure or twisting.
- Handle Break:The bottom part near the grip breaks from dropping or heavy strain.
- Guide Damage:The small rings on the rod may crack or come loose, causing line problems.
Identifying The Break Point
Finding the exact break point helps you fix the rod well. Check the rod carefully for cracks or missing pieces.
Look for these signs:
- Visible cracks or splits in the rod surface
- Loose or missing rod guides
- Changes in rod shape or bending
- Unusual sounds like snapping or popping
Test the rod by gently bending it. The weak spot will feel different or may even snap again.

Credit: www.youtube.com
Tools And Materials
Fixing a broken fishing rod is possible with the right tools and materials. It’s important to know what you need before starting the repair.
This guide will help you gather essential tools and recommended materials for the job.
Essential Repair Tools
Having the right tools makes fishing rod repair easier. You will need some basic items to get started.
- Epoxy glue for bonding broken parts
- Sandpaper to smooth rough edges
- Small hacksaw for precise cuts
- Clamps to hold pieces in place
- Measuring tape for accurate alignment
Recommended Materials
Choosing the right materials is crucial for a strong repair. Some materials work better than others.
- Fiberglass tape for reinforcing joints
- Rod varnish for a smooth finish
- Thread for wrapping guides
- Replacement guides if needed
- Heat shrink tubing for a neat repair
Quick Fixes For Cracks
Cracks in a fishing rod can stop you from catching fish. Fixing small cracks quickly can save your rod. This guide shows easy ways to repair cracks fast.
Use simple tools and materials to make your rod strong again. Follow these tips to fix cracks without waiting for a full replacement.
Using Epoxy Resin
Epoxy resin is a strong glue that works well on fishing rods. It fills cracks and holds the rod parts tightly together.
Clean the cracked area before applying epoxy. Use a small brush to spread the resin evenly. Let it dry for several hours to get a solid fix.
- Sand the crack lightly to remove loose pieces
- Mix epoxy resin according to instructions
- Apply resin carefully on the crack
- Wipe off extra resin before it hardens
- Allow at least 6 hours to dry fully
Applying Thread Wraps
Thread wraps add extra support to the cracked part. Wrap strong thread tightly around the crack after applying glue or resin.
Use a thin needle or small tool to keep the thread neat. Seal the thread with clear nail polish or resin for a smooth finish.
- Choose nylon or polyester thread for strength
- Start wrapping a bit before the crack area
- Wrap tightly and evenly to cover the crack
- Secure the thread ends with glue or tape
- Coat the wrapped area with clear resin or polish
Replacing Rod Guides
Broken or damaged rod guides can affect your fishing experience. Replacing them is a simple way to fix your fishing rod.
This guide explains how to remove old guides and install new ones properly.
Removing Old Guides
Start by carefully removing the damaged guides from your fishing rod. Use tools like a heat source and a sharp blade for best results.
- Warm the old thread wraps with a lighter or heat gun to soften the glue.
- Cut the thread carefully with a razor blade or small knife.
- Gently pull off the old guide from the rod blank.
- Remove any leftover glue or residue with fine sandpaper or rubbing alcohol.
Installing New Guides
Installing new guides requires patience and steady hands. Follow these steps to ensure the guides are secure and aligned.
| Step | Action |
|---|---|
| 1 | Position the new guide on the rod at the correct spot. |
| 2 | Wrap the guide foot tightly with rod wrapping thread. |
| 3 | Apply epoxy or rod finish over the thread to seal it. |
| 4 | Allow the epoxy to dry fully before use. |
Fixing Broken Tips
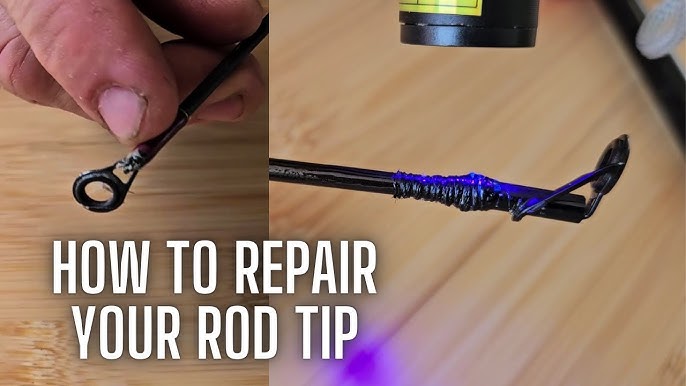
Fixing a broken fishing rod tip can save your rod and keep you fishing longer. It is a simple repair if you follow the right steps.
This guide will help you choose a replacement tip and attach it correctly to your rod.
Selecting A Replacement Tip
Choose a tip that matches your rod’s size and action. The diameter of the new tip should fit snugly on the rod tip.
- Measure the broken tip’s diameter.
- Match the length and weight to your rod.
- Pick a durable material like stainless steel or ceramic.
- Buy a tip that fits your rod’s guide system.
Attaching The New Tip
Attach the new tip carefully to keep your rod balanced and strong. Use glue designed for fishing rods.
| Material Needed | Purpose |
| Replacement tip | Replace the broken end |
| Rod tip glue or epoxy | Secure the tip in place |
| Sandpaper | Clean and prepare the rod end |
| Masking tape | Hold the tip while drying |
First, sand the rod end to remove old glue. Then, apply a small amount of glue inside the replacement tip. Slide the tip onto the rod end and wipe off extra glue.
- Clean the rod end with sandpaper.
- Apply glue inside the new tip.
- Push the tip onto the rod firmly.
- Use masking tape to keep it steady.
- Let the glue dry for several hours.

Credit: www.amazon.ca
Reinforcing Weak Spots
Fishing rods can develop weak spots after long use or accidental damage. Fixing these spots helps keep the rod strong. Reinforcing weak areas can extend the life of your fishing rod.
Using simple materials, you can add strength to the rod. These fixes protect the rod from breaking further and improve its performance.
Using Fiberglass Tape
Fiberglass tape is a strong, flexible material. It wraps around the rod to support weak spots. This tape adds extra strength without making the rod heavy.
To use fiberglass tape, clean the damaged area well. Then wrap the tape tightly around the spot. Apply several layers for better support. Let it dry completely before use.
- Clean the rod surface first
- Wrap tape tightly around the weak spot
- Apply multiple layers if needed
- Let the tape dry fully before fishing
Adding Protective Coatings
Protective coatings seal and protect the fiberglass tape and rod. They stop water and dirt from causing more damage. Coatings also make the repair smooth and neat.
Common coatings include epoxy and clear varnish. Apply a thin layer over the taped area. Let it dry before adding more layers. This helps the repair last longer in water.
- Choose a waterproof coating like epoxy or varnish
- Apply thin, even layers over the tape
- Allow each layer to dry fully
- Use several layers for best protection
When To Seek Professional Help
Fixing a broken fishing rod can be tricky. Some repairs are easy to do at home. Others need a skilled expert to handle.
Knowing when to call a professional can save you time and money. It also helps keep your rod in good shape.
Limitations Of Diy Repairs
DIY repairs work well for small breaks or loose parts. Simple fixes like reattaching guides or wrapping small cracks are possible.
Big breaks or damage to the rod’s core need more care. Poor repairs can make the rod unsafe or weak.
- Severe cracks or breaks in the blank
- Damage to the rod’s internal fibers
- Broken reel seats or complex parts
- Rod sections that don’t fit together properly
Finding A Rod Repair Expert
Look for a repair expert with good experience in fishing rods. They use proper tools and materials for lasting repairs.
Check local fishing shops or ask fishing groups for recommendations. A skilled expert can restore your rod’s strength and performance.
- Search for shops specializing in fishing gear repairs
- Read reviews and ask other anglers for advice
- Choose experts who offer warranties on their work
- Ensure they use quality materials for repairs

Credit: www.ebay.ca
Maintaining Your Rod Post-repair
Fixing a broken fishing rod is just the first step. Proper care after repair helps your rod last longer. You can avoid future damage with simple habits.
Taking care of your rod after repair keeps it strong and ready for your next fishing trip. Follow easy tips to protect your investment.
Proper Storage Tips
Store your rod in a dry place away from direct sunlight. Heat and moisture can weaken the rod and repair parts.
Use a rod rack or holder to keep your rod straight. Avoid leaning it against walls or leaving it in a tangled pile.
- Keep rod away from extreme heat and cold
- Store rods vertically or horizontally on racks
- Use rod sleeves or tubes for extra protection
- Keep rods in a place with good air circulation
Regular Inspection And Care
Check your rod often for any signs of damage or wear. Look closely at the repaired area and guides.
Clean your rod after each use. Remove dirt, salt, and debris with a soft cloth and mild soap. This helps prevent rust and damage.
- Examine rod guides for cracks or bends
- Look for loose wraps or glue near the repair
- Wipe down the rod with fresh water after fishing
- Dry rod completely before storing
Frequently Asked Questions
Can You Repair A Broken Fishing Rod Yourself?
Yes, many fishing rods can be fixed at home with proper tools. Simple breaks like cracked tips or loose guides are repairable using epoxy, replacement parts, and careful alignment. Complex breaks may need professional help.
What Materials Are Needed To Fix A Fishing Rod?
Common materials include epoxy resin, replacement guides, thread wraps, sandpaper, and rod finish. You may also need a small heat source and a sharp blade. These tools help restore the rod’s strength and performance.
How Long Does Fishing Rod Repair Usually Take?
Basic repairs like reattaching guides or tips often take 30 minutes to an hour. More extensive fixes may require several hours or drying time for adhesives. Time depends on the damage severity and repair method.
Is It Cost-effective To Fix A Broken Fishing Rod?
Repairing a rod is often cheaper than buying new, especially for quality rods. DIY fixes save money but require time and skill. For severe damage, consider cost vs. replacement value before deciding.
Conclusion
Broken fishing rods can often be fixed with the right tools and care. Small cracks or snapped tips do not always mean you must buy new gear. Repair kits and simple techniques help save money and keep fishing fun. Patience and careful work bring your rod back to life.
Try fixing it yourself or ask a local expert for help. Don’t give up on your favorite rod too soon. Fishing trips await with a rod that works again.