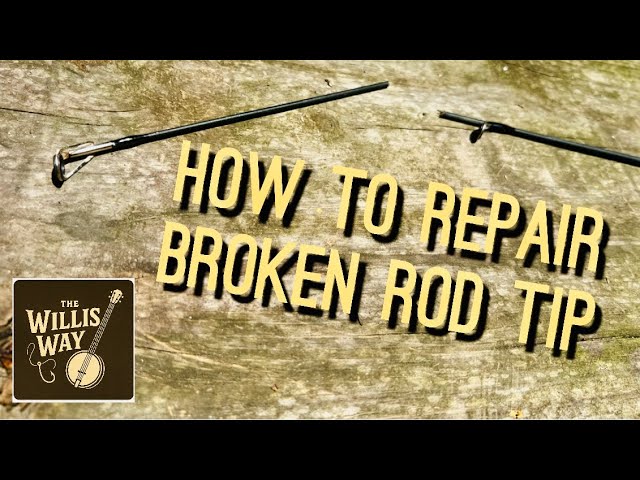
Have you ever felt the frustration of a snapped fishing rod just when the big catch was on the line? It’s a moment that can ruin your day on the water.
But here’s the good news: you might not need to toss your rod out or rush to buy a new one. You can fix it yourself, saving money and getting back to fishing sooner than you think. You’ll discover simple, step-by-step ways to repair your fishing rod, even if you’ve never done it before.
Keep reading, and you’ll learn how to bring your favorite rod back to life—so nothing stands between you and your next great catch.
Assessing The Damage
When a fishing rod snaps, you need to check how bad the damage is. This helps you decide if the rod can be fixed or if you need a new one.
Looking closely at the break will give you an idea of the repair options. Some breaks are easy to fix, while others are not.
Types Of Breaks
Fishing rods can break in different ways. Knowing the type of break helps you understand how to fix it.
- Clean break:The rod snaps completely in two parts.
- Crack or fracture:A visible line or crack appears but the rod is still in one piece.
- Splintered break:The rod’s material splits into many small pieces.
- Broken guides:The small rings that hold the fishing line are damaged or missing.
Identifying Repairable Breaks
Some breaks on a fishing rod can be fixed, while others cannot. You should check the damage carefully.
Rods with clean breaks or cracked tips often can be repaired. Splintered rods usually cannot be fixed well. Broken guides are easy to replace.
- Small cracks in the tip or body can be glued and wrapped.
- Clean breaks can be joined with special rod repair kits.
- Splintered rods lose strength and are hard to fix.
- Damaged guides can be removed and new ones attached.

Credit: www.reddit.com
Gathering Repair Materials
Fixing a snapped fishing rod requires the right materials. Gathering these helps you repair efficiently.
Prepare by collecting tools and adhesives. These are essential for a successful fix.
Essential Tools
Having the right tools is crucial. They make the repair process smoother and more effective.
- Screwdriver for removing reel seats
- Sandpaper to smooth rough edges
- Utility knife for cutting excess material
- Clamps to hold parts in place
Recommended Adhesives And Tapes
Choosing the right adhesives ensures a strong bond. Tapes help in securing the repaired sections.
- Epoxy resin for a sturdy bond
- Fiberglass tape for reinforcement
- Electrical tape for temporary fixes
- Masking tape to hold parts while drying
Step-by-step Repair Process
Fixing a snapped fishing rod is possible with care and the right tools. Follow this step-by-step guide to repair your rod and get back to fishing quickly.
This guide covers preparing the rod, applying adhesive, securing the repair, and curing time tips for a strong fix.
Preparing The Rod
Start by cleaning the broken area well. Remove any dirt, old glue, or splinters. Use fine sandpaper to smooth the edges and make the surfaces fit tightly.
Applying Adhesive
Choose a strong, waterproof epoxy or rod-specific glue. Apply a thin layer to both broken ends. Spread the adhesive evenly for the best hold.
- Mix the epoxy according to the instructions.
- Use a small brush or toothpick to apply glue.
- Coat both broken rod ends thoroughly.
- Be careful not to use too much glue.
Securing The Repair
Wrap the joint tightly to hold the pieces together while drying. Use one of the following:
- Fishing rod wrapping thread
- Strong tape
- Rubber bands
Make sure the pieces align perfectly before securing.
Curing Time And Tips
| Tip | Details |
| Keep still | Do not move the rod for at least 24 hours. |
| Room temperature | Allow glue to cure at a warm, dry place. |
| Check strength | Test the repair gently before fishing again. |
| Optional finish | Sand and paint the joint for a smooth look. |

Credit: www.youtube.com
Reinforcing The Repair
Fixing a snapped fishing rod is not just about joining the broken parts. You need to reinforce the repair to make it strong and long-lasting.
Proper reinforcement helps the rod handle stress and prevents it from breaking again during use.
Using Fiberglass Tape
Fiberglass tape is a popular material for strengthening rod repairs. It wraps tightly around the break, adding a strong layer.
- Clean the rod surface before applying the tape.
- Wrap the tape evenly around the broken area.
- Overlap each layer to avoid weak spots.
- Use epoxy resin over the tape for a hard finish.
- Let it dry fully before testing the rod.
Adding Extra Strength
Adding extra strength can protect the repair under heavy use. Some materials help improve durability and flexibility.
| Material | Purpose | How to Use |
|---|---|---|
| Carbon Fiber Wrap | Increases rod stiffness | Wrap tightly over fiberglass tape |
| Epoxy Resin | Bonds layers and seals repair | Apply on top of wraps and let cure |
| Heat Shrink Tubing | Protects outer layer | Shrink tubing over repaired section with heat |
Testing The Repaired Rod
After fixing a snapped fishing rod, you must check if it works well. Testing the rod helps ensure it is safe and strong.
Two important parts to test are safety and performance. These checks help avoid accidents and poor fishing results.
Safety Checks
First, look for any cracks or weak spots near the repair. These can make the rod break again while fishing.
Check if the rod feels stable when you hold it. Make sure the repair does not create sharp edges or rough areas.
- Inspect the rod closely under good light
- Gently bend the rod to find weak points
- Look for loose parts or damaged guides
- Feel for splinters or sharp edges
Performance Testing
Test how the rod bends and flexes under pressure. It should feel like it did before the break.
Try casting a light lure or weight to check the rod’s action. The repaired rod should perform smoothly without strange sounds.
- Use a practice cast with no line first
- Cast a light lure in an open area
- Check for odd noises or stiffness
- Notice if the rod returns to its shape quickly
Preventing Future Breaks
Fixing a snapped fishing rod is possible, but preventing breaks is better. Taking care of your rod helps it last longer.
Simple habits can protect your rod from damage. Learn how to handle and store it properly.
Proper Handling
Handle your fishing rod gently to avoid cracks and breaks. Do not bend it too much or use it for heavy tasks.
Always support the rod near the handle and tip when carrying it. Avoid dropping or throwing the rod.
- Do not lean the rod against hard surfaces
- Keep the rod away from sharp objects
- Use the rod only for fishing, not prying or hitting
Storage Tips
Store your fishing rod in a dry, cool place to prevent warping or weakening. Avoid direct sunlight for long periods.
Use a rod rack or case to keep your rod safe. Keep it straight or slightly angled to avoid bending.
- Keep the rod away from heavy items that can press on it
- Clean the rod before storing to remove dirt and salt
- Check for damage regularly and repair small cracks early
When To Replace Instead
Fixing a snapped fishing rod can save money and keep your favorite gear. Yet, some breaks mean it’s better to replace the rod.
Knowing when repair is not enough helps you avoid weak spots and unsafe fishing gear.
Signs Repair Isn’t Enough
Some damage to a fishing rod cannot be fully fixed. Watch for these signs to decide if a new rod is needed.
- The rod breaks near the handle or reel seat.
- Multiple cracks or splinters appear along the rod.
- Repairs have failed before or the rod feels weak.
- The rod bends or flexes unevenly after repair.
- Damage affects the rod’s action and casting ability.
Cost Vs. Benefit
Repair costs can add up. Sometimes, buying a new rod is a smarter choice.
| Repair Type | Average Cost | Benefit |
| Simple crack repair | $15 – $30 | Restores function well |
| Replacing rod tip | $20 – $40 | Good for minor breaks |
| Major break repair | $50 – $80 | May weaken rod strength |
| New fishing rod | $60 – $150+ | Full strength, warranty |

Credit: www.ebay.ca
Frequently Asked Questions
Can A Snapped Fishing Rod Be Repaired Effectively?
Yes, a snapped fishing rod can often be repaired. Using rod repair kits or professional services can restore functionality. However, the repair depends on the break’s location and severity. Small cracks or breaks near the tip are easier to fix than breaks near the handle.
What Tools Are Needed To Fix A Broken Fishing Rod?
Common tools include epoxy resin, sandpaper, rod wraps, and replacement guides. A rod repair kit usually contains these essentials. Having a clean workspace and patience is crucial for successful repairs. Proper tools ensure the rod is restored securely and lasts longer.
How Long Does It Take To Repair A Snapped Fishing Rod?
Repairing a fishing rod typically takes a few hours to a day. Drying times for epoxy or glue affect the total time. Quick repairs might be possible for minor cracks, but full curing ensures durability. Rushing can weaken the repair and cause future breaks.
Is It Worth Repairing A Snapped Fishing Rod?
Repairing is worth it if the rod is valuable or sentimental. High-quality rods often justify repair costs. For inexpensive rods, replacement might be more practical. Consider repair cost, time, and rod condition before deciding to fix or replace.
Conclusion
Fixing a snapped fishing rod is possible with the right tools and care. Small breaks can often be repaired at home. Strong glue, wraps, or rod repair kits help. Sometimes, replacing a section is the best choice. Take your time and follow clear steps.
Keep your rod in good shape to avoid future breaks. Fishing is about patience and care, just like fixing your rod. Don’t throw it away too soon. Try fixing it first and enjoy many more fishing trips.