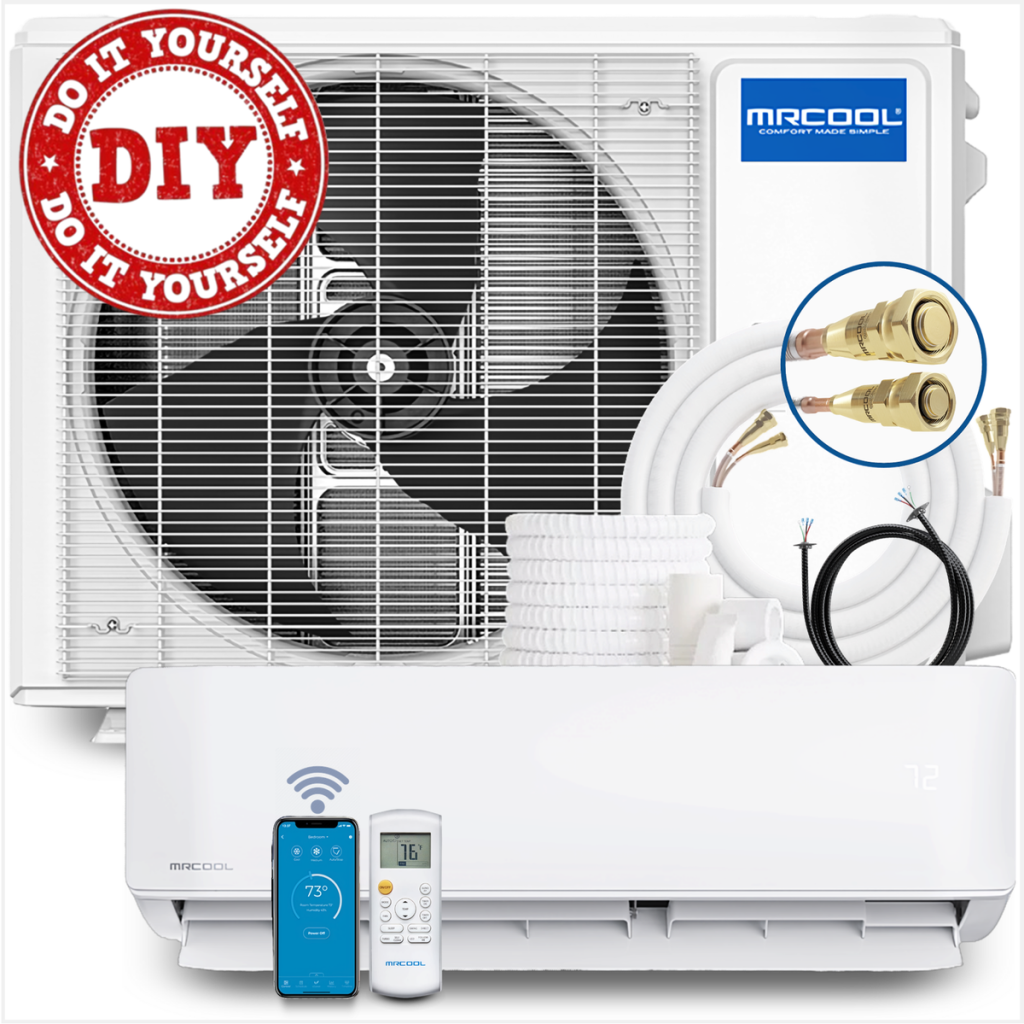
Looking to beat the heat without breaking the bank? Installing a mini split air conditioner yourself might be easier than you think.
Imagine staying cool all summer long while saving money on costly installation fees. This guide will show you step-by-step how to set up your own mini split system, even if you’ve never done it before. By the end, you’ll feel confident, empowered, and ready to enjoy cool comfort on your terms.
Keep reading—you’re just one decision away from transforming your space and your summer.
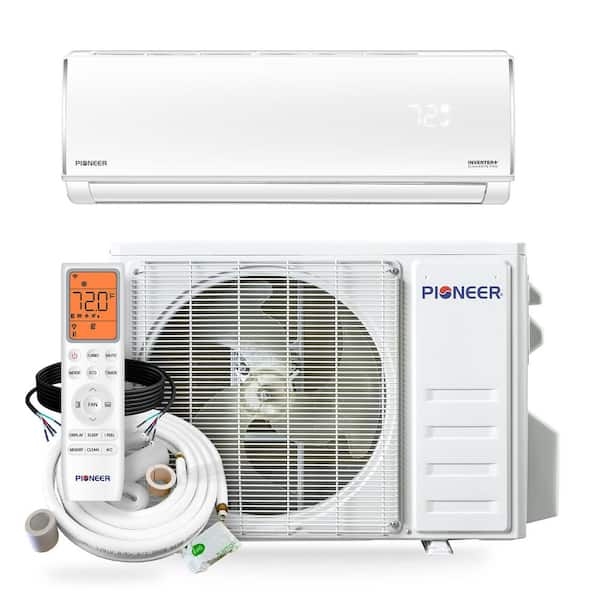
Credit: www.homedepot.com
Benefits Of Mini Split Air Conditioners
Mini split air conditionersuse less energy than central AC systems. They cool only the rooms you use. This means lower electric billsand less energy waste.
These units cost less to run and install. No need for big ducts or pipes. That saves money on installationand maintenance. They also last a long time, reducing replacement costs.
- Easy to install in many places
- Control temperature in each room separately
- Quiet operation for better comfort
- Can be moved or added as needed
Choosing The Right Mini Split Unit
Sizing your spaceis key for an efficient mini split unit. Measure the room size in square feet. Choose a unit with the right cooling capacity, often shown in BTUs. Too small a unit won’t cool well; too big wastes energy.
- Cooling capacity:Match BTUs to room size.
- Energy efficiency:Look for units with high SEER ratings.
- Noise level:Quieter units make for better comfort.
- Installation type:Check if the unit fits your wall or window space.
- Additional features:Remote control, timers, and air filters.
Plan your budgetcarefully. Include unit cost, installation fees, and possible maintenance. Compare prices from different brands. Balance cost with features and energy savings. A good mini split saves money in the long run.
Tools And Materials Needed
Essential tools include a drill, screwdrivers, and a pipe cutter. A levelensures the unit is straight. Wrencheshelp tighten connections securely.
Required accessories include mounting brackets, insulated copper tubing, and electrical wiring. Don’t forget sealant tapeto prevent leaks.
| Safety Equipment | Purpose |
|---|---|
| Gloves | Protect hands from sharp edges and chemicals |
| Safety Glasses | Shield eyes from debris and dust |
| Mask | Prevent inhaling dust and fumes |
| Hearing Protection | Guard ears from loud noises |

Credit: www.shopabunda.com
Preparing For Installation
Select a location that is close to an exterior wall. The spot should allow good airflow and easy access for maintenance. Avoid places near heat sources or direct sunlight. The unit must be installed where noise won’t disturb you or your neighbors.
Check the electrical system before starting. The unit needs a dedicated circuit with the right voltage. Use a voltage tester to confirm power supply. Make sure the circuit breaker can handle the load safely. Incorrect wiring can cause damage or fire.
Clear the workspace around the installation area. Remove furniture, rugs, and any obstacles. Keep the area clean to avoid accidents. A tidy space helps you work faster and safer. It also protects your floors and walls from damage.
Step-by-step Installation Guide
Choose a strong wallto mount the indoor unit. Use a level to keep it straight. Drill holes and fix the mounting plate securely. Make sure there is enough space around for airflow and maintenance.
Place the outdoor unit on a firm base or mounting bracket. Avoid direct sunlight and heavy rain. Keep it clear of plants and debris. Secure it to reduce noise and vibrations.
Use insulated copper tubes for refrigerant lines. Connect the indoor and outdoor units carefully to avoid leaks. Wrap the pipes with insulation tape to keep them cool and prevent condensation.
Turn off power before starting electrical work. Connect wires according to the manual. Use wire nuts and electrical tape for safety. Ground the system properly to avoid shocks.
Turn on the power and test the system. Check for cool air from the indoor unit. Listen for unusual sounds. Look for refrigerant leaks. Adjust settings to your comfort.
Common Installation Challenges
Challenges include mounting the unit securely and connecting electrical wiring safely. Proper sealing and refrigerant handling also require care. Mistakes can lead to leaks or poor cooling performance.
Dealing With Refrigerant Leaks
Refrigerant leakscan cause poor cooling and damage the system. Finding leaks requires careful inspection. Use a leak detector or soapy water to spot bubbles. Fix leaks before charging refrigerant. Safety gear is important to avoid skin or eye contact. Proper sealing and tightening of connections help prevent leaks. Always follow local laws about refrigerant handling.
Electrical Issues
Electrical problems may stop the mini split from working properly. Check the power supply and breaker box first. Use the right wire size and follow wiring diagrams closely. Poor connections can cause shorts or fires. Ground the system correctly to avoid shock risks. Test all electrical parts before finishing installation. If unsure, ask a professional electrician for help.
Mounting Difficulties
Mounting the indoor and outdoor units can be tricky. Choose a strong, level wall for the indoor unit. Avoid direct sunlight or heat sources near the unit. The outdoor unit needs good airflow and a flat surface. Secure mounting brackets tightly to reduce vibration. Use a level tool to keep units straight. Proper placement helps the system work well and last longer.
Maintaining Your Mini Split System
Keeping your mini split air conditioner clean helps it run well. Clean the filters every month to stop dust buildup. Use a soft brush or cloth for the indoor unit’s vents. Wipe the outdoor unit gently to remove dirt and leaves. Avoid using strong chemicals that can harm parts.
Replacing the air filter regularly is key. Old filters block air and make the system work hard. Check the filter every 3 months and replace it if dirty. Always use the right filter type for your model.
| Common Problem | Possible Cause | What to Do |
|---|---|---|
| Not Cooling | Dirty filter or low refrigerant | Clean filter, call technician for refrigerant |
| Strange Noise | Loose parts or debris | Check and tighten parts, clean debris |
| Water Leaks | Clogged drain line | Clear drain line with a small brush |

Credit: www.youtube.com
Maximizing Savings And Efficiency
Using a smart thermostathelps control temperature efficiently. It adjusts cooling based on your schedule. This avoids wasting energy when no one is home. You can set it remotely with a phone app. This saves money and keeps your home comfortable.
Good insulationkeeps cool air inside and hot air outside. Seal gaps around windows and doors. Use weatherstripping or caulk to close leaks. Insulate walls and attics to lower energy loss. This helps your mini split work less and saves energy.
- Turn off the mini split when rooms are empty.
- Use fans to help spread cool air.
- Keep blinds closed during hot days to block sunlight.
- Clean or replace filters regularly for better airflow.
- Avoid setting the temperature too low; 75°F is enough.
Frequently Asked Questions
How To Install A Mini Split Ac Yourself?
Installing a mini split AC involves mounting the indoor unit, connecting refrigerant lines, and setting up the outdoor unit. Ensure proper sealing to avoid leaks. Follow the manufacturer’s instructions carefully. It’s crucial to have basic DIY skills and tools. Always prioritize safety and check local regulations before proceeding.
What Tools Are Needed For Diy Installation?
For DIY installation, you’ll need a drill, hole saw, wrench, and level. Additionally, you may require a vacuum pump, gauge set, and refrigerant. Ensure you have the right size drill bits and a stud finder. Having the right tools ensures a smoother installation process and helps prevent potential damage.
Can I Install A Mini Split Without Professional Help?
Yes, you can install a mini split without professional help if you have DIY experience. Follow the manufacturer’s instructions closely. However, improper installation can void warranties and lead to inefficiency. If unsure, consulting a professional is advisable to ensure safety and optimal performance.
How Long Does Diy Installation Take?
DIY installation of a mini split air conditioner can take 4 to 8 hours. The time varies based on your skill level and the complexity of the setup. Proper preparation and having all necessary tools ready can expedite the process, ensuring a smooth and efficient installation.
Conclusion
Installing a mini split air conditioner yourself saves money and builds skills. It takes careful planning and some basic tools. Follow each step to avoid common mistakes. Doing it yourself gives control over the process. Enjoy cool air and lower energy bills afterward.
Small effort leads to big comfort at home. Try it and see how simple it can be.