Are you thinking about upgrading your home’s cooling system? Ductless air conditioners might be the perfect solution for you.
But how exactly are these systems installed? Understanding the installation process can help you feel confident and prepared for the change. You’ll discover step-by-step how ductless air conditioners are set up, what to expect, and how the process can be smooth and hassle-free.
Keep reading to learn everything you need to know before making your move to a cooler, more comfortable space.
Choosing The Right Location
The indoor unitshould be placed where air flows freely. Avoid spots near heat sources or direct sunlight. Mount it high on the wall for better cooling. Make sure there is enough space around the unit for easy cleaning and maintenance.
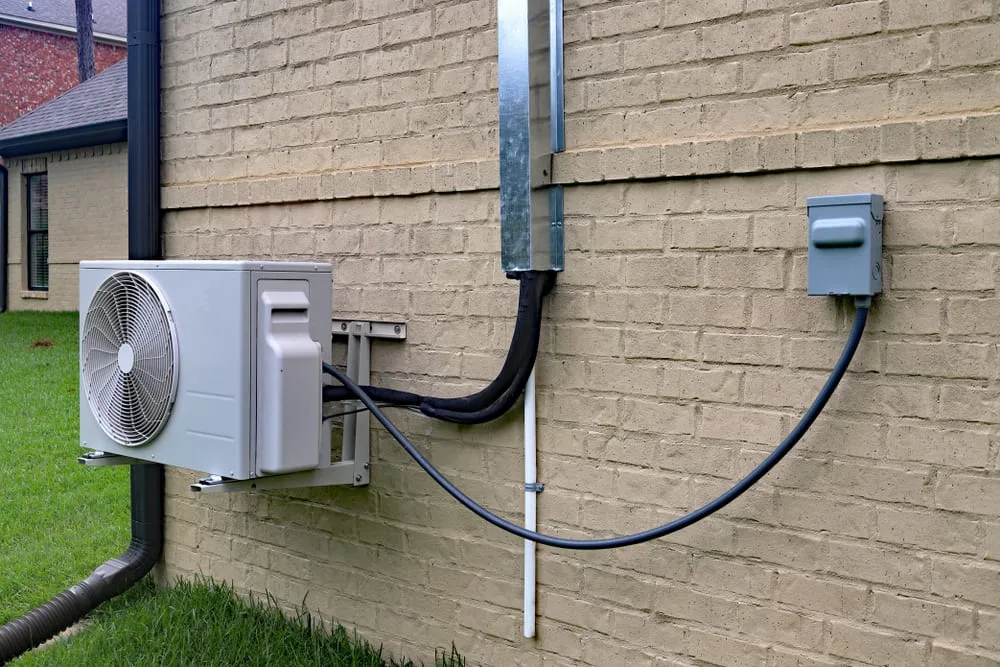
The outdoor unitneeds a stable, flat surface. Choose a location with good air circulation. Keep it away from dust, plants, or anything that blocks airflow. Avoid noisy areas near windows or neighbors. Secure the unit to prevent vibrations and noise.
Gathering Required Tools
Start by gathering the necessary tools for the installation. You will need a drill and screwdriver. These tools are important for securing the unit. A level ensures the unit is straight. A measuring tape helps in marking the right spots. Wall brackets are used to hold the unit in place. Don’t forget the wrench for tightening connections.
A hole saw is needed for drilling through walls. Cable ties help in managing wires neatly. Ensure you have electrical tape for safety. Keep a vacuum nearby for cleaning dust. Finally, have some safety goggles to protect your eyes. With these tools, you’ll be ready to start the installation.
Mounting The Indoor Unit
The mounting plate holds the indoor unit firmly on the wall. It must be fixed straight and level. Use a spirit level to check. Secure the plate with screws into wall studs or anchors. This ensures the unit stays stable.
Drilling the hole for piping is crucial. The hole should be about 3 inches wide to fit all pipes and cables. Drill at a slight downward angle toward the outside to help water drain. Make sure the hole is sealed well to prevent air leaks and pests.

Credit: thefurnaceoutlet.com
Installing The Outdoor Unit
Start by choosing a flat, stable spot for the outdoor unit. The base must be level to avoid vibrations and noise. Use concrete pads or metal brackets to create a strong foundation.
Make sure the base is slightly raised. This keeps the unit safe from water and dirt. Clear the area around the base for good airflow and easy maintenance.
Place the outdoor unit where it gets enough space on all sides. Avoid spots near trees or walls that block airflow. The unit should be easy to reach for repairs and cleaning.
- Keep at least 12 inches of space above the unit.
- Leave 24 inches of space on the sides.
- Position away from direct sunlight to improve efficiency.
- Avoid placing near noisy areas to reduce disturbance.
Connecting Refrigerant Lines
Running the piping requires careful planning and precision. The pipes carry refrigerant between the indoor and outdoor units. Pipes should be insulated well to prevent energy loss. They are usually run through walls or ceilings. Avoid sharp bends to keep refrigerant flow smooth. Use a pipe sleeve to protect pipes passing through walls.
Flare connection techniques create tight, leak-proof joints. The pipe ends are flared using a special tool. This shaped end fits securely to the fitting. Tighten the flare nut by hand first, then use a wrench. Do not overtighten to avoid damage. Check connections for leaks using soapy water or a leak detector.

Credit: genzryan.com
Electrical Wiring Setup
The power supply must be turned off before starting any work. Connect the indoor and outdoor units to a dedicated circuit breaker. Use wires that match the unit’s voltage and current requirements. Ensure all connections are tight and secure to avoid any hazards.
Wiring the indoor and outdoor units involves running a cable through the wall or conduit. This cable carries power and communication signals between units. Use insulated wires and protect them from moisture and damage. Follow the manufacturer’s wiring diagram carefully to connect the terminals correctly.
- Use a circuit breaker suitable for the unit’s power.
- Run wires through a protective conduit.
- Connect power wires to the correct terminals.
- Connect communication wires as per instructions.
- Check all connections for tightness and safety.
Vacuuming And Leak Testing
Removing air and moisturefrom the system is crucial for ductless air conditioner installation. A vacuum pump is used to suck out all air and water vapor inside the refrigerant lines. This process prevents damage to the compressor and helps the unit run smoothly. The vacuum also ensures no moisture is left, which can cause rust or blockages.
Checking for leaksis done after vacuuming. Technicians apply a special leak detection solution or use electronic leak detectors. This step is important to make sure no refrigerant escapes. Leaks can reduce cooling efficiency and harm the environment. If leaks are found, they are sealed immediately, and the system is tested again.
System Start-up And Testing
Powering on the ductless air conditioner requires careful attention. First, ensure all wiring connections are secure and correct. Turn on the main power supply to the unit. Listen for any unusual sounds that could indicate a problem. Check that the remote control or thermostat communicates well with the system. The unit should start without delay or error signals.
Checking cooling performance is essential to confirm the system works well. Feel the air coming out of the indoor unit. It should be cold and steady. Measure the temperature difference between the air entering and leaving the system. A good system often cools air by about 15 to 20 degrees Fahrenheit.
| Test | What to Check |
|---|---|
| Power On | Unit starts smoothly, no error codes, remote works |
| Air Temperature | Cold air flows consistently from indoor unit |
| Temperature Difference | Indoor air cools by 15-20°F compared to room air |
Final Adjustments And Maintenance Tips
Adjusting settingsis important for comfort and energy use. Use the remote control to set the temperature. Choose a mode: cooling, heating, or fan. Set fan speed to low, medium, or high. Make sure the air flows freely from the indoor unit. Check the timer to turn the unit on or off automatically. Small changes can save energy and improve comfort.
Routine maintenancekeeps the unit working well. Clean or replace filters every month. Wipe the indoor unit with a soft cloth. Check the outdoor unit for dirt and leaves. Keep the area around the outdoor unit clear. Call a technician once a year to check the system. Regular care helps the unit last longer and work better.

Credit: www.uniqueheatingandcooling.com
Frequently Asked Questions
How Long Does Ductless Ac Installation Take?
Ductless AC installation usually takes 3 to 5 hours. It depends on the unit size and wall complexity. Professional installers ensure quick and efficient setup.
What Tools Are Needed For Ductless Ac Installation?
Common tools include a drill, hole saw, vacuum pump, and refrigerant gauges. These help mount the unit and connect refrigerant lines properly.
Can I Install A Ductless Ac Myself?
DIY installation is possible but not recommended. Proper handling of refrigerant and electrical work requires professional expertise. Hiring a licensed technician ensures safety and warranty.
Where Is The Best Place To Install Ductless Ac?
Install the indoor unit high on a wall, away from direct sunlight. Outdoor units should be on a stable surface with proper ventilation.
Conclusion
Installing ductless air conditioners is a simple and quick process. It requires careful planning and the right tools. Professionals usually handle the installation for best results. The indoor and outdoor units connect through small holes in the wall. This setup saves space and avoids messy ducts.
Proper installation ensures efficient cooling and saves energy. Understanding the steps helps you prepare for the process. Now, you know how ductless air conditioners get installed. Easy, neat, and effective.