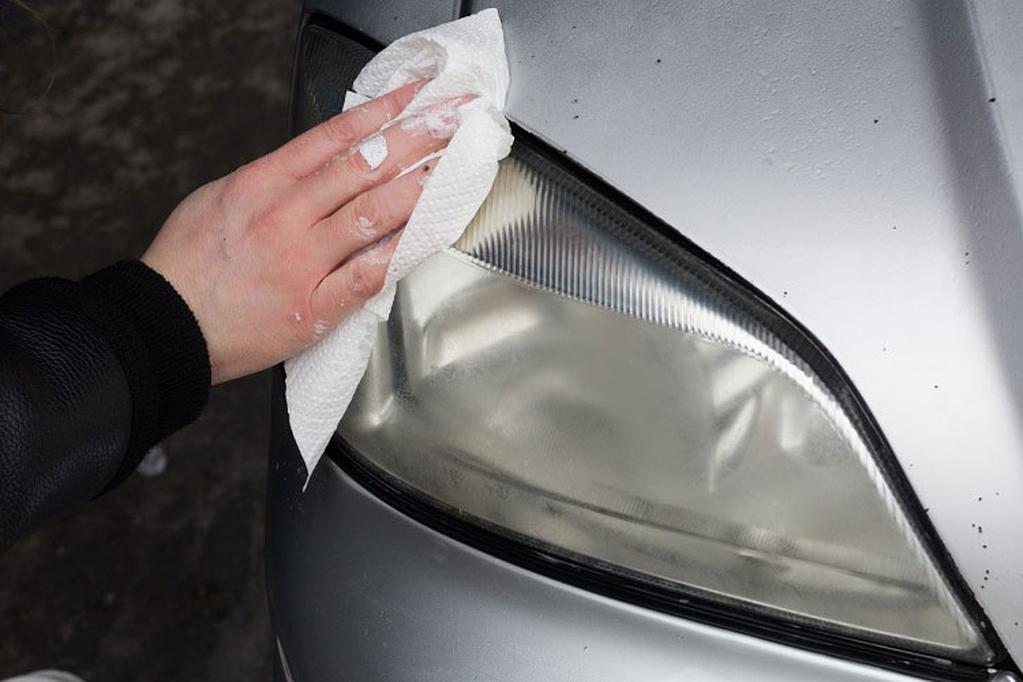
Are your headlights looking dull or cloudy? This can make driving at night harder and even unsafe.
You might think cleaning them is complicated or expensive, but it’s easier than you imagine. You’ll discover simple, step-by-step ways to restore your headlights’ shine using things you probably already have at home. Keep reading, and you’ll be surprised how much brighter and clearer your headlights can be—helping you see better and drive safer tonight.

Credit: parade.com
Why Clean Headlights Matter
Clean headlights help you see better at night. Dirt and grime can make lights dim and blurry.
Keeping headlights clean improves your car’s look and safety on the road.
Impact On Night Driving
Dirty headlights reduce the light that shines on the road. This makes it hard to see obstacles and signs.
Clear headlights give you better visibility and help you drive safely in the dark.
- Better distance vision
- Easier to spot pedestrians and animals
- Clearer view of road signs
Effect On Car Appearance
Clean headlights make your car look newer and well-kept. Cloudy or yellow headlights can make your car look old.
Regular cleaning keeps your car’s front bright and attractive to others.
- Improves car’s overall look
- Shows you take care of your vehicle
- Increases car value if you sell it
Safety Benefits
Clean headlights help other drivers see your car better. This lowers the risk of accidents on the road.
They also make it easier for you to react to hazards quickly and avoid crashes.
- Increases visibility to others
- Helps avoid collisions
- Supports safer night driving
Tools And Materials Needed
Cleaning car headlights can improve visibility. You need specific tools and materials to get the job done right.
There are common household items you can use, or you can choose specialty kits. Don’t forget protective gear for safety.
Common Household Items
Many people have items at home that can clean headlights. These are easy to find and use.
- Baking soda and vinegar
- Toothpaste
- Soap and water
- Microfiber cloth
Specialty Cleaning Kits
Specialty kits are made for cleaning headlights. They often include everything you need.
- Headlight restoration kits
- UV sealant
- Sanding pads
- Polishing compounds
Protective Gear
Safety is important when cleaning headlights. Use protective gear to avoid accidents.
- Gloves
- Safety glasses
- Face mask
Step-by-step Cleaning Process
Cleaning your car’s headlights makes them clearer and brighter. It also improves your safety while driving at night.
This guide will show you how to clean your headlights with easy steps. You only need a few tools and some time.
Preparing The Headlight Surface
Start by washing the headlights with soap and water. This removes dirt and grime from the surface.
Dry the headlights with a clean cloth. Also, cover the area around the lights with tape to protect your car’s paint.
- Use car soap or mild detergent
- Rinse with clean water
- Dry with a soft cloth
- Apply painter’s tape around headlights
Applying The Cleaning Solution
Choose a headlight cleaning solution or make one with baking soda and water. Apply it evenly on the headlight.
Use a spray bottle or cloth to spread the cleaner. Let it sit for a few minutes to break down the haze.
- Use commercial headlight cleaner or homemade paste
- Apply a thin, even layer
- Wait 5 minutes before scrubbing
Scrubbing Techniques
Use a soft sponge or microfiber cloth to scrub the headlight. Rub in small circles to remove dirt and oxidation.
Apply light pressure to avoid scratches. Keep the surface wet to help the cleaning process.
- Use a soft sponge or cloth
- Rub in circular motions
- Apply gentle pressure only
- Keep headlight surface wet
Rinsing And Drying
Rinse the headlight with clean water to remove the cleaning solution. Make sure all residue is washed away.
Dry the headlights with a clean microfiber cloth. Remove the tape and check if the lights look clear.
- Use plenty of clean water for rinsing
- Dry with a soft, clean cloth
- Remove painter’s tape carefully
- Inspect the headlight for clarity

Credit: www.carsales.com.au
Dealing With Stubborn Cloudiness
Car headlights can become cloudy over time. This cloudiness reduces visibility at night. Cleaning them improves safety and car appearance.
Some stains are hard to remove. They need extra care and proper tools to restore clear headlights.
Using Sandpaper Or Abrasives
Sanding removes the top cloudy layer from headlights. Use fine-grit sandpaper to avoid scratches. Wet the surface before sanding to prevent damage.
Start with 1000 grit sandpaper and move to 2000 grit for a smooth finish. Sand in circular motions for even results.
- Clean headlights with soap and water first
- Wet sandpaper and headlight surface
- Sand gently and evenly
- Rinse and dry before next step
Polishing For Extra Shine
Polishing removes small scratches and restores clarity. Use a plastic polish or rubbing compound made for headlights. Apply polish with a soft cloth or foam pad.
Rub the polish in circular motions until the cloudiness fades. Wipe off excess polish with a clean cloth for a bright finish.
- Use a small amount of polish
- Work in sections for best results
- Buff gently to avoid damage
- Repeat if needed for clearer light
Sealing And Protecting
After cleaning, seal headlights to keep them clear longer. Use a UV sealant or clear coat designed for plastics. This stops new cloudiness caused by sun damage.
Apply the sealant evenly and let it dry completely. Reapply every few months to maintain protection.
- Choose a UV-resistant sealant
- Clean surface before applying
- Use thin, even layers
- Allow full drying time
Maintenance Tips For Long-lasting Clarity
Clean headlights improve your vision and make your car safer to drive. Dirt and grime build up over time. Regular care keeps your headlights clear and bright.
Follow simple tips to protect your headlights from damage. Use gentle products and park wisely. This helps maintain clarity for years.
Regular Cleaning Schedule
Clean your headlights every two weeks to remove dirt and bugs. This prevents buildup that can cloud the lens. Use a soft cloth and mild soap with water.
- Rinse headlights with water to remove loose dirt.
- Apply mild soap solution and wipe gently.
- Rinse again with clean water.
- Dry with a soft microfiber cloth.
- Check for scratches or yellowing and treat if needed.
Avoiding Harsh Chemicals
Harsh cleaners can damage the plastic lens or cause cloudiness. Avoid using bleach, ammonia, or abrasive pads. Stick to products made for automotive headlights.
| Safe Cleaners | Unsafe Cleaners |
|---|---|
| Soap and water | Bleach |
| Car headlight cleaner kits | Ammonia-based cleaners |
| Vinegar diluted with water | Scouring pads |
| Baking soda paste | Strong solvents |
Parking Strategies To Prevent Damage
Sunlight and weather can fade headlights over time. Park in shaded areas or use a car cover. This helps reduce UV damage and keeps headlights clearer longer.
- Park in garages or covered areas when possible.
- Use a windshield sunshade to block UV rays.
- Avoid parking near trees that drop sap or debris.
- Wash your car regularly to remove harmful residues.
When To Seek Professional Help
Cleaning your car’s headlights can improve visibility and safety. Some problems need expert care.
Learn signs that show you should visit a professional. Also, find out the benefits and costs of their help.
Signs Of Headlight Damage
If your headlights are cracked, foggy, or yellowed, they may need more than cleaning. Flickering lights or reduced brightness also signal damage.
- Cracks or chips on the lens
- Yellow or cloudy appearance
- Lights flickering or dimming
- Condensation inside the headlight
- Scratches that reduce light output
Benefits Of Professional Restoration
Professionals use special tools and products. They restore headlights to look clear and work well.
- Improve light brightness and clarity
- Protect headlights from future damage
- Save time and effort
- Ensure safe driving at night
Cost Considerations
| Service Type | Price Range |
| Basic headlight cleaning | $20 – $50 |
| Professional headlight restoration | $50 – $150 |
| Headlight replacement | $100 – $400 |
Prices vary by location and damage level. Consider the cost against safety and headlight life.
Credit: www.youtube.com
Frequently Asked Questions
How Often Should I Clean My Car Headlights?
Clean your headlights every 3 to 6 months. Regular cleaning prevents fogging and improves visibility. Frequency depends on weather and road conditions.
What Materials Do I Need To Clean Headlights?
You need mild soap, water, microfiber cloth, toothpaste or baking soda, and a soft brush. These materials safely remove dirt and oxidation.
Can I Use Toothpaste To Clean Headlights?
Yes, toothpaste works as a mild abrasive. Apply it with a cloth, scrub gently, then rinse. It helps remove minor cloudiness effectively.
Is It Safe To Clean Headlights With Household Items?
Yes, household items like baking soda and toothpaste are safe. They clean without harsh chemicals, preserving the headlight surface and clarity.
Conclusion
Cleaning your car headlights is simple and helps you drive safer. Clear headlights improve night vision and make your car look better. Use common household items or special cleaners for best results. Regular cleaning stops dirt and fog from building up.
Spend a few minutes every month to keep headlights bright. Bright lights mean better visibility and fewer accidents. Take care of your headlights, and enjoy safer drives ahead.