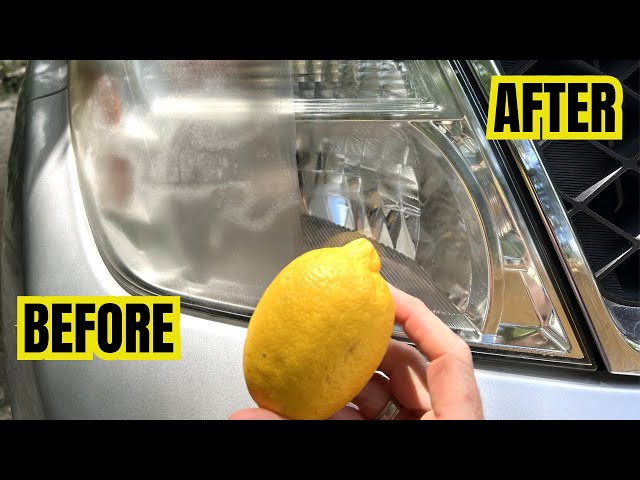
Are your car’s headlights looking dull or foggy? This not only makes your car look older but can also reduce how well you see at night.
You might be wondering, “How do I clean the headlights on my car? ” The good news is, you don’t need special tools or expensive products to fix them. You’ll discover simple, effective ways to make your headlights shine bright again.
Keep reading to learn easy steps that anyone can do to improve your safety and your car’s appearance.
Credit: www.youtube.com
Causes Of Headlight Dullness
Headlights can become dull over time. This makes it harder to see at night and can be dangerous.
Several things cause headlights to lose their shine. Knowing these helps you clean them better.
Effects Of Oxidation
Oxidation happens when the plastic on headlights reacts with oxygen. This creates a cloudy layer on the surface.
The cloudy layer blocks light and makes headlights look foggy. It is one of the main reasons for dull headlights.
Impact Of Dirt And Grime
Dirt, dust, and grime build up on headlights every day. This layer covers the lights and reduces brightness.
Road grime can stick tightly and is hard to remove with just water. Cleaning helps headlights shine clearly again.
- Dust from roads
- Insect remains
- Oil and tar spots
- Water spots from rain
Wear From Uv Exposure
Sunlight has ultraviolet (UV) rays that break down plastic over time. This causes headlights to fade and crack.
UV damage makes the headlight surface rough. This reduces how well light passes through and lowers visibility.

Credit: www.carsales.com.au
Tools And Materials Needed
Cleaning your car’s headlights improves visibility and safety. Using the right tools makes the job easier.
This guide covers the main tools and materials you will need for cleaning headlights effectively.
Cleaning Solutions
Cleaning solutions remove dirt and grime from the headlight surface. Choose a mild solution to avoid damage.
Common options include soap and water, vinegar, or specialized headlight cleaners.
- Soap and water mix
- White vinegar diluted with water
- Commercial headlight cleaning sprays
Polishing Compounds
Polishing compounds help remove oxidation and restore clarity. Use one designed for plastic surfaces.
They come in paste or liquid form and gently smooth out the headlight lens.
- Plastic polish paste
- Liquid polishing compound
- Fine abrasive rubbing compound
Protective Gear
Wear protective gear to keep yourself safe while cleaning headlights. Some chemicals can irritate skin or eyes.
Always use gloves and eye protection during the cleaning process.
- Rubber or latex gloves
- Safety goggles or glasses
- Old clothes or apron
Preparation Before Cleaning
Cleaning car headlights improves visibility and safety. Proper preparation helps get the best results. Before starting, take time to set up correctly.
This guide covers the key steps you need before cleaning your headlights. Follow these tips to avoid damage and work efficiently.
Gathering Supplies
Gathering the right supplies ensures the cleaning process is smooth. You will need items that help clean without scratching or damaging the headlights.
- Soft microfiber cloths
- Mild soap or car wash detergent
- Water in a spray bottle
- Masking tape to protect paint
- Sandpaper or polishing compound (if needed)
- Protective gloves
Protecting Surrounding Areas
Protect the car’s paint and trim from cleaning products. Use tape and covers to shield these areas before you start.
| Area to Protect | Protection Method |
|---|---|
| Car Paint | Apply masking tape around headlights |
| Windshield | Cover with plastic sheet or cloth |
| Trim and Rubber Seals | Use painter’s tape or plastic wrap |
Safety Precautions
Safety is important when working with cleaning products and tools. Wear gloves and work in a well-ventilated area to avoid irritation or injury.
- Wear protective gloves to keep skin safe
- Work outside or in a garage with open doors
- Keep cleaning products away from children and pets
- Read product labels and follow instructions carefully
Step-by-step Cleaning Process
Cleaning your car’s headlights improves visibility and safety. Over time, headlights get cloudy from dirt and sun damage. Follow these simple steps to restore their brightness.
This guide covers washing, sanding, polishing, and buffing. Each step helps remove grime and scratches for a clear finish.
Initial Washing
Start by rinsing the headlights with water. Use a mild soap and a soft cloth to clean off dirt and bugs. Dry the surface with a clean towel before moving on.
Sanding Techniques
Wet sanding removes the yellow layer and smooths scratches. Use fine-grit sandpaper, such as 1000 to 2000 grit. Keep the surface wet to avoid damage.
- Soak sandpaper in water for 10 minutes.
- Sand the headlight in a horizontal motion.
- Keep spraying water to keep the area wet.
- Switch to vertical sanding for even coverage.
- Wipe off residue and dry the surface.
Applying Polish
Polishing restores clarity and removes fine scratches. Use a plastic polish or a dedicated headlight polish. Apply it with a microfiber cloth in small circular motions.
| Polish Type | Use | Dry Time |
|---|---|---|
| Plastic Polish | Removes scratches | 5 minutes |
| Headlight Polish | Restores shine | 3 minutes |
| UV Sealant | Protects finish | 10 minutes |
Buffing For Shine
Buffing removes polish residue and brings out a glossy finish. Use a clean microfiber cloth or a buffing pad. Rub the headlight gently until it shines.
- Work in small sections.
- Use circular motions.
- Check for even shine.
- Apply UV protectant if available.
Alternative Cleaning Methods
Cleaning car headlights can improve your night driving safety. There are different ways to clean headlights at home.
Some alternatives use common household items. Others use products made just for headlights.
Using Toothpaste
Toothpaste can clean cloudy headlights because it contains mild abrasives. These help remove dirt and grime from the surface.
Apply a small amount of toothpaste on a soft cloth. Rub it gently on the headlight in circular motions, then rinse with water.
- Use non-gel toothpaste
- Apply with a soft cloth or sponge
- Rinse thoroughly with water
- Dry with a clean towel
Commercial Headlight Restoration Kits
Many stores sell kits made to clean and restore headlights. These kits include cleaning solutions and sandpaper or polishing pads.
Follow the instructions carefully to avoid damage. Kits work well for headlights with heavy yellowing or scratches.
- Clean the headlight surface first
- Use sandpaper to remove old layers
- Apply the polishing compound
- Seal with the protective coating
Natural Remedies
Some natural items can help clean headlights. Baking soda and vinegar are popular choices because they are mild and safe.
Mix baking soda with water to make a paste. Rub it on the headlight and then rinse. Vinegar can be sprayed on and wiped off to remove dirt.
- Baking soda paste for gentle scrubbing
- White vinegar to dissolve grime
- Use soft cloths to avoid scratches
- Rinse and dry after cleaning
Maintaining Clean Headlights
Clean headlights help you see better at night. They also make your car look nice. Dirt and grime can build up over time.
Keeping headlights clean is an easy way to improve safety. You can do it yourself with simple tools.
Regular Cleaning Schedule
Clean your headlights often to stop dirt from building up. Try to clean them every two weeks. This keeps light bright and clear.
If you drive on dusty roads, clean more often. Use soap, water, and a soft cloth. Avoid harsh scrubbing that can scratch lenses.
Protective Coatings
Apply a protective coating after cleaning. It helps keep dirt and bugs away. Coatings also stop UV rays from making headlights yellow.
Use a coating made for headlights. Follow the instructions carefully. Reapply every few months for best results.
- Protects against sun damage
- Keeps headlights shiny longer
- Makes future cleaning easier
Avoiding Common Mistakes
Do not use abrasive cleaners or rough cloths. These can scratch the headlights. Avoid using household chemicals that may damage plastic.
Do not clean headlights only when very dirty. Waiting too long can cause permanent damage. Regular care keeps headlights working well.

Credit: www.whocanfixmycar.com
Frequently Asked Questions
How Often Should I Clean My Car Headlights?
Clean your headlights every 3 to 6 months to maintain brightness. Frequent cleaning prevents dirt buildup and yellowing. Regular care improves night visibility and driving safety.
What Household Items Can Clean Car Headlights Effectively?
Use toothpaste or baking soda mixed with water to clean headlights. These items gently remove grime and oxidation. They are affordable, easy to find, and safe for plastic lenses.
Can Headlight Cleaning Improve Night Driving Visibility?
Yes, cleaning headlights significantly enhances night visibility. Clear lenses allow more light to pass through. This reduces glare and improves road safety during night drives.
Is It Necessary To Polish Headlights After Cleaning?
Polishing headlights after cleaning restores shine and removes fine scratches. It helps maintain clarity longer and protects the lens surface. Polishing is a recommended step for best results.
Conclusion
Cleaning car headlights can be simple and rewarding. Clear headlights improve night driving safety. Gather supplies like soap, water, and a soft cloth. Gently scrub to remove dirt and grime. For stubborn stains, try toothpaste or baking soda. Rinse thoroughly and let them dry.
Maintain regularly to keep them shining bright. Consistent cleaning prevents long-term damage. Remember, clean headlights enhance car appearance. Plus, they boost your visibility on the road. Keep this task part of your car care routine. It’s easy and keeps your car looking fresh.
Safe travels with bright headlights!