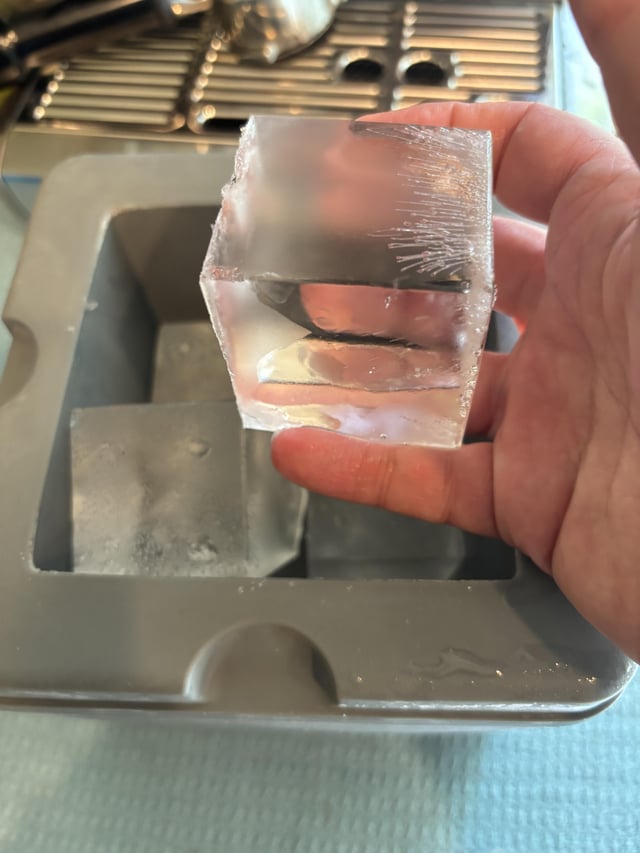
Imagine serving a refreshing drink at your next gathering, and your guests are amazed not just by the flavor but by the crystal-clear ice cubes clinking in their glasses. Clear ice isn’t just for fancy bars or high-end restaurants; you can make it right at home.
Why settle for cloudy, dull ice when you can impress with stunning, transparent cubes? In this guide, you’ll discover the simple steps to creating clear ice that will elevate your beverages and make you the host everyone admires. Stick around to learn how to transform your homemade drinks into something extraordinary with the perfect, clear ice cubes.
Choosing The Right Water
Choosing the right water is key to making clear ice at home. The purity and quality of water affect the ice’s transparency. Impurities and minerals cause cloudiness and bubbles in the ice. Using the best water helps create crystal-clear ice cubes that look great and melt slowly.
Distilled Vs Tap Water
Distilled water has fewer minerals and impurities. It is boiled and condensed to remove contaminants. This makes it ideal for clear ice. Tap water often contains minerals and chemicals that cause cloudiness. Using tap water can result in cloudy ice cubes. Distilled water gives a cleaner, clearer ice appearance.
Boiling Water For Clarity
Boiling water removes dissolved gases like oxygen and nitrogen. These gases cause tiny bubbles in ice. Boil the water for about 3-5 minutes. Let it cool slightly before freezing. Boiled water freezes with fewer air bubbles, making ice more transparent. Repeat boiling twice for even better clarity.
Filtering Techniques
Filtering water removes impurities and particles that cloud ice. Use a carbon or charcoal filter for best results. Filtering tap water reduces chlorine and other chemicals. Pour filtered water slowly into your ice tray. Avoid shaking or stirring to keep air out. Clean water and careful handling improve ice clarity greatly.

Credit: www.youtube.com
Freezing Methods
Making clear ice at home can seem tricky, but understanding the freezing methods helps you get there faster. The clarity of ice depends largely on how you freeze the water. Different techniques can reduce trapped air and impurities, giving you that crystal-clear look.
Directional Freezing Explained
Directional freezing means controlling the way ice forms by freezing water from one direction only. This pushes air bubbles and impurities away from the freezing front, leaving a clear block of ice behind.
Imagine freezing water from the top down versus freezing it all at once. If you freeze it all at once, air and minerals get trapped inside. But if the ice forms gradually from one side, those impurities are forced to the opposite side, which you can then trim away.
Using A Cooler For Clear Ice
A simple and effective way to achieve directional freezing is to use a small cooler without its lid inside your freezer. Fill the cooler with water, and the insulation slows down freezing from the sides and bottom, so the ice freezes top-down.
After 24 hours, you’ll notice a block of clear ice on top with cloudy water or ice beneath. Remove the block, and you have clear ice ready to cut. This method doesn’t require special equipment and fits easily into most freezers.
Freezing Time Tips
Patience is key. Clear ice forms best when frozen slowly, usually taking 18 to 24 hours depending on your freezer and cooler size.
Rushing the process by freezing too fast traps air bubbles, creating cloudy ice. Try to plan ahead so you’re not tempted to speed it up.
Also, use boiled or filtered water to reduce impurities. Have you noticed how much difference clean water makes in your ice clarity?
Ice Molds And Tools
Creating clear ice at home requires the right molds and tools. These help control the freezing process and improve ice clarity. Choosing good molds makes a big difference in the final look of your ice cubes.
Using special molds helps prevent air bubbles and cracks. The shape and material of the mold affect how the ice freezes. Some molds are designed to freeze water slowly, which leads to clearer ice.
Best Molds For Clear Ice
- Large block molds freeze water slowly and evenly.
- Directional freezing molds guide ice to freeze from one side only.
- Insulated molds reduce freezing speed to avoid cloudy ice.
- Clear ice trays with lids prevent contamination and dust.
These molds help produce crystal-clear ice cubes for drinks.
Diy Mold Options
Simple household items can work as DIY molds. Use plastic containers or small food storage boxes. Make sure they are clean and free of odors. Cut holes or slots in containers to control freezing direction. Wrap containers with towels to slow freezing.
DIY molds save money and allow custom sizes. They may not be perfect but can still improve ice clarity.
Using Silicone Vs Plastic
| Material | Flexibility | Ease of Use | Effect on Ice |
|---|---|---|---|
| Silicone | Very flexible, easy to pop out ice | Easy to clean and handle | Freezes slowly, helps clear ice |
| Plastic | Less flexible, harder to remove ice | Can crack or warp over time | May freeze faster, less clear ice |
Silicone molds offer better results for clear ice. Plastic molds are affordable but less effective. Choose based on convenience and budget.
Removing Air Bubbles
Removing air bubbles is key to making clear ice at home. Air bubbles cause cloudiness and cracks inside the ice. They trap impurities and block light, ruining the ice’s clarity. Understanding how these bubbles form helps in minimizing them effectively.
Why Air Bubbles Form
Air bubbles form when water freezes too fast. As ice forms, dissolved gases like oxygen and nitrogen escape. These gases collect as small bubbles inside the ice. Rapid freezing traps these bubbles before they can escape. Impurities and minerals in water also create tiny pockets of air. These pockets remain visible as cloudy spots in the ice.
Techniques To Minimize Bubbles
Slow freezing helps reduce air bubbles. It gives gases time to escape before the water solidifies. Use boiled or distilled water to lower impurities. Pour water into an insulated container to freeze from one direction. This pushes air and impurities toward the bottom. Remove the cloudy layer before using the ice.
- Boil water twice and let it cool before freezing
- Freeze water in a cooler with the lid off
- Use silicone molds that allow slow freezing
- Tap or shake the water container to release trapped air
- Freeze in layers, allowing each layer to fully freeze
Storing Clear Ice
Storing clear ice properly is just as important as making it. Without the right care, even the clearest ice can become cloudy or pick up unwanted odors. Keeping your ice pristine ensures every sip of your drink stays visually impressive and tastes fresh.
Preventing Cloudiness After Freezing
Cloudiness often happens when ice absorbs impurities or refreezes unevenly. To avoid this, freeze your ice in a clean environment and don’t refreeze melted ice cubes. Handle your clear ice with clean hands or utensils to keep dirt and oils away.
Think about how you store other fresh foods. Would you leave them exposed to open air or contaminants? The same logic applies to your clear ice. Cover your ice immediately to block moisture and airborne particles that cause cloudiness.
Storage Containers And Conditions
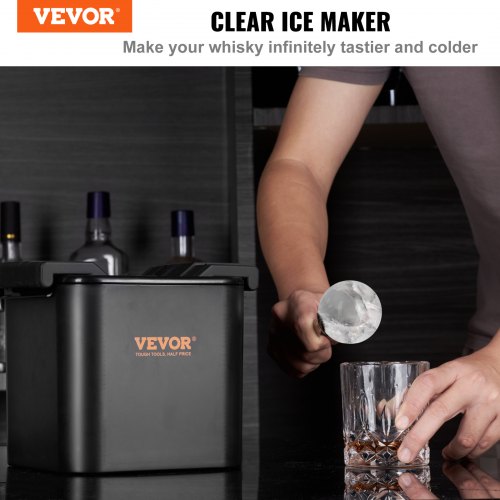
Use airtight containers to store your clear ice. Plastic containers with tight-fitting lids work well to keep the ice isolated from freezer smells and humidity. Silicone molds with lids can also double as storage, saving space and reducing exposure.
Keep your ice in the coldest part of the freezer where the temperature stays steady. Avoid placing your ice near the freezer door or items that frequently open and close. This minimizes temperature fluctuations that lead to cracks and frost buildup.
- Label your containers with the date so you use the oldest ice first.
- Store smaller batches to prevent frequent thawing and refreezing.
- Separate clear ice from regular ice to avoid contamination.
Have you noticed how even slight freezer smells can alter the taste of your drinks? Protect your clear ice by sealing it well—your taste buds will thank you.
Credit: www.vevor.ca
Troubleshooting Common Issues
Troubleshooting common issues helps improve the quality of clear ice at home. Small problems can cause cracks or cloudiness in your ice cubes. Fixing these issues ensures your ice looks great and melts slowly. Understanding the causes makes the process easier.
Cracking And Cloudiness
Cracks form when ice freezes too fast or unevenly. Rapid freezing traps air and water inside, causing stress. Slow freezing helps avoid cracks by allowing ice to form gently. Use an insulated cooler inside the freezer to slow freezing. Remove ice cubes quickly to prevent stress from temperature changes.
Cloudiness appears from trapped air bubbles and minerals. Clear ice needs pure water and controlled freezing. Boil water before freezing to remove air bubbles. Pour water slowly to avoid bubbles inside the mold. Freeze ice from one direction, usually top to bottom, to push impurities away.
Dealing With Impurities
Impurities cause cloudiness and affect ice flavor. Tap water contains minerals that create cloudy ice. Use distilled or filtered water for best results. Boiling water twice removes more impurities and dissolved gases. Clean your ice molds regularly to avoid residue build-up.
Impurities can settle at the bottom of the ice block. Cut off the cloudy part after freezing to get clear ice. Store ice in a sealed container to avoid absorbing freezer smells. Clear ice needs pure water and patience for best results.
Creative Uses For Clear Ice
Clear ice isn’t just about aesthetics—it can transform your drink experience in ways you might not expect. Its purity and slow melting rate make it perfect for more than just cooling beverages. Let’s look at some creative ways you can use clear ice to impress and elevate your home bar setup.
Cocktail Presentation
Imagine serving a cocktail with a perfectly clear ice cube that catches the light and shows off your drink’s colors. Clear ice adds a touch of elegance that regular cloudy ice simply can’t match.
Try using large, clear ice cubes or spheres in your favorite cocktails. They melt slower, so your drink stays cold without getting watered down quickly.
You can even freeze herbs, edible flowers, or citrus peels inside the clear ice for an eye-catching garnish that stays fresh longer. Have you ever noticed how a clear ice cube can make a simple drink feel special?
Home Bar Enhancements
Clear ice can be the centerpiece of your home bar, making it look more sophisticated and inviting. Display a tray of clear ice cubes in a stylish container for guests to admire before they sip.
Consider using clear ice in whiskey tastings or craft cocktails to highlight the drink’s flavors without distraction. It’s a small detail that shows you care about quality and presentation.
You might also experiment with different shapes—like diamonds or large blocks—to create a unique vibe. How could you change your bar’s atmosphere simply by upgrading your ice?

Credit: www.hindustantimes.com
Frequently Asked Questions
How Do I Make Clear Ice At Home Easily?
To make clear ice, use boiled, distilled water and freeze it slowly. Use an insulated container to control freezing direction. This method reduces air bubbles and impurities, resulting in clear, crystal-like ice cubes perfect for drinks.
Why Is My Ice Cloudy Instead Of Clear?
Cloudy ice forms when trapped air and impurities freeze quickly. Using boiled or distilled water and freezing it slowly helps reduce cloudiness. Directional freezing pushes air and impurities away, producing clearer ice cubes with better appearance and taste.
What Water Type Is Best For Clear Ice?
Distilled or boiled water is best for clear ice. These water types have fewer impurities and dissolved gases. Removing these elements prevents cloudiness and produces transparent, pure ice cubes ideal for cocktails and beverages.
How Long Should I Freeze Ice For Clarity?
Freeze ice slowly for 24 to 48 hours. Slow freezing allows air and impurities to escape. Using an insulated cooler helps control the freezing process, improving ice clarity and creating beautiful, clear ice cubes.
Conclusion
Making clear ice at home takes patience and simple steps. Use pure water and freeze it slowly. Remove bubbles by boiling or filtering water first. Freeze water from one direction to push air out. Clear ice looks great and melts slower in drinks.
Try these easy tips to enjoy better ice today. Your drinks will taste cooler and look sharper. Keep practicing, and soon you will make perfect clear ice every time. Simple tricks can bring big results. Give it a try!