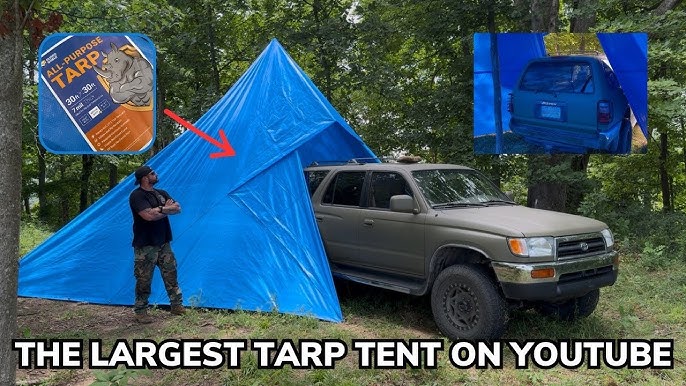
Building a tent might seem tricky at first, but with the right steps, you can set up your own cozy shelter quickly and easily. Imagine having a safe, dry space ready wherever you go—whether you’re camping in the woods or spending a night under the stars.
This guide will show you exactly how to build a tent, breaking down each step so you feel confident and ready. Stick with me, and you’ll master tent setup in no time, making your outdoor adventures more enjoyable and stress-free.
Ready to learn? Let’s get started!

Credit: rangerrick.org
Choosing The Right Tent
Picking the right tent is important for a good camping trip. The tent keeps you safe and comfortable outdoors.
You should think about the tent’s type, materials, and size before buying or setting it up.
Types Of Tents
Tents come in many shapes. Each type suits different camping needs and places.
- Dome tents are easy to set up and stable in wind.
- Cabin tents offer more space and stand tall inside.
- Backpacking tents are light and small for hiking trips.
- Pop-up tents open fast and are good for festivals.
Materials And Durability
Tent fabrics and poles affect how long a tent lasts. Strong materials handle weather better.
Nylon and polyester are common fabrics. Polyester handles sun damage well. Nylon is lighter but less UV resistant.
- Aluminum poles are light and strong.
- Fiberglass poles cost less but break easier.
- Waterproof coatings keep rain outside.
- Look for tents with good seams to stop leaks.
Size And Capacity
Choose a tent size that fits everyone and gear. Size means how many people can sleep inside.
Allow extra space for bags and movement. A tent too small feels crowded and uncomfortable.
- 2-person tents fit two people and some gear.
- 4-person tents offer more space for families.
- 6-person tents are good for groups or extra comfort.
Selecting The Campsite
Choosing the right place to set up your tent is very important. A good site keeps you safe and comfortable during your stay.
Look around carefully before you start building your tent. Think about the ground, weather, and any dangers nearby.
Flat And Dry Ground
Pick a spot with flat ground. It makes sleeping easier and keeps your tent stable. Avoid slopes or uneven surfaces.
Dry ground helps keep your tent clean and stops water from coming inside. Wet soil can be uncomfortable and messy.
Avoiding Hazards
Look for dangers like falling branches or loose rocks. Stay away from spots below dead trees or steep cliffs.
Avoid areas near animal trails or insect nests. These places can cause problems during your camping trip.
- Check above for loose branches
- Stay clear of rocky slopes
- Avoid animal paths and insect nests
- Watch for signs of flooding
Sun And Wind Considerations
Find a place where the sun warms your tent in the morning. This helps dry dew and warms the inside.
Choose a spot shielded from strong winds. Use trees or hills to block the wind and protect your tent.
- Face the tent door away from the wind
- Use natural windbreaks like trees
- Pick sunny spots for warmth
Preparing The Area
Preparing the area is important before building a tent. It helps keep the tent safe and steady. You need to clear the ground, mark the tent corners, and check the ground condition.
Taking time for these steps makes setting up easier. It also protects the tent and the people inside it from problems.
Clearing Debris
Start by removing sticks, rocks, and leaves from the tent spot. This stops damage to the tent floor. It also helps keep you comfortable while inside.
- Pick up large sticks and stones
- Rake away leaves and small debris
- Check for sharp objects that might poke the tent
- Clear away any trash or litter
Marking Tent Corners
Mark the corners to know where to place the tent stakes. This helps keep the tent shape right and the setup smooth. You can use small rocks or sticks as markers.
| Corner Marker | Purpose |
|---|---|
| Rock | Easy to find and stable |
| Stick | Visible and simple to move |
| Flag | Bright and easy to see |
Checking Ground Conditions
Check if the ground is flat and dry. Uneven or wet ground makes the tent unstable and uncomfortable. Avoid low spots where water can collect.
- Look for flat areas without big holes
- Test if the ground is soft or hard
- Avoid places near water or slopes
- Choose ground that drains water well
Setting Up The Tent Base
Setting up the tent base is important for a safe and dry camping experience. A good base protects the tent and makes your stay more comfortable.
Focus on preparing the ground and placing the tent carefully. This helps avoid damage and keeps dirt out of your tent.
Laying The Footprint
The footprint is a groundsheet that fits under your tent. It protects the tent floor from sharp rocks and moisture.
- Choose a footprint that matches your tent size exactly.
- Spread it flat on the ground where you want to camp.
- Check for sticks or stones and remove them before laying the footprint.
- Make sure the footprint edges do not stick out beyond the tent floor to avoid water pooling.
Positioning The Tent
Pick a flat spot with good drainage. Avoid low areas where water can collect during rain.
| Position Tip | Reason |
|---|---|
| Face the tent door away from wind | Keeps the inside warmer and prevents rain from blowing in |
| Place tent on firm ground | Prevents sinking and keeps the tent stable |
| Avoid spots under dead tree branches | Reduces risk of falling debris |
Securing The Tent Floor
Keep the tent floor tight and secure to stop dirt and water from entering. Use tent stakes and guy lines well.
Follow this quick checklist to secure your tent floor:
- Pull the tent floor flat and smooth out wrinkles.
- Place stakes at all corners, pushing them fully into the ground.
- Tighten the guy lines to hold the tent firmly in place.
- Check that the tent floor is raised slightly off wet ground.
Assembling Tent Poles
Building a tent starts with assembling the poles. The poles give the tent its shape and strength. You need to handle them carefully to avoid damage.
Each tent has poles that fit together in sections. These sections connect to form long poles that support the tent fabric.
Connecting Poles
Most tent poles use shock cords inside to hold sections together. This makes assembly fast and easy. Pull the sections apart gently and then snap them together along the cord.
- Find all pole sections laid out flat.
- Hold one end and let the sections unfold along the cord.
- Make sure each section clicks firmly into the next.
- Align the poles so they are straight and not twisted.
Inserting Poles Into Tent
Poles usually slide through sleeves or clip onto hooks on the tent body. This helps secure the structure and shape of the tent.
| Method | Description |
| Slide Through Sleeves | Insert poles into fabric tubes sewn along the tent. |
| Clip On Hooks | Attach poles by clipping hooks on the tent to pole sections. |
| Insert Into Grommets | Place pole ends into metal rings at tent corners for stability. |
Raising The Tent Frame
After poles are connected and inserted, lift the tent frame carefully. This step shapes the tent and prepares it for staking and guy lines.
- Lift poles evenly to avoid bending.
- Ask a friend to help if the tent is large.
- Check that all poles fit into their sockets securely.
- Stand back and adjust the frame if it looks uneven.
Credit: shop.evolutionpowertools.com
Attaching The Tent Body
Attaching the tent body is an important step in setting up your tent. It connects the fabric to the frame securely. This helps keep the tent stable and protects you from weather.
There are different ways to attach the tent body. These include clipping or sliding it onto the poles, adjusting the tension, and securing the corners. Each step ensures the tent stays strong.
Clipping Or Sliding Tent Body
Most tents use clips or sleeves to attach the body to the poles. Clips snap onto the frame easily. Sleeves slide over the poles to hold the fabric in place.
Choose the method your tent uses. Clips are faster to attach. Sleeves give a smoother look but take more time to set up.
- Find the clips along the tent body edges
- Snap each clip onto the tent poles
- Or slide the tent body sleeves fully over the poles
- Make sure the fabric is evenly spread
Adjusting Tension
After attaching, adjust the tent body to remove slack. Tight fabric helps the tent resist wind and rain. It also keeps the shape neat.
Pull the tent body gently but firmly. Check all sides and corners. Make sure the fabric is smooth without wrinkles or sagging.
- Pull fabric evenly from each side
- Check tension around poles
- Adjust clips or sleeves if needed
- Repeat until fabric is tight
Securing Tent Corners
Securing the tent corners is key for stability. Most tents have loops or tabs at each corner. Attach these to stakes or anchors in the ground.
Push the stakes firmly into the ground. Tighten the corner straps to keep the tent body snug. This prevents the tent from moving or collapsing.
- Locate corner loops or tabs on tent body
- Place stakes through loops and push into ground
- Tighten corner straps or cords
- Double-check all corners are secure
Adding The Rainfly
The rainfly is a waterproof cover that protects your tent from rain. It helps keep the inside dry and comfortable.
Adding the rainfly is an important step after setting up the main tent structure. It creates a shield against wet weather.
Positioning The Rainfly
Lay the rainfly over the tent so it fully covers the roof and sides. Make sure the rainfly matches the shape of the tent.
Check that the rainfly’s door flap lines up with the tent’s door for easy access. This keeps you dry when entering or exiting.
Securing Rainfly To Tent
Attach the rainfly to the tent using clips, straps, or Velcro tabs. These help keep the rainfly tight and stable.
Pin down the rainfly’s edges with stakes or guy lines. This prevents the rainfly from blowing away in strong wind.
- Connect clips to tent poles
- Tighten straps for a snug fit
- Stake corners firmly into the ground
- Use guy lines to add extra support
Adjusting For Ventilation
Open vents or windows on the rainfly to allow airflow. This reduces condensation inside the tent.
Make small adjustments to the rainfly’s position to improve air circulation while still protecting from rain.
- Lift vent flaps slightly on dry days
- Secure vents with mesh screens
- Keep some space between rainfly and tent walls
Staking And Guying Out
Setting up a tent properly keeps it safe from wind and rain. Staking and guying out are important steps to hold the tent firmly.
These steps help the tent stay in place and protect it from collapsing. Learning how to stake and guy out your tent is key for a good camping experience.
Driving Tent Stakes
Choose the right stakes for the ground type. Drive the stakes in at a 45-degree angle away from the tent for best hold.
Use a mallet or rock to push stakes deep into the soil. Make sure they are firm and do not wiggle.
- Soft ground: use longer stakes for better grip
- Hard or rocky ground: use metal stakes or pegs
- Sand: use wide or specialized sand stakes
Using Guy Lines
Guy lines are ropes attached to the tent to add extra support. Tie them to loops on the tent and pull tight.
Secure the other end of the guy lines to stakes driven into the ground. This helps keep the tent walls taut and stable.
- Use reflective guy lines to see them at night
- Adjust tension as needed to avoid sagging
- Place guy lines on all sides for balanced support
Ensuring Stability
Check all stakes and guy lines before and during use. Make sure they are tight and secure to prevent movement.
Re-tighten guy lines after strong winds or rain. Keep the tent floor clear to avoid pulling on stakes.
- Inspect stakes for looseness regularly
- Tighten or replace guy lines as needed
- Clear debris around stake points
Final Checks
After setting up your tent, it is important to do final checks. These checks help keep you safe and comfortable inside the tent.
Look closely at your tent and test its strength. Organize your space well to enjoy your time outdoors.
Inspecting For Gaps
Check all the seams and openings in your tent. Small gaps can let in wind, rain, or bugs.
Make sure the rainfly covers the tent completely. Also, check the door and windows for secure closures.
- Look for holes or tears in the fabric
- Ensure zippers close smoothly and fully
- Seal any gaps with tape or flap adjustments
- Check that stakes hold the tent edges tight
Testing Stability
Push lightly on the tent poles to see if they hold. The tent should not wobble or lean.
Make sure all stakes and guy lines are tight. This will keep your tent steady in wind or rain.
- Press on poles to check for movement
- Tighten all guy ropes and stakes
- Adjust stakes if the tent feels loose
- Look for bent or broken poles and fix them
Organizing Inside Space
Arrange your gear neatly inside the tent. Keep the sleeping area clear and dry.
Use pockets or small bags to store items. This keeps the tent tidy and easy to move in.
- Place sleeping bags and mats side by side
- Store shoes and wet clothes near the door
- Use tent pockets for small items like flashlights
- Keep food sealed and away from sleeping areas

Credit: www.youtube.com
Frequently Asked Questions
How Do You Start Building A Tent?
Begin by choosing a flat, clear spot. Lay out the tent footprint or tarp. Assemble poles and insert them into the tent sleeves or clips. Secure the tent body and stake it firmly to the ground.
What Tools Are Needed To Build A Tent?
Typically, no special tools are needed. Most tents come with poles, stakes, and a mallet or hammer. A ground tarp can be helpful but is optional. Proper setup relies mainly on following instructions correctly.
How To Secure A Tent In Windy Conditions?
Use all stake points and guy lines. Angle stakes away from the tent for better hold. Tighten guy lines to stabilize the tent structure. Consider additional weight like rocks if stakes won’t hold.
How Long Does It Take To Build A Tent?
Setting up a basic tent usually takes 10 to 20 minutes. Experience can reduce this time significantly. Complex tents may take longer. Practice helps speed up the process and ensures proper setup.
Conclusion
Building a tent can seem hard at first. Start with a flat, clear spot. Follow the steps carefully and take your time. Use the right tools and check the weather. Practice helps you get faster and better. Soon, setting up a tent feels easy and fun.
Enjoy your outdoor adventure with confidence and comfort. Remember, every camper learns by doing. Keep trying, and you will improve. Happy camping!