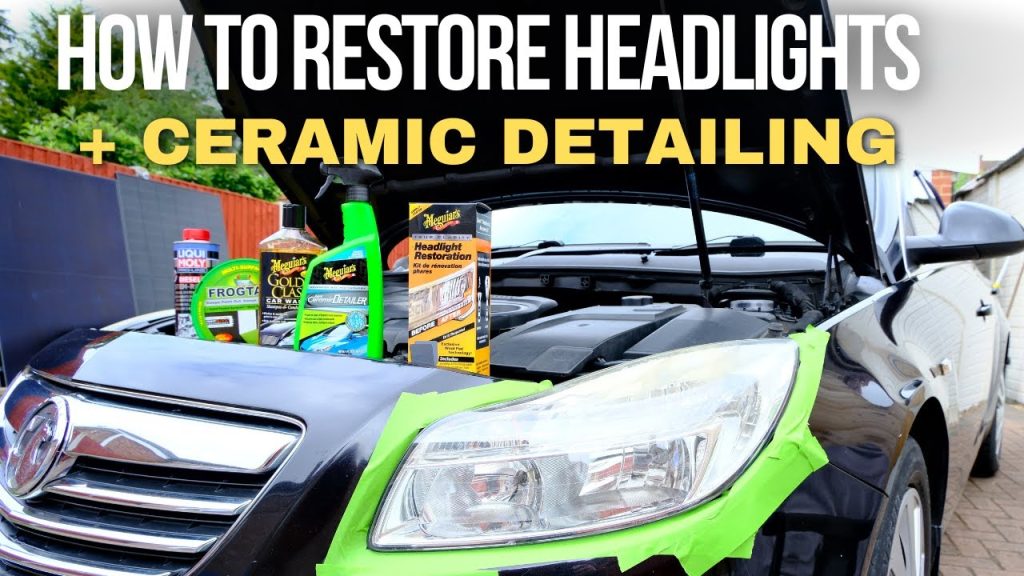
Are your car’s headlights looking dull or cloudy? This can make driving at night harder and even unsafe.
But don’t worry—cleaning your headlights is easier than you think. You don’t need special tools or expensive products to bring back their shine. You’ll discover simple, effective ways to clean your headlights and improve your car’s appearance and safety. Keep reading, and you’ll learn how to do it yourself quickly and confidently.
Causes Of Headlight Cloudiness
Headlight cloudiness makes it hard to see at night. Dirt and damage cause this problem.
Knowing what causes cloudiness helps you clean headlights better.
Exposure To Uv Rays
Sunlight has UV rays that harm headlight plastic. UV rays break down the clear coating. This makes headlights look foggy and yellow.
Environmental Damage
Pollution and dirt build up on headlights. Rain, dust, and chemicals wear down the surface. This causes cloudy and scratched headlights.
- Road salt in winter
- Bird droppings and tree sap
- Acid rain and smog
- Road debris and small stones
Wear And Tear Over Time
Headlights age with use. The plastic can get scratched or cracked. This lets dirt and moisture inside.
| Type of Wear | Effect on Headlights |
| Scratches | Reduce brightness and clarity |
| Cracks | Allow dirt and water inside |
| Fading | Make headlights look dull |
| Oxidation | Cause yellowing and cloudiness |
Signs Your Headlights Need Cleaning
Clean headlights are vital for safe driving, especially at night. Dirt and grime can build up over time.
Knowing when to clean your headlights helps keep your vision clear and your car looking good.
Dull Or Yellowed Appearance
Headlights can look cloudy or yellow after long use. Sunlight and pollution cause this damage.
This dull look reduces how well your headlights shine on the road.
Reduced Night Visibility
Dirty headlights make it hard to see at night. You may notice dimmer light or shadows.
- Objects on the road become harder to spot
- Signs and road markings appear less clear
- Your driving confidence may drop in dark areas
Uneven Light Distribution
When headlights are dirty, light spreads unevenly. This creates bright and dark spots on the road.
| Problem | Effect on Driving |
| Bright spots | Can cause glare and distract you |
| Dark spots | Hide obstacles and hazards |
| Blurred edges | Reduce overall visibility range |
Tools And Materials Needed
Cleaning your car’s headlights requires some basic tools and materials. Using the right items makes the job easier and helps get better results.
Below are the key tools and materials you will need to clean your headlights effectively and safely.
Cleaning Solutions And Polishes
Cleaning solutions remove dirt and grime from the headlights. Polishes help restore clarity and shine. Choose products made for automotive use for best results.
- Mild soap or specialized headlight cleaner
- Water for rinsing
- Plastic polish or headlight restoration polish
- Microfiber cloths for applying and wiping
Sandpaper And Buffing Pads
Sandpaper smooths out scratches and cloudy layers on the headlights. Buffing pads help polish the surface to a clear finish. Use the correct grit and type for safety.
| Material | Purpose | Common Grit |
| Wet/Dry Sandpaper | Remove oxidation and scratches | 800 to 3000 grit |
| Buffing Pads | Apply polish and smooth surface | Foam or microfiber pads |
Protective Gear
Protective gear keeps you safe from dust, chemicals, and debris during cleaning. Always wear these items to avoid injury or irritation.
- Safety goggles to protect your eyes
- Rubber gloves to protect your hands
- Mask to avoid inhaling dust or fumes
- Old clothes or apron to prevent stains

Credit: www.carsales.com.au
Step-by-step Cleaning Process
Cleaning your car’s headlights can improve visibility and safety at night. Follow these simple steps to restore your headlights to clear condition.
This guide breaks down the process into easy tasks that anyone can do with common materials.
Prepare And Protect The Area
Start by parking your car in a shaded spot to avoid quick drying. Use painter’s tape to cover the areas around the headlights. This protects the car paint from scratches and chemicals.
Clean Surface Dirt
Wash the headlight lenses with soap and water to remove dirt and grime. Dry them with a clean cloth before moving on to sanding.
Sand The Headlight Lens
- Wet sandpaper with water to reduce scratches.
- Start with 1000-grit sandpaper and sand the lens in a horizontal motion.
- Switch to 2000-grit sandpaper and sand in a vertical motion.
- Keep the surface wet while sanding.
- Rinse and dry the headlight after sanding.
Apply Polishing Compound
Use a soft cloth or polishing pad to apply a small amount of polishing compound. Rub it in small circles over the headlight lens to smooth the surface and remove fine scratches.
Buff To Restore Clarity
Buff the headlight with a clean microfiber cloth or a buffer tool. This step removes the polishing compound and brings back the headlight’s shine.
| Buffing Tool | Use Time | Effect |
|---|---|---|
| Microfiber Cloth | 5-10 minutes | Manual control, gentle finish |
| Electric Buffer | 2-3 minutes | Faster, more even polish |
Apply Uv Sealant
After polishing, apply a UV sealant to the headlights. This protects them from sun damage and keeps them clear longer. Follow the product instructions for best results.
Diy Vs Professional Cleaning
Cleaning car headlights is important for safety and looks. You can clean them yourself or hire a professional. Each choice has benefits and drawbacks.
This guide compares DIY cleaning and professional cleaning on cost, effectiveness, and time needed.
Cost Comparison
DIY cleaning usually costs less because you buy cleaning kits or use household items. Professional cleaning costs more but includes expert work.
Professional services may charge for parts and labor, raising the total price.
- DIY cleaning kits: $10 to $30
- Professional cleaning: $50 to $150
- DIY uses materials you may already have
- Professional service includes warranty or guarantee
Effectiveness
DIY cleaning works well for light dirt and mild cloudiness. It may not remove deep scratches or heavy yellowing.
Professionals use special tools and chemicals. They can restore headlights to near-new condition.
- DIY suits minor grime and fog
- Professional cleaning handles tough stains and damage
- DIY results depend on skill and materials
- Professionals deliver consistent, high-quality results
Time And Effort Required
DIY cleaning takes more time and effort. You must prepare, clean carefully, and may repeat steps.
Professional cleaning is faster. Experts complete the job quickly with less hassle for you.
- DIY can take 1 to 3 hours
- Professional cleaning usually takes less than 1 hour
- DIY requires physical work and patience
- Professional service is convenient and hands-off

Credit: www.youtube.com
Maintenance Tips For Clear Headlights
Clear headlights help you see better at night and keep your car looking nice. Dirt and grime can build up on headlights over time.
Regular care can stop headlights from becoming cloudy or yellow. Follow easy tips to keep your headlights clean and bright.
Regular Cleaning Routine
Wipe your headlights often to remove dirt and bugs. Use a soft cloth and mild soap with water for cleaning.
Rinse with clean water and dry with a microfiber towel. Cleaning your headlights every two weeks helps keep them clear.
- Use gentle soap and water
- Clean with a soft cloth
- Rinse and dry completely
- Repeat every two weeks
Parking In Shade
Park your car in the shade to protect headlights from sun damage. Sunlight can make headlights cloudy and yellow.
Shaded parking keeps headlights looking new longer. Try to avoid direct sunlight during long parking times.
- Choose shade spots when parking
- Protect headlights from UV rays
- Reduce fading and yellowing
- Keep headlights clear and bright
Using Protective Covers
Use headlight covers to shield against dirt and scratches. Covers help prevent damage from road debris and weather.
Protective covers are easy to use and keep headlights looking clean. Change or clean covers as needed to maintain clarity.
- Install covers to protect from dirt
- Prevent scratches and chips
- Keep headlights clear longer
- Clean or replace covers regularly

Credit: www.youtube.com
Frequently Asked Questions
How Do You Clean Car Headlights Effectively?
To clean car headlights effectively, start by washing them with soap and water. Then, use a mixture of baking soda and water to scrub away grime. Rinse thoroughly and dry with a clean cloth. For stubborn stains, a headlight restoration kit can provide more professional results.
What Household Items Can Clean Headlights?
Household items like baking soda, toothpaste, and vinegar can effectively clean headlights. Apply baking soda with a damp cloth, or use toothpaste as a mild abrasive. Vinegar can be used to remove oxidation. Always rinse and dry thoroughly to prevent residue buildup.
Can Toothpaste Clean Foggy Headlights?
Yes, toothpaste can clean foggy headlights. Its mild abrasives can remove surface dirt and oxidation. Apply a small amount to a cloth, gently rub in circular motions, and rinse thoroughly. It’s a quick fix but may not last as long as professional products.
How Often Should You Clean Headlights?
You should clean your headlights every few months or as needed. Regular maintenance prevents oxidation and fogging. Check for clarity and brightness regularly. If they appear dull or foggy, it’s time to clean them. Consistent cleaning ensures optimal visibility and safety.
Conclusion
Cleaning your car’s headlights improves safety and appearance. Clear headlights help you see better at night. Use simple household items for easy cleaning. Regular care prevents dirt and yellowing buildup. Bright headlights also make your car look newer. Take a few minutes to clean them often.
Your driving will feel safer and more confident. Keep your headlights clear, and enjoy better night drives. Small effort, big difference.