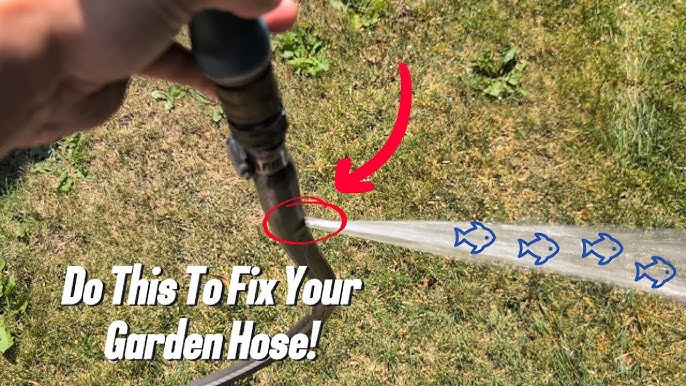
Is your garden hose leaking, kinked, or just not working like it used to? You rely on it to keep your plants healthy and your outdoor space clean.
When it breaks, it can quickly turn a simple watering task into a frustrating mess. But don’t worry—you don’t have to throw it away or call a professional right away. In this guide, you’ll discover easy, practical ways to fix your garden hose yourself.
By the end, you’ll save money, time, and keep your garden thriving. Ready to get your hose back in shape? Let’s dive in.
Identify Common Hose Problems
Garden hoses can stop working well for several reasons. Knowing these problems helps you fix them fast.
Look closely at your hose before trying to repair it. This saves time and effort.
Leaks And Cracks
Leaks and cracks let water escape, lowering water pressure. Sun, cold, and rough use cause these issues.
Small cracks look like thin lines on the hose surface. Leaks may form puddles or wet spots.
Kinks And Twists
Kinks and twists block water flow and can damage the hose. They happen when the hose bends too much.
- Store the hose properly on a reel or hanger.
- Unroll the hose fully before use.
- Avoid sharp bends and tight loops.
- Use hoses made from kink-resistant materials.
Damaged Fittings
| Type of Damage | Signs | Fix Tips |
|---|---|---|
| Loose Fittings | Water leaks at connection points | Tighten connectors or replace washers |
| Cracked Fittings | Visible cracks or broken plastic | Replace the fitting or use a repair coupling |
| Corroded Fittings | Rust or mineral buildup | Clean with vinegar or replace the fitting |
Gather Necessary Tools And Materials
Fixing a garden hose requires the right tools and parts. Gathering everything first makes the repair smooth.
Knowing what you need helps avoid delays and ensures a proper fix. Let’s look at the main categories of materials.
Repair Kits
Repair kits contain all parts needed for common hose problems. They are ready to use and save time.
- Hose connectors
- Rubber washers
- Clamps
- Replacement washers
- O-rings
Replacement Parts
You might need separate parts if a repair kit is not enough. Some hoses require specific sizes or types.
| Part | Description | Use |
| Hose End | Metal or plastic fitting | Attach to hose end |
| Coupler | Connector piece | Join two hose sections |
| Washer | Flat rubber ring | Seal water connections |
| Clamp | Metal band with screw | Secure hose to fitting |
Basic Tools
Basic tools make the repair work easier and faster. Keep these tools handy before you start.
- Utility knife or scissors to cut the hose
- Screwdriver for clamps and fittings
- Pliers to hold or twist parts
- Measuring tape to check hose length
- Bucket to catch water during repair
Fixing Leaks And Small Holes
Garden hoses often develop leaks and small holes over time. Fixing these issues quickly saves water and prevents damage to your plants. You can repair your hose using simple tools and materials.
This guide explains three easy methods to fix leaks and holes in your garden hose. Each method works well depending on the size and location of the damage.
Using Waterproof Tape
Waterproof tape is a quick fix for small leaks and holes. It creates a tight seal and stops water from escaping. Make sure the hose is dry before applying the tape.
- Cut a piece of waterproof tape longer than the damaged area.
- Wrap the tape tightly around the hose, overlapping the edges.
- Press the tape firmly to ensure it sticks well.
- Test the hose by turning on the water and checking for leaks.
Applying Sealant
Sealants work well for sealing small holes that tape cannot cover properly. They fill the hole and harden to block water flow.
| Type of Sealant | Use | Dry Time |
|---|---|---|
| Silicone Sealant | Flexible and waterproof | 24 hours |
| Rubberized Sealant | Strong hold for hoses | 12 hours |
| Epoxy Resin | Hard and durable seal | 6 hours |
Clean the hose and dry it well before applying the sealant. Use a small brush or stick to spread it over the hole. Let the sealant dry completely before using the hose again.
Patching With Hose Repair Tape
Hose repair tape is designed specifically for fixing garden hoses. It stretches and bonds tightly to seal holes and leaks.
- Turn off the water and dry the hose around the leak.
- Remove any dirt or debris near the damaged spot.
- Wrap the repair tape around the hole, stretching it as you go.
- Cover the hole completely and overlap the tape edges.
- Press the tape firmly and wait a few minutes before turning on the water.

Credit: www.youtube.com
Repairing Hose Fittings
Fixing a garden hose is simple if you know how to repair the fittings. Hose fittings often get damaged or leak over time.
Replacing the old fittings with new ones can save you money and extend the hose’s life. This guide shows you how to do it step-by-step.
Removing Old Fittings
Start by cutting off the damaged fitting with a sharp knife or scissors. Make sure the cut is straight and clean.
Remove any remaining pieces of the old fitting inside the hose to prepare for the new connector.
- Cut the hose about 2 inches from the damaged fitting
- Clear debris or old clamp pieces from the hose end
- Check that the hose end is smooth and ready
Installing New Connectors
Push the new hose connector firmly into the hose end. You may need to soften the hose by soaking it in warm water first.
Slide a hose clamp over the hose and tighten it around the connector to hold it in place.
- Soak hose end in warm water for a few minutes
- Insert new connector fully into the hose
- Position hose clamp over the connector area
- Tighten the clamp securely but avoid over-tightening
Ensuring A Tight Seal
Check for leaks by turning on the water slowly. Look for drips around the fitting.
If you see leaks, tighten the clamp more or add plumber’s tape to the connector threads.
- Turn water on gently to test the seal
- Tighten the clamp if water leaks
- Wrap plumber’s tape on threaded parts if needed
- Retest until no leaks appear
Dealing With Kinks And Twists
Kinks and twists can stop water flow in your garden hose. Fixing these issues helps water run smoothly. It also extends the life of your hose.
This guide shows easy ways to straighten kinks. It also shares tips to avoid future twists and bends.
Straightening Techniques
Start by laying the hose out in the sun. Warmth softens the hose material. This makes it easier to fix kinks. Then, gently stretch the hose to remove bends.
- Place the hose in a sunny spot for 30 minutes.
- Hold the kinked area and pull gently in opposite directions.
- Roll the hose back and forth to loosen twists.
- Use warm water inside the hose to soften it further.
- Hang the hose to dry after straightening.
Preventing Future Kinks
Proper storage and handling stop kinks before they start. Keep the hose coiled loosely. Avoid sharp bends or tight loops.
| Tip | Reason |
|---|---|
| Use a hose reel | Keeps hose organized and untangled |
| Avoid dragging hose across rough surfaces | Prevents damage and weak spots |
| Store hose away from direct sunlight | Reduces material wear and stiffness |
| Drain water before storing | Stops freezing and cracking in cold weather |

Credit: www.familyhandyman.com
Replacing Hose Sections
Fixing a garden hose can save money and extend its life. Sometimes, replacing a damaged section is the best solution.
Replacing hose sections is easy if you follow simple steps. This guide will help you cut, join, and test the hose.
Cutting Damaged Areas
Start by finding the damaged part of the hose. Use a sharp knife or scissors to cut out the broken section.
Make sure to cut straight to create clean edges. This helps the new section fit well when you join it.
Joining Replacement Pieces
Use a hose connector to join the new section with the old hose. Insert each hose end into the connector firmly.
- Push the hose ends fully into the connector
- Tighten any clamps to hold the hose securely
- Check that the connector fits tightly to stop leaks
Testing The Repair
Turn on the water slowly to check the repair. Look for leaks around the connector and hose ends.
If you see leaks, tighten the clamps or push the hose further into the connector. Test again until no leaks appear.
Maintenance Tips To Extend Hose Life
Garden hoses last longer with good care. Simple steps help avoid leaks and cracks.
Follow these tips to keep your hose working well for many years.
Proper Storage
Store your hose in a cool, dry place. Avoid leaving it in direct sunlight.
Keep the hose coiled loosely to stop kinks and bends.
- Use a hose reel or hanger
- Keep away from sharp objects
- Do not leave under heavy items
Regular Inspection
Check your hose often for cracks, holes, or leaks. Early fixes stop bigger problems.
Look at the connectors too. Tighten or replace them if they are loose or damaged.
- Run water through the hose to find leaks
- Feel for soft spots or cracks
- Replace washers inside connectors if needed
Winterizing Your Hose
Drain all water from the hose before winter. Water left inside can freeze and damage it.
Store the hose indoors during cold months to avoid cracks from freezing.
- Disconnect the hose from the faucet
- Drain water by holding the hose upright
- Store in a garage or shed away from frost

Credit: www.reddit.com
Frequently Asked Questions
How Do You Repair A Leaking Garden Hose?
To fix a leaking garden hose, first locate the leak. Cut out the damaged section and use a hose repair kit. Insert the connectors, secure with clamps, and test for leaks. This method restores water flow and prevents wastage effectively.
What Tools Are Needed To Fix A Garden Hose?
Essential tools include a utility knife, hose repair kit, clamps, and pliers. These help cut, connect, and secure hose sections easily. Having these tools ensures quick and efficient garden hose repairs without professional help.
Can I Fix A Garden Hose Without Replacing It?
Yes, small punctures or leaks can be fixed using waterproof tape or sealant. For larger damages, a hose repair kit is necessary. Proper repair extends the hose life and saves money on replacements.
How Do I Prevent Future Garden Hose Damage?
Store the hose away from direct sunlight and extreme cold. Avoid kinks by coiling it properly after use. Regularly inspect for wear and repair small issues promptly to prevent bigger damage.
Conclusion
Fixing a garden hose does not have to be hard. Small leaks and cracks can be fixed with simple tools. Cut out damaged parts and use connectors to join the hose again. Checking your hose regularly helps avoid big problems later.
A well-maintained hose lasts longer and saves water. Keep these tips in mind for easy and quick repairs. Your garden will stay healthy with steady water flow. Try these steps next time your hose has a leak. Simple fixes can make a big difference.