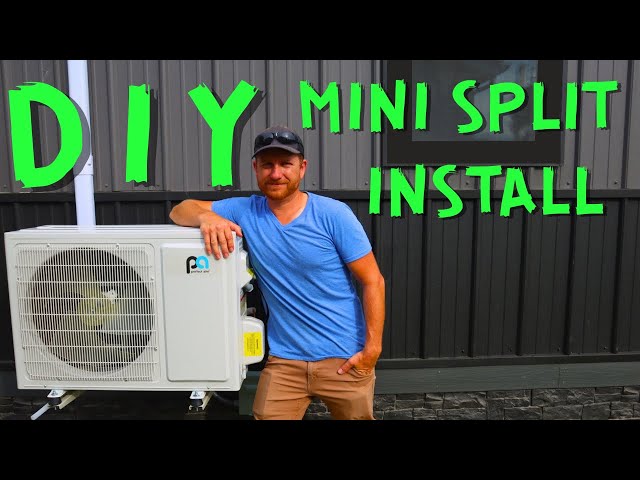
Are you ready to beat the heat without the hassle of complicated installations? Installing a ductless air conditioner might sound tricky, but with the right steps, you can do it yourself and enjoy cool, comfortable air in no time.
In this guide, you’ll discover simple, clear instructions that make the process easy to follow—even if you’re not a pro. Stick with me, and by the end, you’ll have the confidence to set up your ductless air conditioner quickly and efficiently.
Let’s get started!
Choosing The Right Unit
Choosing the right ductless air conditioner means matching its size and capacityto your room. A unit too small won’t cool well. One too big wastes energy. Measure your room’s square footage to find the right size.
Energy efficiency ratingslike SEER and EER show how well a unit saves power. Higher ratings mean lower bills and less harm to the environment.
- Quiet operationfor peaceful rooms.
- Remote controlfor easy use.
- Multiple fan speedsto adjust airflow.
- Dehumidifier functionto reduce moisture.
- Filter optionsto improve air quality.

Credit: www.thisoldhouse.com
Tools And Materials Needed
Basic tools include a drill, screwdriver, and level. A tape measure helps ensure correct placement. A stud finder locates secure wall spots. You will also need a wrench for tightening bolts.
The installation kit has key components: the indoor unit, outdoor compressor, and mounting brackets. Copper tubing connects the two units. Electrical wires run power between them. Drain pipes remove condensation safely.
Safety equipment is important. Wear gloves to protect your hands. Safety goggles shield your eyes from dust. A mask can stop inhaling particles. Use ear protection if drilling loud holes.
Preparing The Installation Site
Choose a spot for the indoor unit that is high on the wall. It should be away from direct sunlight and heat sources. Make sure air can flow freely around it. Avoid placing near doors or windows to keep cool air inside.
Pick a flat, shaded area for the outdoor unit. It must have good air flow and be easy to reach for maintenance. The spot should be firm and strong enough to hold the unit’s weight. Keep it away from dust and debris.
| Electrical Requirement | Details |
|---|---|
| Power Supply | Check if the location has a proper power source matching unit needs. |
| Voltage | Confirm voltage matches the air conditioner’s rating. |
| Circuit Breaker | Use a dedicated breaker to avoid overload. |
| Wiring | Ensure wiring is safe and follows local codes. |

Credit: apexelectricmechanical.ca
Mounting The Indoor Unit
The mounting plate holds the indoor unit in place. It must be fixed firmly to the wall. Use a level tool to keep it straight. Mark the spots for screws before drilling. The plate should be at least 7 feet from the floor for good air flow.
Drill a hole through the wall for the pipes and wires. The hole should be slightly sloped downward outside. This helps water drain out. The hole size depends on your unit’s pipe size, usually around 3 inches wide.
Secure the indoor unit by hanging it on the mounting plate. Connect the pipes and wires carefully through the hole. Make sure everything fits tightly to avoid leaks. Use insulation tape to wrap the pipes for protection.
Installing The Outdoor Unit
The outdoor unit should be placed on a flat, stable surface. Choose a spot that is close to the indoor unit to reduce pipe length. Avoid areas with direct sunlight or heavy wind to keep the unit efficient.
Mounting the unit can be done on the ground or on a wall bracket. Ground mounting needs a concrete slab or a strong base. Wall mounting requires secure brackets that can hold the unit’s weight safely.
Proper clearance is crucial for good airflow and easy maintenance. Leave at least 12 inches of space on all sides. Keep the unit away from plants, walls, and other objects that block air.
Connecting Refrigerant Lines And Wiring
Refrigerant lines must pass through a hole drilled in the wall. The hole should be slightly larger than the lines for easy movement. Use a sleeve or conduit to protect the lines from damage. Keep the lines straight to avoid kinks.
Seal the hole tightly with weatherproof caulk or foam. This stops air leaks and keeps pests out. Wrap the refrigerant lines with insulation to keep cold air inside and save energy.
Electrical connections link the indoor and outdoor units. Turn off power before working on wiring. Connect wires according to the unit’s manual. Use wire nuts or connectors for secure joins. Cover connections with electrical tape or a junction box for safety.
Testing And Final Checks
Use a vacuum pump to remove air and moisture from the system. This step is crucial to ensure proper cooling performance. After vacuuming, perform a leak testby applying soapy water to all connections. Look for bubbles that show leaks and fix them immediately.
Power on the unit by connecting it to the power supply. Check the indicators and displayfor error codes or warnings. Make sure the outdoor and indoor units start running smoothly without strange noises.
- Set the temperature to a comfortable level.
- Adjust the fan speed to your preference.
- Choose the correct mode: cooling, heating, or fan-only.
- Test the remote control for proper response.

Credit: www.youtube.com
Maintenance Tips For Longevity
Regular cleaningkeeps the ductless air conditioner working well. Dust and dirt can block airflow and reduce cooling. Clean the indoor unit’s filters and coils every month to maintain good air quality and efficiency.
Filter replacementis important. Replace filters every 3 to 6 months or as recommended by the manufacturer. Clean or new filters stop dust from entering the system and help it run smoothly.
Professional servicingensures the unit stays in top shape. Have a technician check refrigerant levels, electrical connections, and overall system performance once a year. This prevents costly repairs and extends the unit’s life.
Frequently Asked Questions
How Do You Prepare The Wall For Installation?
First, choose a sturdy wall near an electrical source. Drill a hole for the refrigerant line and wiring. Ensure the hole is slanted slightly downward outside for drainage. This preparation helps secure the unit properly and ensures efficient functioning.
What Tools Are Needed For Installation?
You will need a drill, level, screwdriver, wrench, and a vacuum pump. Also, have a pipe cutter and tubing bender for refrigerant lines. These tools help ensure a precise and safe installation of your ductless air conditioner.
How Do You Mount The Indoor Unit?
Attach the mounting plate to the wall using screws and a level. Hang the indoor unit on the plate carefully. Connect the refrigerant lines, drain pipe, and electrical wiring. Proper mounting ensures stability and efficient cooling performance.
How Do You Connect Refrigerant Lines Properly?
Use a pipe cutter to trim lines to length. Flare the ends for a secure fit. Connect lines to the indoor and outdoor units using flare nuts. Leak test connections to prevent refrigerant loss and maintain efficiency.
Conclusion
Installing a ductless air conditioner is manageable. Follow each step carefully. Begin with gathering tools. Next, find a suitable wall location. Then, mount the indoor unit securely. Connect the refrigerant lines properly. Ensure power supply is off during installation. Finally, test the system for efficiency.
Remember, patience and precision are key. Consult a professional if unsure. Enjoy a cooler, more comfortable home. A successful installation brings relief and satisfaction. Stay cool and enjoy your new air conditioner.