
Have you ever dreamed of having your very own ice skating rink right in your backyard? Imagine the fun and joy of gliding across a smooth, frozen surface anytime you want.
Making your own ice skating rink might seem tricky, but with the right steps, you can create a perfect winter playground. In this guide, you’ll discover simple tips and clear instructions to build an ice rink that you, your family, and friends will love.
Ready to turn your space into a winter wonderland? Let’s get started!
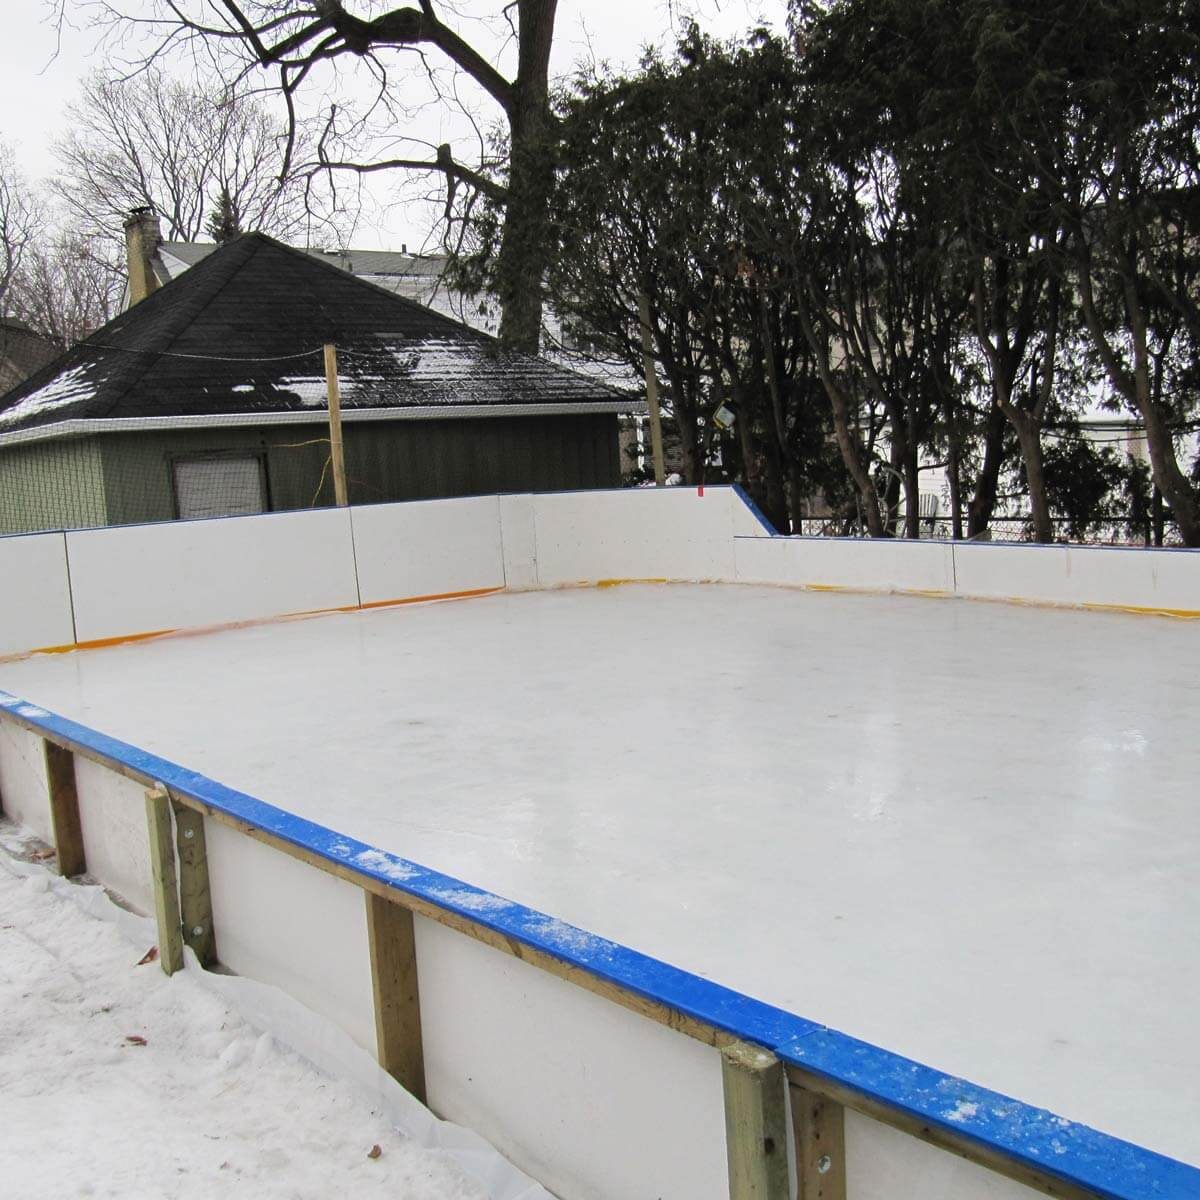
Credit: www.familyhandyman.com
Choosing The Right Location
Choosing the right location is key to building a successful ice skating rink. The site affects the rink’s size, safety, and ice quality. A good spot helps keep the ice smooth and the skaters happy. Consider the space available and the natural conditions around the area. These factors impact how easy it will be to create and maintain the rink.
Assessing Space And Surface
Start by measuring the area to fit the rink size you want. The ground should be flat and solid for a stable base. Avoid uneven or soft surfaces that might cause water to pool or ice to crack. Hard surfaces like concrete or packed earth work best. Clear the area from rocks, sticks, or debris that could damage the ice or skates.
Considering Sunlight And Shade
Sunlight warms the ice and makes it melt faster. Choose a shaded spot or place the rink where trees or buildings block direct sun. Shade helps keep the ice frozen longer and reduces the need for constant resurfacing. Avoid areas with strong afternoon sun, especially in warmer climates. A cooler location means better ice and longer skating hours.
Gathering Materials And Tools
Before you start creating your own ice skating rink, gathering the right materials and tools is crucial. Having everything ready not only saves time but also ensures your rink is safe and enjoyable. Think about the space you have and the type of ice surface you want to create, then collect what fits your plan.
Essential Supplies
- Plastic Liner or Tarp:A heavy-duty plastic sheet is the foundation to hold the water in place. Choose one that’s thick enough to prevent leaks and large enough to cover your entire rink area.
- Wood or Metal Boards:These act as the rink’s frame to keep the water contained. Make sure they are sturdy and tall enough to hold the water depth you want.
- Water Source:You’ll need a reliable way to fill the rink with water. A garden hose works perfectly if you have an outdoor tap nearby.
- Shovel or Snow Removal Tools:Removing snow from your rink surface is vital to maintain smooth ice. Having a shovel handy will make this task much easier.
- Leveling Tools:To avoid uneven ice, use a level or straight edge to make sure the ground or frame is flat before filling with water.
When I built my first rink, I underestimated the importance of a thick plastic liner. It developed small holes that caused water to leak, costing me time and extra material. Don’t make the same mistake—invest in quality supplies from the start.
Optional Accessories For Maintenance
- Ice Resurfacer or Zamboni:For larger rinks, a manual or small powered ice resurfacer can keep the surface smooth between skating sessions.
- Water Sprayer or Hose Attachment:A fine spray helps create an even, glass-like ice surface with fewer bumps.
- Snow Blower or Leaf Blower:Clearing snow quickly can save hours of manual shoveling, especially after heavy snowfall.
- Temperature Monitor:Keeping an eye on the weather helps you decide the best times to add water or resurface the ice.
- Rink Covers:A cover protects your ice from debris and sunlight, extending skating time by slowing down melting.
Have you thought about how often you’ll need to maintain the rink? Maintenance tools can make your work easier and keep your ice in top shape. Choose accessories that fit the size of your rink and your available time for upkeep.
Preparing The Base
Start by clearing and leveling the ground to create a smooth, flat surface. Lay down a waterproof liner to protect the base from moisture and ensure ice forms evenly.
Preparing the base for an ice skating rink is the foundation of your winter wonderland. This crucial step ensures that the rink is safe, level, and capable of holding water effectively. It’s where the journey from a simple backyard or open space to a gleaming ice rink begins.Clearing And Leveling The Area
Start by selecting a location that is as flat as possible. An uneven surface will make it difficult to create a smooth ice surface, leading to frustrating bumps and hazards. Use a shovel or a snow blower to clear away any snow, leaves, or debris. Once cleared, focus on leveling the area. A carpenter’s level or a laser level can be helpful tools. Even slight inclines can cause water to pool unevenly, so take your time to get it right. If necessary, add or remove soil to ensure the ground is flat.Creating A Barrier For Water Containment
After leveling, the next step is to create a barrier. This will keep the water contained as it freezes. Use wooden planks or PVC pipes to construct a frame around the perimeter of your rink. The height of the barrier should be at least 6 inches to accommodate the water depth needed for a solid ice base. Secure the barriers firmly into the ground to prevent any leaks or shifts. Consider using plastic sheeting or a tarp to line the bottom of your rink area, which helps keep water from seeping into the ground. When setting up your rink, think about the fun and joy it will bring once it’s complete. Imagine gliding across the ice or playing a game of hockey with friends. Does the effort seem worth it now? A well-prepared base is the secret to hours of winter enjoyment.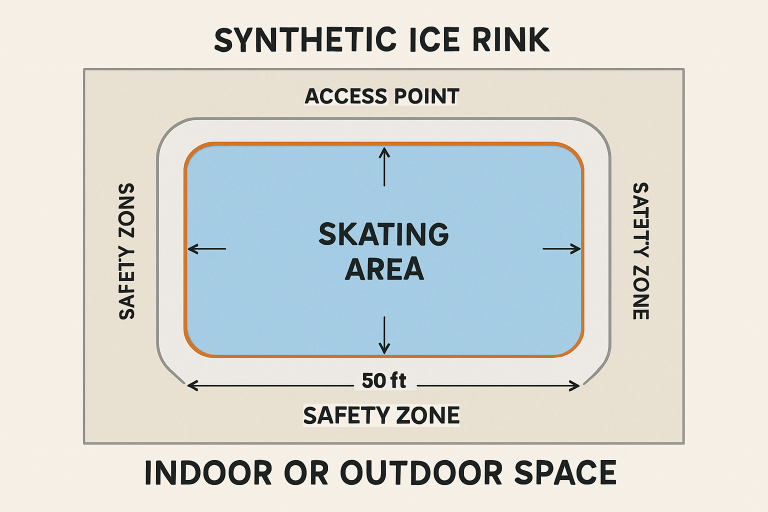
Credit: downbeach.com
Building The Frame
Building the frame is the first key step in creating a solid ice skating rink. The frame holds the water that will freeze into ice. It must be strong and stable to support the weight and pressure of the ice surface. A well-built frame ensures safety and a smooth skating experience.
Constructing Sidewalls
Start by choosing sturdy materials like treated wood or metal for the sidewalls. Cut the boards to the size of the rink you want. Place the boards upright around the rink’s perimeter. Make sure the edges fit tightly to stop water leaks. Use screws or nails to join the boards securely. Check that the walls form a perfect rectangle or circle, depending on your rink shape.
Securing The Structure
Drive stakes or posts into the ground outside the sidewalls for extra support. Attach the sidewalls to these stakes using strong brackets or straps. This stops the walls from bending or moving. Add braces across corners to keep the frame square. Check the frame for any gaps or loose parts. Tighten all connections before adding water. A secure frame holds the ice evenly and lasts longer.
Filling With Water
Filling your ice skating rink with water is a crucial step that determines the quality and smoothness of your ice surface. The type of water you use and how you layer it can make a noticeable difference in how well the ice holds up and how enjoyable it is to skate on. Paying attention to these details can save you time and frustration later.
Best Water Type To Use
Using clean, fresh water is essential for creating clear, strong ice. Tap water often contains minerals and impurities that can cause cloudy ice and weak spots. If possible, use filtered or softened water to reduce these issues.
Many rink builders recommend using cold water because it freezes faster and creates a harder surface. I once filled a small backyard rink with warm water, hoping it would melt snow faster, but it ended up creating uneven ice. Stick to cold water for the best results.
Layering For Smooth Ice
Don’t pour all the water at once. Instead, add thin layers of water and let each freeze completely before adding the next. This approach builds a solid, smooth surface without cracks.
Spraying water with a fine mist rather than pouring it can help avoid bumps and bubbles. You might want to try a garden sprayer for this. It’s a small step that leads to a big difference in ice quality.
Have you noticed how some rinks have shiny, glass-like ice while others are rough? The secret often lies in layering properly. Taking your time here pays off when you glide across your rink later.
Freezing Process Tips
Freezing the ice is the most important part of making a skating rink. It requires patience and the right conditions. Ice must form evenly and solidly. Small mistakes can cause cracks or weak spots. Here are helpful tips to make the freezing process easier and more effective.
Ideal Weather Conditions
Cold air is key for freezing water quickly. The best temperature is below 20°F (-6°C). Clear, calm nights help ice form smoothly. Wind can cause uneven freezing and rough surfaces. Avoid freezing during sunny days. Sunlight can melt and weaken the ice. Humidity should be low to reduce frost buildup. Check weather forecasts for several days ahead. This helps plan the freezing steps properly.
Speeding Up The Freeze
Thin layers freeze faster than thick ones. Pour water in thin, even layers about 1/4 inch thick. Let each layer freeze fully before adding the next. Use a hose with a fine spray to create a smooth surface. Cover the rink at night with a tarp to keep cold in. Remove the tarp in the morning to let sunlight harden the ice. You can also add snow on top and spray water over it. This creates a strong, smooth ice surface faster.
Maintaining The Ice Surface
Maintaining the ice surface is essential for a safe and smooth skating experience. Proper care keeps the ice clean and even. Regular maintenance helps prevent accidents and extends the rink’s usability. Pay attention to removing snow and debris quickly. Use the right resurfacing techniques to keep the ice smooth and fresh.
Removing Snow And Debris
Snow and debris can build up fast on the ice. Clear the surface often to avoid rough patches. Use a snow shovel or a broom for light snow. For heavier snow, a snow blower works well. Remove leaves, twigs, and other debris by hand or with a soft brush. Keep the ice free of dirt to maintain good skating conditions.
Resurfacing Techniques
Resurfacing smooths out the ice and fills in cracks. Use a manual or automatic ice resurfacer if available. For small rinks, flooding with a thin layer of water helps. Allow the water to freeze completely before skating resumes. Regular resurfacing prevents rough spots and holes. This process keeps the ice safe and enjoyable for all skaters.
Safety Measures
Safety is the foundation of any successful ice skating rink. Without it, even the most beautifully crafted rink can become a hazard. Focusing on safety measures ensures that everyone can enjoy skating without worry.
Ensuring Ice Thickness
Ice thickness is the most crucial factor for safety on your rink. It needs to be at least 4 inches thick to support a single skater safely. For groups or skating events, aim for 6 inches or more to prevent accidents.
Regularly check the ice thickness by drilling small test holes across the rink. Never assume the ice is thick enough just because it looks solid. Remember, thin ice can crack unexpectedly and cause serious injuries.
Have you tested your ice thickness today? Skating on unsafe ice is a risk you don’t want to take.
Setting Up Boundaries
Clear boundaries help keep skaters within safe zones and prevent wandering into dangerous areas. Use sturdy barriers like wooden boards or inflatable bumpers around the rink perimeter.
- Mark the edges with bright tape or lights for visibility in low-light conditions.
- Ensure barriers are smooth and without sharp edges to avoid injuries during falls.
- Designate an emergency exit path that is easy to access but keeps skaters away from hazards.
Think about where you’d want to stop if you lost balance. Setting up boundaries properly protects you and every skater on the ice.
Credit: wildlingstoys.com
Frequently Asked Questions
How Do You Build A Backyard Ice Skating Rink?
To build a backyard rink, choose a flat area and clear debris. Set up a frame using wood or plastic boards. Lay a plastic liner inside the frame to hold water. Fill the rink with water and let it freeze naturally.
What Materials Are Needed To Make An Ice Skating Rink?
You need wood or plastic boards for the frame, a plastic liner, water, and a flat surface. Optional items include a hose, shovel, and water source. Safety gear like helmets is also recommended for skaters.
How Long Does It Take To Freeze An Ice Rink?
Freezing time depends on the temperature, usually 24 to 48 hours below 20°F (-6°C). Colder weather speeds up freezing. Consistent cold nights help maintain a smooth, solid ice surface.
Can You Make An Ice Rink Without Refrigeration?
Yes, natural ice rinks freeze outdoors in cold climates without refrigeration. They rely on freezing temperatures to solidify water. Proper insulation and location help maintain ice quality.
Conclusion
Creating an ice skating rink takes some planning and effort. Choose a flat area and keep it cold enough. Pour water slowly to build smooth ice layers. Regularly check the surface and fix rough spots. With patience, you can enjoy skating at home.
It brings fun and exercise for everyone. Start small, learn as you go, and have fun!