Have you ever found yourself in the middle of baking a cake, only to realize that your icing is lacking that perfect shade of red you envisioned? You’re not alone.
Creating the ideal red icing can feel like a daunting task, especially when you want to achieve that vibrant, eye-catching hue. Whether you’re preparing for a birthday party, Valentine’s Day, or just a fun weekend baking project, knowing how to make red icing can transform your creation from ordinary to extraordinary.
Imagine the satisfaction of seeing your friends and family marvel at your baking skills, all because you unlocked the secret to that perfect red. Stick around, and you’ll discover how to avoid common pitfalls and master the art of making stunning red icing that will make your desserts unforgettable.
Choosing The Right Ingredients
Choosing the right ingredients is crucial for making vibrant and smooth red icing. The color intensity and texture depend heavily on what you use. Knowing how to pick the best food coloring and base icing will save you time and prevent disappointment.
Types Of Food Coloring
You have a few options when it comes to red food coloring: gel, liquid, and powder. Gel colors are concentrated and give a deep, rich red without adding too much liquid. They are my favorite because a little goes a long way, and the color stays bright.
Liquid food coloring is easy to find but can thin out your icing if you add too much. Powdered coloring is great for avoiding extra moisture but can be tricky to mix evenly. Think about the final look you want and how the coloring will affect the icing’s texture before choosing.
Selecting The Base Icing
The base icing you pick matters just as much as the color. Buttercream is creamy and smooth, making it easy to mix in red coloring without streaks. I’ve noticed that powdered sugar-based icings hold color better than cream cheese versions, which can dull the red slightly.
Royal icing dries hard and shines beautifully but can be less forgiving when adjusting colors. If you want a bright red that stays put on cakes or cookies, try a simple buttercream or a stable powdered sugar icing. What texture do you want your icing to have—soft or firm? That choice will guide your base selection.

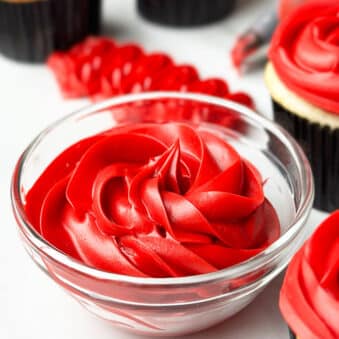
Credit: www.twosisterscrafting.com
Preparing The Icing Base
Preparing the icing base is the first step to make perfect red icing. The texture and flavor depend on a smooth, creamy base. It starts with combining the right ingredients carefully. This base will hold the red color well and taste delicious. Focus on mixing and smoothing the icing for the best result.
Mixing Powdered Sugar And Butter
Use room temperature butter for easy mixing. Powdered sugar should be sifted to avoid lumps. Blend butter and sugar in a large bowl. Use a hand mixer or stand mixer at low speed. Mix until the sugar blends completely with the butter. The mixture will look fluffy and pale. This mix forms the sweet, creamy part of your icing base.
Achieving Smooth Consistency
Add a small amount of milk or cream to the mixture. Mix again on medium speed for a few minutes. Stop and scrape the bowl’s sides to mix evenly. The icing should be smooth and spreadable. Avoid making it too runny by adding liquid slowly. Smooth consistency helps the red color spread evenly on cakes or cookies.
Adding Color For Vibrancy
Adding color to red icing brings life to any baked treat. The right shade of red can make cookies, cakes, and cupcakes look more appealing. Achieving a vibrant red requires attention to the type of coloring and how it is applied. Small changes can create big differences in appearance.
Using Gel Vs Liquid Food Coloring
Gel food coloring is thicker and more concentrated than liquid. A small amount of gel creates a strong red color without making the icing runny. Gel is ideal for maintaining the icing’s texture and consistency.
Liquid food coloring is easier to mix but can thin the icing. It may require more drops to reach the desired red shade. Using liquid can sometimes result in a lighter, less vibrant color.
Gel is better for bold, bright red icing. Liquid works for softer, pastel reds.
Layering Color For Depth
Layering color means adding color in stages. Start with a small amount of red coloring. Mix well and check the shade. Add more color gradually for a deeper red.
This process helps avoid over-coloring. It also creates a richer, more natural red tone. Layering lets you control the intensity without ruining the icing’s texture.
Patience is key. Mixing and adjusting color slowly ensures a perfect, vibrant red every time.
Credit: cakewhiz.com
Adjusting The Shade
Adjusting the shade of red icing lets you match the color to your design perfectly. Small changes can make a big difference. It helps to know simple ways to lighten or deepen the red. This control gives your icing a custom look for cakes or cupcakes.
Lightening The Color
To lighten red icing, add white icing or a small amount of white food coloring. Mix slowly and check the color often. Avoid adding too much at once. Another way is to use a touch of cream or milk to soften the shade. This makes the red less intense but still bright.
Deepening The Red
Deepen red icing by adding more red food coloring in small amounts. Stir well after each addition. You can also add a tiny bit of purple or brown food coloring to create a richer tone. Be careful not to add too much. A few drops can turn the color dark quickly.
Troubleshooting Common Issues
Making red icing can be tricky. The color might turn out pink or orange instead of bright red. The texture can also cause problems. Icing might become too runny or too thick. These issues can affect how your icing looks and spreads on cakes or cookies.
Fixing these problems is simple with the right tips. Understanding what causes these issues helps you create perfect red icing every time. Let’s explore common problems and how to solve them.
Avoiding Pink Or Orange Tones
Pink or orange tones happen when the red color mixes with other colors. Using the wrong red food coloring can cause this.
- Choose gel or paste red food coloring for a stronger color.
- Avoid liquid red coloring; it often looks pink or orange.
- Add color slowly to avoid overdoing it and changing the shade.
- Use a small amount of blue or purple food coloring to deepen the red.
- Mix colors well and wait a few minutes to see the true shade.
Fixing Runny Or Thick Icing
The texture of icing affects how it spreads and sets. Runny icing is hard to control, while thick icing can be stiff and hard to spread.
- For runny icing, add small amounts of powdered sugar to thicken it.
- For thick icing, add a few drops of water or milk to thin it out.
- Mix gently to avoid adding air bubbles.
- Check consistency by spreading a small amount on a plate.
- The icing should hold its shape but still be smooth enough to spread.
Tips For Storing And Using Red Icing
Knowing how to store and use red icing properly can save you time and keep your creations looking perfect. Red icing has a unique vibrancy that can fade or change texture if not handled right. Let’s dive into some practical tips to help you keep your red icing fresh and ready for your next decorating project.
Proper Storage Techniques
Red icing tends to dry out quickly if left exposed to air. Always store it in an airtight container to lock in moisture and maintain its smooth texture.
If you’ve made a large batch, portion the icing into smaller containers before storing. This way, you only expose what you need, keeping the rest fresh longer.
Keep your red icing in the refrigerator if you don’t plan to use it within a day or two. Before using chilled icing, bring it to room temperature and stir gently to restore the right consistency.
Best Practices For Application
Before applying red icing, make sure your cake or cookies are completely cool. Warm surfaces can cause the icing to melt or slide off.
Use a clean, dry spatula or piping bag to avoid introducing moisture that can change the icing’s texture. Thin layers are easier to control and less likely to crack as they dry.
Have you ever noticed your red icing turning dull after drying? A quick trick is to brush a tiny amount of clear piping gel over the surface for a fresh, glossy finish.
Finally, practice makes perfect. Try testing your icing on a small piece of parchment paper to see how it spreads and dries before decorating your final piece.

Credit: chelsweets.com
Frequently Asked Questions
How Do You Make Red Icing Naturally?
To make red icing naturally, use beetroot powder or juice as a colorant. These alternatives provide vibrant red color without artificial dyes and add a subtle earthy flavor.
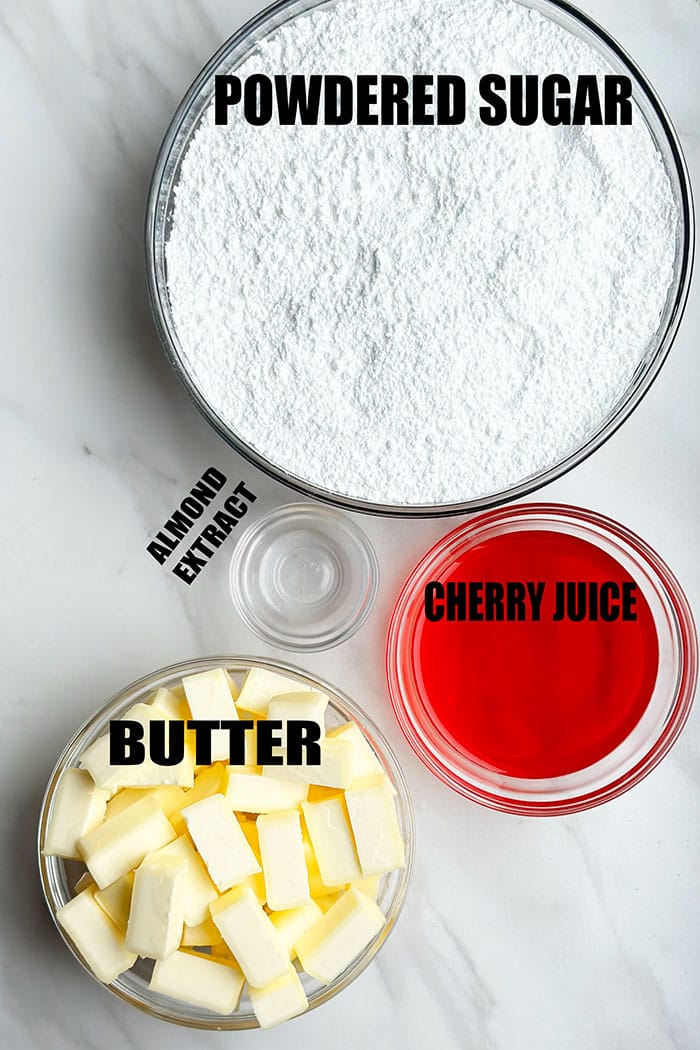
What Ingredients Are Needed For Red Icing?
Red icing requires powdered sugar, butter or shortening, milk or cream, vanilla extract, and red food coloring. These ingredients create a smooth, sweet, and colorful frosting.
Can I Use Gel Food Coloring For Red Icing?
Yes, gel food coloring is ideal for red icing. It provides intense color without thinning the icing, ensuring a thick, vibrant finish.
How Do I Prevent Red Icing From Bleeding?
To prevent bleeding, avoid excess liquid and use gel or paste food coloring. Allow the icing to dry completely before stacking or decorating.
Conclusion
Making red icing is simple with the right steps. Use gel food coloring for bright, rich color. Mix colors slowly to get the shade you want. Stir well to avoid lumps and streaks. Store your icing in an airtight container to keep it fresh.
Enjoy decorating cakes, cookies, or cupcakes with your vibrant red icing. With practice, your icing will look smooth and perfect every time. Give it a try and add a splash of color to your baking!