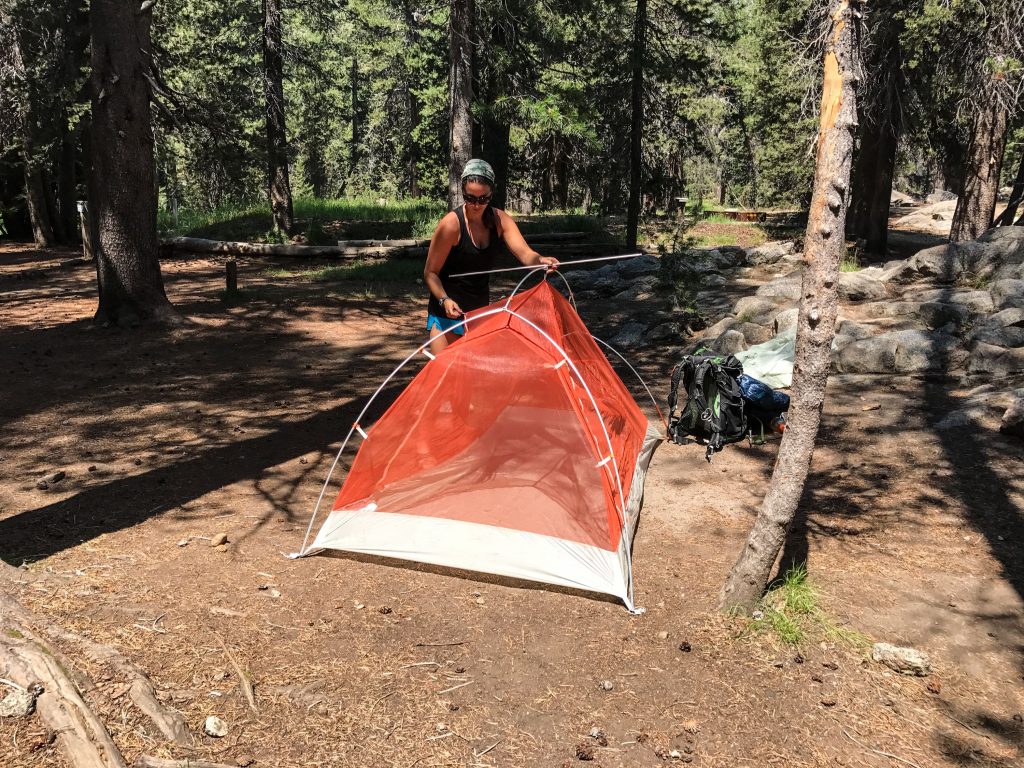
Setting up your tent might seem tricky if you’re new to camping. But what if you could learn a simple, step-by-step way to pitch your tent quickly and confidently every time?
Imagine arriving at your campsite and having your shelter ready in minutes, so you can relax and enjoy the outdoors without stress. You’ll discover easy tips and clear instructions that make pitching a tent straightforward—even if it’s your very first time.
Ready to master this essential skill and make your camping trips more enjoyable? Keep reading, and you’ll be pitching your tent like a pro in no time.
Choosing The Right Spot
Picking a good spot is key to a safe and comfy camping experience. Your tent needs a place that keeps you dry and protected.
Look around carefully before setting up. The right spot can make your trip much better.
Flat And Dry Ground
Choose ground that is flat. It helps your tent stay stable and makes sleeping easier. Avoid places that slope or have bumps.
Dry ground stops water from pooling under your tent. Wet soil can soak through and make your gear damp.
- Look for smooth, even soil or grass
- Avoid low spots where water collects
- Check if the ground feels dry to touch
Avoiding Hazards
Stay clear of dangers like dead trees, rocks, and insect nests. These hazards can cause injury or damage.
Check the area for sharp sticks or roots that can poke through your tent floor. Remove any trash or debris.
- Look overhead for unstable branches
- Avoid camping near animal paths
- Clear the ground of stones and sticks
Considering Wind Direction
Set your tent so the door faces away from the wind. This stops rain and dust from blowing inside.
Use natural windbreaks like trees or hills to block strong winds. This keeps your tent steady and warm.
- Find out which way the wind blows
- Face the narrow side of the tent into the wind
- Use trees or rocks as protection

Credit: woodsworthexploring.co.uk
Preparing Your Tent Site
Choosing and preparing the right spot is key for a good camping experience. A well-prepared tent site keeps you safe and comfortable.
Before pitching your tent, clear the area, level the ground, and mark the corners. These steps help your tent stand firm and last longer.
Clearing Debris
Remove rocks, sticks, and leaves from your tent area. Debris can damage your tent floor or make sleeping uncomfortable.
Use your hands or a small tool to clear the site. Make sure the ground is smooth and free of sharp objects.
Leveling The Surface
Find a flat spot or gently level the ground. A flat surface helps your tent stand steady and keeps you comfortable inside.
Use a small shovel or your hands to fill low spots and flatten high spots. Remove bumps that could hurt your back while sleeping.
Marking Tent Corners
Mark the corners of your tent site to guide where to place stakes. This helps keep your tent shape correct and taut.
- Use small rocks or sticks to mark each corner.
- Measure tent size to space the corners properly.
- Check the marks before pitching to avoid mistakes.
Unpacking And Sorting Gear
Before you pitch a tent, unpack all your gear carefully. Sorting the items helps you find everything fast.
Organizing your tent parts makes setup easier. Check each piece to avoid problems later.
Identifying Tent Components
First, lay out all the parts on a clean surface. Look for the tent body, poles, stakes, and rainfly.
Knowing each component helps you set up the tent quickly and correctly. Keep similar items together.
- Tent body – the main fabric part
- Poles – support the tent structure
- Stakes – anchor the tent to the ground
- Rainfly – covers the tent for extra weather protection
- Guy lines – ropes to secure the tent
- Carry bag – holds all parts together
Checking For Damage
Look over each piece for tears, holes, or broken parts. Damaged gear can cause problems while camping.
Fix small issues before pitching your tent. This helps keep you dry and safe during your trip.
- Check the tent fabric for holes or rips
- Inspect poles for cracks or bends
- Examine stakes for bends or breaks
- Look at zippers to ensure they work smoothly
- Make sure guy lines are not frayed

Credit: www.yahoo.com
Setting Up The Tent Body
Setting up the tent body is the first important step in pitching a tent. It creates the base where you will add poles and rain covers.
Start by finding a flat and clear area to make sure your tent stands well and feels comfortable inside.
Laying Out The Tent
Take the tent out of its bag and unfold it fully. Spread the tent flat on the ground.
Make sure the tent door faces the direction you want. This helps with wind and entry.
- Unroll the tent fabric evenly
- Align the tent with the wind direction
- Check the ground for sharp objects
- Flatten the tent to remove wrinkles
Securing The Corners
After laying the tent, secure its corners with stakes. This keeps the tent in place and stable.
Push the stakes into the ground at a 45-degree angle away from the tent. This helps hold the tent tight.
- Place stakes through the corner loops
- Push stakes deep into the ground
- Use a hammer or rock to drive stakes in
- Tighten the tent fabric by pulling the corners
Assembling And Inserting Poles
Setting up your tent starts with the poles. Poles give the tent shape and support. Knowing how to assemble and insert them is key for a sturdy tent.
Follow each part carefully and work on a flat surface. This helps prevent damage to poles and makes the process easier.
Connecting Poles
Tent poles usually come in sections linked by elastic cords. Connect each pole piece end to end until you have full-length poles.
- Lay out all pole sections on the ground.
- Identify the ends to join together.
- Push the ends firmly until they snap in place.
- Check that all poles are straight and connected fully.
Attaching Poles To Tent
Once poles are connected, attach them to the tent fabric. Use the tent’s pole sleeves or clips to secure poles in place.
| Attachment Method | How to Attach |
|---|---|
| Pole Sleeves | Slide poles through fabric sleeves along the tent’s frame. |
| Clips | Snap clips from the tent body onto the poles for quick setup. |
| Hooks | Hook poles into small loops or rings on the tent corners. |
Raising The Tent Structure
After attaching poles, lift the tent by bending poles into shape. This action creates the tent’s frame and opens the tent.
- Hold the tent base steady on the ground.
- Slowly bend the poles toward the center.
- Secure the ends of poles into ground anchors or grommets.
- Adjust tension to make sure the tent stands firm.
Securing The Tent
Securing your tent is important for safety and comfort. It keeps the tent stable during wind and rain.
Properly securing the tent helps prevent damage and makes your camping experience better.
Staking The Tent
Staking means driving tent pegs into the ground. This holds the tent firmly in place.
Use a hammer or rock to push stakes at a 45-degree angle away from the tent.
- Choose firm ground for better hold
- Place stakes at every corner and along the sides
- Make sure stakes are deep enough to resist wind
Adjusting Tension
Adjust tent ropes to keep the fabric tight. Loose fabric can flap and cause noise.
Tighten straps or cords slowly to avoid tearing the material or poles.
- Check tension on all sides evenly
- Re-tighten after strong wind or rain
- Leave a little slack to prevent damage
Adding Guy Lines
Guy lines add extra support to your tent. They connect to stakes away from the tent.
Use guy lines in windy or rainy conditions for better stability.
- Attach lines to tent loops or rings
- Anchor lines firmly into the ground
- Adjust tension to keep lines tight but not too tight
Attaching The Rainfly
Attaching the rainfly is important to keep your tent dry. It protects you from rain and wind.
Make sure the rainfly fits well and covers the tent fully. This helps avoid water leaks inside.
Positioning The Rainfly
Place the rainfly over the tent with the door aligned to the tent’s entrance. This helps easy access.
Check that the rainfly edges reach the ground or the tent base. This stops rain from getting inside.
Securing Attachments
Use the rainfly’s hooks, clips, or Velcro to attach it to the tent poles or loops. This keeps it tight.
Tighten all straps and guy lines to hold the rainfly steady. Loose attachments can flap in the wind.
- Attach hooks or clips to tent poles
- Tighten straps at all corners
- Secure guy lines to stakes in the ground
Checking Ventilation
Ensure vents or mesh windows are not blocked by the rainfly. This lets air flow inside the tent.
Good ventilation reduces condensation and keeps the tent comfortable during use.

Credit: sunny-outdoors.com
Final Checks
After pitching your tent, it is important to do final checks. These checks ensure your tent stays safe and comfortable.
Take time to inspect stability, ventilation, and inside space before settling in.
Inspecting Stability
Check all poles and stakes to make sure they are secure. Firmly push the stakes into the ground and tighten the guy lines.
Look for any loose parts or sagging fabric. Adjust or add extra support if needed.
- Test the tent by gently pushing on the walls
- Ensure stakes are deep and firm in the soil
- Tighten all ropes and clips
Ensuring Proper Ventilation
Good airflow keeps the tent fresh and reduces moisture inside. Open vents or windows if your tent has them.
Avoid closing all openings to stop heat and condensation build-up.
- Keep vents open but shielded from rain
- Position doors to catch breezes
- Use mesh windows to block bugs
Organizing Inside Space
Arrange your gear neatly to save room and stay safe. Keep heavy items near the tent’s edges for balance.
Clear paths inside the tent to avoid tripping and make moving easy.
- Store shoes in a corner or outside the tent
- Use pockets or gear lofts for small items
- Keep sleeping bags and pads flat and tidy
Frequently Asked Questions
How Do You Start Pitching A Tent?
Begin by selecting a flat, dry spot free of rocks. Lay out the tent footprint or tarp. Assemble the tent poles and insert them into the corresponding sleeves or clips. Raise the tent by securing the poles into the grommets or fasteners.
Stake down the tent corners to ensure stability.
What Tools Do You Need For Pitching A Tent?
You will need a tent, stakes, and a mallet or rock. A ground tarp and a tent footprint are also beneficial. These items help ensure the tent is secure and protected from ground moisture. Always carry extra stakes and rope for emergencies.
How Do You Secure A Tent In Wind?
First, choose a sheltered spot if possible. Use sturdy stakes and ensure they’re driven in at a 45-degree angle. Guy lines should be taut and secured. Utilize additional rocks or logs to weigh down stakes. Always face the tent’s entrance away from prevailing winds.
How Can You Make A Tent More Comfortable?
Start with a ground tarp for moisture protection. Use a sleeping pad or air mattress for cushioning. Bring a comfortable sleeping bag suitable for the temperature. Organize belongings with storage pockets or gear lofts. Ensure proper ventilation to reduce condensation and maintain a pleasant temperature.
Conclusion
Pitching a tent is easier than it seems. Choose a flat, clear spot first. Lay out your tent and organize parts. Secure the tent with stakes tightly. Attach the rainfly to stay dry. Practice makes setting up faster and smoother.
Enjoy your camping with a safe shelter. Now, you can camp comfortably anywhere.