
Thinking about removing your wall oven but not sure where to start? You’re not alone.
Taking out a wall oven may seem tricky, but with the right steps, you can do it safely and quickly. Imagine freeing up space or making way for a new, modern oven without the hassle or extra costs. In this guide, you’ll discover simple, clear instructions that anyone can follow—even if you’re not a DIY expert.
Ready to take control and make this project easier than you expected? Keep reading, and you’ll have your wall oven removed in no time.

Credit: www.youtube.com
Prepare The Area
Removing a wall oven needs careful preparation. This keeps the work safe and smooth.
Start by getting the space ready. Follow these steps to clear the area, gather tools, and turn off power.
Clear Surrounding Space
Make sure the area around the oven is free of objects. This gives you room to work and prevents accidents.
- Remove any kitchen items near the oven.
- Clear countertops and nearby shelves.
- Move furniture or rugs that block access.
- Keep children and pets away from the work area.
Gather Necessary Tools
Use the right tools to remove the oven safely. Having everything ready saves time and effort.
| Tool | Purpose |
| Screwdriver | Remove screws from the oven frame |
| Adjustable wrench | Disconnect gas or water lines if needed |
| Flashlight | See clearly inside dark spaces |
| Gloves | Protect hands from sharp edges |
| Voltage tester | Check if power is off |
Turn Off Power Supply
Cut the power to the oven before starting. This prevents electric shock and damage.
- Find the circuit breaker panel in your home.
- Locate the breaker for the wall oven.
- Switch off the breaker to stop power flow.
- Use a voltage tester to confirm power is off.
Disconnect The Oven
Removing a wall oven starts with disconnecting it safely. This step prevents electric shocks and damage.
Follow simple actions to unplug and cut power before detaching any wiring. Safety is the top priority.
Unplug The Appliance
Locate the oven’s power cord. It is usually behind the oven or inside the cabinet.
Pull the plug from the outlet gently. Do not yank the cord to avoid damage.
Shut Off Circuit Breaker
Find your home’s electrical panel. Turn off the breaker that controls the oven’s circuit.
- Open the electrical panel cover.
- Identify the breaker labeled for the kitchen or oven.
- Flip the breaker switch to the OFF position.
- Use a voltage tester to confirm no power is running to the oven.
Detach Electrical Wiring
Remove the oven’s access panel to reach the wiring. Use a screwdriver if needed.
| Wire Color | Purpose | Action |
|---|---|---|
| Black or Red | Live (Hot) Wires | Disconnect carefully after power is off |
| White | Neutral Wire | Detach gently and label if needed |
| Green or Bare | Ground Wire | Remove last to ensure safety |
Keep track of each wire’s position for reinstallation or replacement. Use tape or labels.
Remove Oven Components
Removing the parts of a wall oven carefully makes the process safer and easier. Start by taking out smaller parts first. This prevents damage and prepares you for the next steps.
Focus on the oven racks, mounting brackets, and the oven door. Each part needs a specific approach to remove it without harm.
Take Out Oven Racks
Oven racks slide in and out easily. Removing them first clears space inside the oven. This makes the next steps simpler and safer.
- Open the oven door fully.
- Pull each rack straight out until it stops.
- Lift the rack slightly to release it from the track.
- Remove the rack from the oven completely.
Unscrew Mounting Brackets
Mounting brackets hold the oven in place inside the wall. You need to unscrew these to free the oven. Use the right tools and keep the screws safe.
| Tool Needed | Description |
| Screwdriver | Use a Phillips or flathead depending on screw type |
| Socket Wrench | For bolts that are hard to reach or tight |
| Flashlight | Helps see screws inside dark spaces |
Handle Oven Door With Care
The oven door is heavy and fragile. Handle it slowly to avoid dropping or breaking it. Some doors may need to be removed before pulling out the oven.
- Check if the door has hinges that lock or release.
- Support the door with both hands when removing.
- Place the door on a soft surface to avoid scratches.
- Store the door safely until reinstallation or disposal.
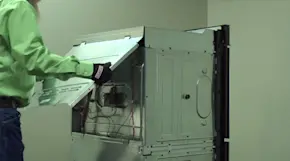
Credit: www.searspartsdirect.com
Extract The Wall Oven
Removing a wall oven takes care and attention. You need to work slowly to avoid damage.
This guide focuses on how to safely extract the oven from its cabinet space.
Loosen The Oven From The Cabinet
First, turn off the power to the oven at the circuit breaker. Then open the oven door to access mounting screws.
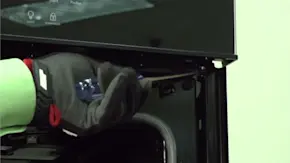
- Locate screws holding the oven to the cabinet frame.
- Use a screwdriver to remove all screws carefully.
- Keep screws in a safe place for reinstallation or disposal.
Slide Oven Out Slowly
Pull the oven out gently from the cabinet opening. Use both hands to support its weight.
Stop if the oven feels stuck or you see resistance. Check for any hidden screws or brackets.
Check For Remaining Connections
Before fully removing the oven, check for cables or gas lines still attached. Disconnect these carefully.
| Connection Type | Action Needed |
| Electrical Cord | Unplug or disconnect from junction box |
| Gas Line | Turn off gas and unscrew line |
| Vent or Exhaust | Detach any vent tubes or covers |
Post-removal Tips
Removing a wall oven leaves an empty space that needs care. Proper steps help keep your kitchen safe and clean.
Follow these tips to check the wall, fix any damage, and handle your oven correctly after removal.
Inspect Wall Opening
Look inside the wall space where the oven was installed. Check for any damage or signs of wear.
- Check for loose wires or exposed electrical parts.
- Look for cracks or holes in the wall or cabinet.
- Make sure the opening size fits a new oven or cover panel.
Seal Or Repair Cabinet
If the cabinet or wall is damaged, fix it to protect your kitchen from pests and dust.
| Issue | Repair Tip |
| Cracked drywall | Use drywall patch and sand smooth |
| Loose cabinet panel | Tighten screws or use wood glue |
| Gaps around opening | Apply caulk or weather stripping |
Dispose Or Store Oven Properly
Decide if you will keep or discard the oven. Handle it safely to avoid damage or injury.
- Clean the oven inside and out before storing or disposing.
- Disconnect power and any gas lines completely.
- Store in a dry, secure place if you keep it.
- Contact local waste services for proper disposal options.
Credit: www.searspartsdirect.com
Frequently Asked Questions
How Do You Safely Disconnect A Wall Oven?
Turn off the power at the circuit breaker. Confirm power is off using a voltage tester. Then, unplug the oven or disconnect its wiring carefully.
What Tools Are Needed To Remove A Wall Oven?
You typically need a screwdriver, voltage tester, and possibly a wrench. A helper may assist with heavy lifting. Always use insulated tools for safety.
Can I Remove A Wall Oven Myself?
Yes, if you have basic electrical and handyman skills. Ensure power is off and follow safety guidelines. Otherwise, hire a professional to avoid risks.
How Do You Detach A Wall Oven From Cabinetry?
Remove screws securing the oven to the cabinet. Gently pull the oven out, supporting its weight. Disconnect any wiring or plugs once accessible.
Conclusion
Removing a wall oven can seem tricky at first. Take your time and follow safety steps carefully. Turn off the power and water before starting. Use the right tools to avoid damage. Ask for help if the oven is heavy.
Double-check all connections before pulling the oven out. Clean the area once the oven is removed. Doing this right keeps your kitchen safe and ready for a new oven. Simple steps make the job easier and safer. You can handle this project with care and patience.