
Your cutting board gets a lot of use, from chopping veggies to slicing meat. But do you know how to properly seal it to keep it safe and lasting longer?
Sealing your cutting board protects it from stains, cracks, and bacteria, making your kitchen cleaner and your board more durable. In this post, you’ll learn simple and effective steps to seal your cutting board like a pro. Keep reading, and you’ll discover easy tips that will save you money and keep your board looking brand new.
Choosing The Right Cutting Board
Choosing the right cutting board helps keep your kitchen safe and clean. Different boards work best for different tasks and types of food.
Consider the material and how easy it is to clean and maintain. This guide covers wood types, plastic boards, and bamboo options.
Wood Types And Durability
Wood cutting boards come in many types. Hardwoods like maple and walnut last longer and resist cuts well. Softwoods can get damaged faster and may harbor bacteria.
- Maple: Durable and easy to maintain
- Walnut: Strong with a rich color
- Cherry: Softer but still good for cutting
- Bamboo: Hard and eco-friendly (see below)
Plastic Vs Wood Boards
| Feature | Plastic | Wood |
|---|---|---|
| Cleaning | Dishwasher safe | Hand wash only |
| Durability | Prone to deep cuts | Resists cuts better |
| Bacteria | Can hide in cuts | Natural antibacterial properties |
| Maintenance | Low, replace when worn | Needs oiling to prevent drying |
Bamboo Boards And Maintenance
Bamboo boards are a popular choice. They are harder than many woods and resist water well. Bamboo needs regular oiling to stay in good shape.
- Clean with warm soapy water
- Dry immediately after washing
- Apply food-safe mineral oil monthly
- Avoid soaking or dishwasher use

Credit: www.youtube.com
Why Sealing Matters
Sealing a cutting board protects it from damage and keeps it safe to use. It helps the board stay clean and last longer. Without sealing, wood can soak up water and germs easily.
Learn why sealing your cutting board is an important step in caring for it. It stops moisture, bacteria, and wear from harming the wood.
Preventing Moisture Damage
Wood cutting boards can absorb water during use. This makes the wood swell, crack, or warp over time. Sealing creates a barrier that stops water from soaking into the wood.
- Prevents wood from swelling and splitting
- Keeps the board flat and smooth
- Stops water from causing stains or odors
Avoiding Bacterial Growth
Cutting boards can hold bacteria if not sealed properly. Sealing closes wood pores where bacteria can hide. This makes cleaning easier and more effective.
| Effect of Sealing | Benefit |
| Sealed board surface | Less bacteria trapped in wood |
| Unsealed board surface | Bacteria can grow inside pores |
| Regular cleaning with sealed board | Removes bacteria more easily |
Extending Board Lifespan
Sealing protects the wood from daily wear and tear. It keeps the board strong and looking new for longer. Well-sealed boards need fewer repairs or replacements.
- Reduces cracks and splits
- Protects against stains and discoloration
- Keeps the board smooth for easier cutting
Types Of Sealants
Sealing a cutting board protects it from water and bacteria. Different sealants work best for various wood types and uses.
Choosing the right sealant keeps your board safe and extends its life. Here are common sealants to consider.
Food-safe Mineral Oils
Mineral oil is a popular choice for sealing cutting boards. It is clear, odorless, and safe for food contact.
This oil soaks into the wood, preventing cracks and water damage. It needs to be reapplied often to stay effective.
Beeswax And Oil Blends
Beeswax blends combine mineral oil and beeswax. They offer better protection by creating a thin, water-resistant layer.
- Protects against moisture better than oil alone
- Leaves a smooth, slightly shiny finish
- Requires less frequent reapplication
- Safe for food use and easy to apply
Commercial Sealers
Commercial sealers include products made for wood cutting boards. Some are food-safe and others are not.
| Sealer Type | Food Safe | Water Resistance | Application |
| Polyurethane | No | High | Brush or Spray |
| Food-Grade Tung Oil | Yes | Medium | Wipe On |
| Shellac | Yes (if pure) | Low | Brush |
| Wax-Based Sealers | Yes | Medium | Rub On |
Credit: www.globalkitchenjapan.com
Preparing Your Cutting Board
Sealing a cutting board starts with good preparation. You must clean and smooth the surface well. This helps the finish stick and protects the wood.
Take your time to remove any old finish and dry the board completely. These steps keep your cutting board safe and long-lasting.
Cleaning And Drying
First, wash your cutting board with warm water and mild soap. Use a scrub brush to remove food bits. Rinse well to avoid soap residue.
Dry the board fully before sealing. Air dry it standing up to let air flow on all sides. Avoid leaving it wet or in damp places.
Sanding For Smoothness
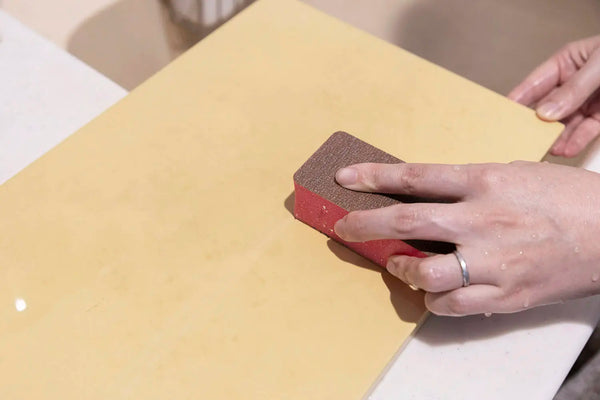
Sanding removes rough spots and old stains. Use fine-grit sandpaper for a smooth finish. Sand in the direction of the wood grain.
- Start with 120-grit sandpaper to even out the surface.
- Use 220-grit sandpaper to smooth it further.
- Wipe off dust with a damp cloth after sanding.
Removing Old Finish
Old finishes can block new sealants. Remove them carefully using these methods:
| Method | Description |
|---|---|
| Chemical Stripper | Apply with a brush and wait. Scrape off old finish gently. |
| Heat Gun | Heat the surface to soften the finish. Scrape carefully to avoid burning wood. |
| Sanding | Use coarse sandpaper to strip finish, then fine sandpaper to smooth. |
Sealing Process Step-by-step
Sealing a cutting board protects the wood from water and stains. It also keeps the board looking fresh longer. The process involves applying oil, adding wax, and finishing with drying and buffing.
This guide explains each step clearly. Follow these steps to keep your cutting board in great shape.
Applying Mineral Oil
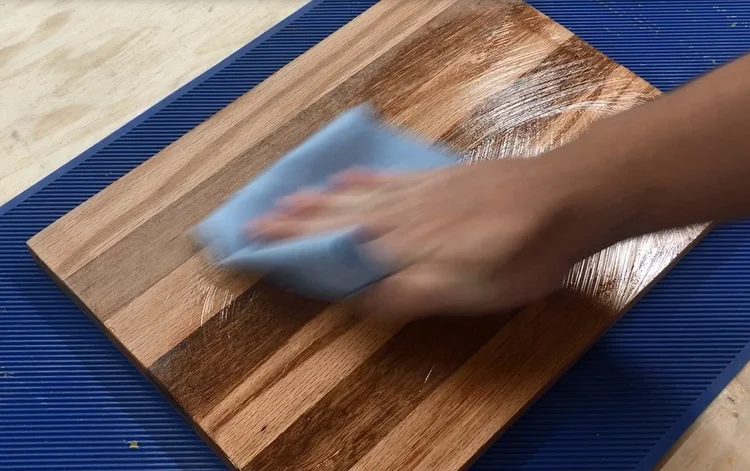
Mineral oil is safe for food contact and easy to apply. It soaks into the wood and prevents cracking. Use a clean cloth to apply the oil evenly across the surface.
- Pour a small amount of mineral oil on the board.
- Spread the oil with a soft cloth or paper towel.
- Cover all sides and edges thoroughly.
- Let the oil soak for at least two hours or overnight.
- Wipe off any extra oil with a clean cloth.
Using Beeswax For Extra Protection
Beeswax adds a water-resistant layer on top of the oil. It seals the board and gives it a smooth finish. Warm the wax slightly before applying to make it easier to spread.
- Use a small amount of beeswax at a time.
- Rub the wax gently into the wood surface.
- Cover the entire board, including edges.
- Let the wax sit for about 20 minutes.
- Buff the board to remove excess wax and shine the surface.
Drying And Buffing
Drying is important for the oil and wax to settle in the wood. Buffing makes the surface smooth and shiny. Use a soft cloth for best results.
| Task | Time Needed | Tools |
|---|---|---|
| Dry the cutting board | Overnight | None |
| Buff the surface | 5 to 10 minutes | Soft cloth |
Maintenance Tips For Sealed Boards
Sealing a cutting board helps protect it from water and stains. Proper care keeps the seal strong and the board safe to use.
Follow simple steps to maintain your sealed cutting board. This guide explains how often to reseal, how to clean, and when to know it needs resealing.
Regular Reapplication Schedule
Sealing wears off over time. You should apply a fresh coat regularly to protect the wood.
For most boards, reseal every 1 to 3 months. If you use the board a lot or wash it often, reseal sooner.
- Light use: reseal every 3 months
- Heavy use: reseal every month
- Apply oil or wax for best protection
Cleaning Without Damage
Clean your sealed board gently to avoid breaking the seal. Use mild soap and warm water.
Do not soak the board in water. Wipe it dry right after washing to keep moisture out.
- Use a soft sponge or cloth
- Avoid harsh detergents or bleach
- Dry with a towel after cleaning
- Never put the board in the dishwasher
Signs Your Board Needs Resealing
Look for changes on your board that show the seal is wearing off. These signs mean it is time to reseal.
Dry spots or water stains appear when the seal is gone. Cracks or rough texture also show the board needs care.
- Water soaks in quickly
- Board feels dry or rough
- Visible cracks or splits
- Stains do not wipe off easily
Common Mistakes To Avoid
Sealing a cutting board helps protect it from water and stains. Doing it wrong can damage the board or make it unsafe for food.
Learn about common mistakes people make when sealing cutting boards. Avoid these errors to keep your board safe and lasting longer.
Using Non-food-safe Products
Some products look like good choices but can harm your health. Avoid using any sealers not marked as food-safe.
- Do not use paint, varnish, or polyurethane on cutting surfaces.
- Choose mineral oil or beeswax made for kitchen use.
- Check labels to ensure the product is safe for food contact.
Over-saturating The Board
Applying too much oil or finish can cause the wood to stay wet inside. This leads to swelling and warping over time.
| Problem | Result |
| Too much oil applied | Wood becomes sticky and soft |
| Board left to soak | Swelling and cracking |
| Not wiping off excess | Uneven finish and dirt buildup |
Ignoring Cracks And Damage
Sealing over cracks or damage does not fix the board. Dirt and bacteria can hide in these areas and cause health risks.
- Fill small cracks with food-safe wood filler before sealing.
- Smooth rough or splintered areas with fine sandpaper.
- Replace boards with deep cracks or rot to stay safe.
Credit: www.slightlycrookedworkshop.com
Alternative Sealing Methods
Sealing a cutting board keeps it safe from water and bacteria. There are many natural ways to seal wood without chemicals.
Using oils and waxes can protect the board and keep it looking good for years.
Walnut Oil And Other Natural Oils
Walnut oil is a popular choice for sealing cutting boards. It soaks into the wood and creates a water-resistant layer.
Other natural oils like mineral oil, coconut oil, and almond oil also work well. They are safe for food contact and easy to apply.
- Apply oil with a clean cloth
- Let it soak for a few hours
- Wipe off any excess oil
- Repeat regularly to keep the board sealed
Linseed Oil Uses
Linseed oil, especially the food-grade type, is good for cutting boards. It hardens into a protective finish on the wood.
It helps stop water from soaking in and prevents cracks. Use boiled or polymerized linseed oil for faster drying.
- Apply a thin coat with a soft cloth
- Let it dry for 24 hours
- Sand lightly between coats if needed
- Use multiple coats for strong protection
Diy Wax Recipes
Wax can add extra protection to your cutting board. You can make your own wax mix at home with simple ingredients.
Combining natural oils with beeswax creates a durable seal that repels water and food stains.
- Melt 1 part beeswax with 4 parts natural oil
- Stir until smooth and mix well
- Let the mixture cool slightly
- Rub the wax on the board with a cloth
- Buff the board for a smooth finish
Frequently Asked Questions
What Materials Are Safe For Sealing Cutting Boards?
Food-grade mineral oil is safe for sealing cutting boards. It penetrates wood fibers, keeping them hydrated. Beeswax is another popular choice that adds a protective layer. Both options are non-toxic and enhance the board’s longevity. Regular application is key to maintaining the board’s quality.
How Often Should I Seal My Cutting Board?
Seal your cutting board every three to four weeks. Regular sealing prevents cracking and warping. Frequency may vary based on usage. If the board appears dry or worn, it’s time to seal. Proper maintenance extends the board’s lifespan and ensures food safety.
Can I Use Olive Oil For Sealing?
Avoid using olive oil for sealing cutting boards. It can turn rancid over time. This can lead to unpleasant odors and compromise food safety. Stick to food-grade mineral oil or beeswax. These options ensure a longer-lasting and safer surface for food preparation.
Is Sanding Necessary Before Sealing?
Sanding is recommended if the board’s surface is rough. It helps remove cuts and scratches. Use fine-grit sandpaper for a smooth finish. A smooth surface ensures better oil absorption. This step enhances the board’s appearance and prolongs its usability.
Conclusion
Sealing a cutting board keeps it safe and long-lasting. Use the right oil or finish for best results. Apply evenly and let it dry well. Regular sealing stops water and bacteria from damaging wood. A sealed board stays smooth and easy to clean.
Take a few minutes to seal after each use. Your cutting board will look good and work better. Simple steps make a big difference in care and safety. Keep sealing often to protect your kitchen tool.