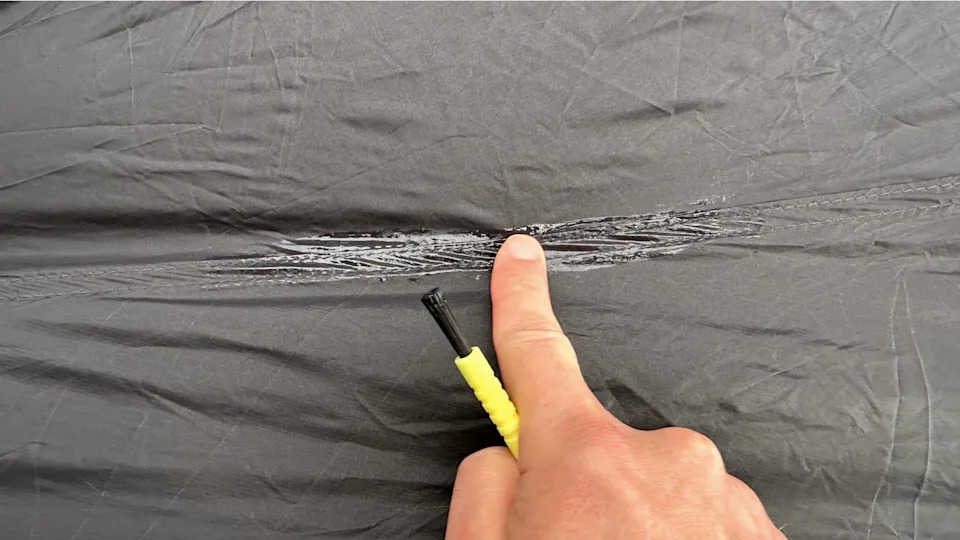
If you want your tent to keep you dry and comfortable, seam sealing is a step you can’t skip. You might think your tent’s seams are already waterproof, but even the smallest gaps can let water sneak in when it rains.
Seam sealing stops leaks before they start, protecting your gear and your peace of mind. In this guide, you’ll learn exactly how to seam seal your tent easily and effectively, so you can enjoy your outdoor adventures without worrying about unexpected drips.
Ready to make your tent truly weatherproof? Let’s get started.
Why Seam Sealing Matters
Seam sealing keeps your tent safe from water leaks. It stops rain and moisture from getting inside. This simple step makes camping more comfortable.
Seam sealing also helps protect the tent fabric and stitching. It keeps your gear dry and your tent strong for many trips.
Preventing Leaks
Seams are the weakest points on a tent. Water can pass through tiny holes or gaps in the stitching. Seam sealing creates a waterproof barrier on these areas.
- Stops water from entering through needle holes
- Prevents mold and mildew growth inside the tent
- Keeps the tent interior dry during heavy rain
- Improves overall tent waterproofing performance
Extending Tent Life
Seam sealing protects the fabric and threads from damage. It stops water from weakening the tent material and stitching.
| Benefit | How It Helps |
| Fabric Protection | Prevents water damage and fabric wear |
| Thread Strength | Stops stitches from loosening or breaking |
| UV Protection | Some sealants add extra UV resistance |
| Long-Term Use | Keeps tent durable for many camping seasons |
Tools And Materials Needed
Seam sealing a tent protects it from water leaks and keeps you dry. Using the right tools and materials makes the job easier and more effective.
This guide covers the types of seam sealers and extra supplies you will need to complete the task.
Types Of Seam Sealers
Seam sealers come in different forms. Each type works best for certain fabrics and conditions.
- Liquid Seam Sealers:These are brush-on liquids that create a waterproof layer. They dry clear and flexible.
- Tape Seam Sealers:Heat-activated tapes seal seams quickly. They need an iron or heat source to bond.
- Spray Seam Sealers:Sprays cover large areas fast. Use them for quick touch-ups or hard-to-reach spots.
Additional Supplies
You need more than just the seam sealer. These extra supplies help prepare and finish the tent seams properly.
| Supply | Purpose |
|---|---|
| Clean Cloth | Wipes dirt and moisture from seams before sealing |
| Rubbing Alcohol | Cleans fabric to improve sealer adhesion |
| Painter’s Tape | Protects fabric edges and controls sealer spread |
| Small Brush or Applicator | Applies liquid sealers evenly on seams |
| Iron or Heat Gun | Activates heat tape sealers safely |
| Gloves | Keeps hands clean and safe from chemicals |
Preparing Your Tent
Seam sealing a tent helps keep water out and improves its durability. Getting your tent ready before sealing is very important. This makes sure the sealant sticks well and works properly.
Preparing your tent involves cleaning the seams and making sure it is dry. These steps help the sealant bond to the fabric and prevent leaks.
Cleaning The Seams
Clean seams remove dirt, oils, and old sealant that can stop new sealant from sticking. Use a soft brush or cloth to get rid of dust and loose debris from the seams.
For tougher grime, use warm water and mild soap. Gently scrub the seams and rinse well to remove soap residue. Avoid harsh chemicals that can damage the fabric.
- Brush off loose dirt with a soft brush
- Use mild soap and water for sticky spots
- Rinse thoroughly to remove all soap
- Do not use bleach or strong cleaners
Drying Tips
Make sure the tent and seams are completely dry before applying sealant. Moisture can stop the sealant from bonding and cause leaks later.
Set up the tent in a shaded, well-ventilated area. Avoid direct sunlight, which can damage the fabric and dry the tent unevenly. Allow plenty of time for full drying.
- Air dry the tent in shade
- Use a fan to speed drying if needed
- Do not use heat sources like hair dryers
- Check seams carefully to confirm dryness

Credit: www.yahoo.com
Step-by-step Seam Sealing Process
Seam sealing helps keep your tent waterproof. It stops water from leaking through stitched areas.
This process is simple and improves your tent’s durability. Follow these steps to seal your tent seams well.
Applying The Sealer
First, clean the tent seams with rubbing alcohol. This removes dirt and oils for better sealing.
Use a brush or applicator to spread the seam sealer. Cover the entire stitched line carefully.
- Apply a thin, even layer on the seam tape
- Work slowly to avoid missing spots
- Check for holes or gaps in the fabric
Ensuring Even Coverage
Even coverage stops leaks and strengthens the seam. Make sure no part looks thin or dry.
Use a soft brush to smooth the sealer over the tape. This helps fill all tiny gaps and holes.
- Check both sides of the seam
- Look for consistent thickness of the sealer
- Reapply if you see any missed areas
Drying Time
Let the seam sealer dry fully before packing your tent. Dry time varies based on temperature and humidity.
It usually takes 12 to 24 hours to dry. Avoid touching or moving the tent during this time.
- Place the tent in a dry, shaded area
- Avoid direct sunlight or rain
- Check the sealer feels dry and firm before use
Tips For Best Results
Seam sealing a tent protects it from leaks and water damage. Doing it right keeps your tent dry and durable.
Use the right sealant and prepare the seams well. This guide helps you know when to reseal and avoid common mistakes.
When To Reseal
Seam seals wear out after some use. Check your tent regularly for signs of wear or leaks.
- Look for cracks or peeling on old sealant
- Test by sprinkling water on the seams
- Reseal if water soaks through or forms droplets inside
- Reseal after heavy use, long trips, or washing the tent
Common Mistakes To Avoid
Some mistakes reduce the effectiveness of seam sealing. Avoid these to keep your tent waterproof.
| Mistake | Problem | How to Avoid |
| Not cleaning seams | Sealant won’t stick | Clean seams with rubbing alcohol |
| Applying sealant on wet seams | Sealant won’t dry properly | Make sure seams are dry before sealing |
| Using too much sealant | Takes long to dry and can peel | Apply a thin, even layer |
| Skipping drying time | Sealant stays tacky and weak | Let sealant dry fully before packing |
| Sealing in cold or humid weather | Sealant cures poorly | Seal in warm, dry conditions |

Credit: www.yahoo.com
Maintaining Your Tent Post-sealing
Seam sealing your tent helps keep water out and extends its life. After sealing, proper care keeps your tent strong and dry.
Maintaining your tent is easy with the right steps. Storage and regular checks protect your tent from damage.
Storage Advice
Store your tent in a cool, dry place to avoid mold and mildew. Keep it away from direct sunlight to protect the fabric and sealant.
Do not store your tent wet or tightly packed for long times. Let it dry fully and fold it loosely before storing.
- Dry the tent completely before storage
- Fold loosely to avoid creases on seams
- Use a breathable storage bag, not plastic
- Keep away from heat and sunlight
Regular Inspections
Check your tent seams regularly for cracks or peeling sealant. Early fixes stop leaks and keep the tent strong.
Inspect the tent after each trip. Look closely at all sealed seams and corners. Reapply sealant if needed.
- Look for cracked or dry sealant
- Test seams for leaks during rain or with water
- Apply seam sealer to damaged areas
- Keep a repair kit handy on trips

Credit: www.yahoo.com
Frequently Asked Questions
What Materials Are Needed To Seam Seal A Tent?
To seam seal a tent, you need seam sealer, a clean cloth, and a brush or applicator. Some tents require specific sealers based on fabric type. Always check manufacturer recommendations to ensure proper adhesion and waterproofing.
How Long Does It Take To Seam Seal A Tent?
Seam sealing typically takes 30 minutes to an hour. Drying time varies from 6 to 24 hours depending on temperature and humidity. It’s best to apply sealant in a well-ventilated, dry area for optimal results.
Can Seam Sealing Improve Tent Waterproofing?
Yes, seam sealing enhances tent waterproofing by blocking water entry at stitching points. It reinforces weak spots where water might leak. Regular seam sealing helps maintain the tent’s durability and weather resistance.
How Often Should You Seam Seal A Tent?
You should seam seal your tent annually or after heavy use. Inspect seams for cracks or leaks before each camping trip. Applying seam sealer when needed keeps your tent reliable and waterproof.
Conclusion
Seam sealing a tent keeps you dry and comfortable outdoors. It stops water from leaking through the stitches. Use the right sealant and apply it carefully on clean seams. Let it dry completely before using your tent again. This simple step protects your gear and improves your camping experience.
Take time to seal seams well for long-lasting results. Your tent will stay strong and water-resistant for many trips. Seal seams and enjoy dry nights under the stars.