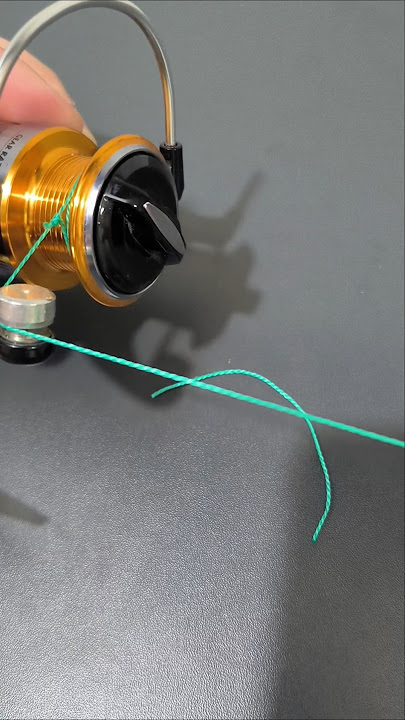
Are you ready to improve your fishing game? One of the most important skills you need is knowing how to tie your fishing line to a spinning reel properly.
If your line isn’t tied right, you could lose a big catch or even damage your gear. Don’t worry—this guide will show you simple, step-by-step instructions to make sure your line stays secure and your fishing experience is smooth. Keep reading, and you’ll be ready to cast like a pro in no time!

Credit: www.youtube.com
Choosing The Right Line
Picking the correct fishing line is key for a good fishing trip. The line must fit your reel and the fish you want to catch.
Different lines work best in different situations. Learn about the types and strengths before tying your line to a spinning reel.
Monofilament Vs. Braided
Monofilament line is soft and easy to handle. It stretches under pressure, which helps prevent line breaks.
Braided line is very strong and thin. It has little stretch, giving you better control and sensitivity.
- Monofilament is good for beginners and light fishing.
- Braided line suits heavy cover and big fish.
- Monofilament floats, braided sinks.
- Braided line is more visible in water than monofilament.
Line Strength And Diameter
Line strength is how much weight the line can hold before breaking. It is measured in pounds (lbs).
Diameter is the thickness of the line. Thinner lines cast further and are less visible to fish.
| Line Type | Strength (lbs) | Diameter (inches) |
|---|---|---|
| Monofilament | 6-20 | 0.008-0.020 |
| Braided | 10-50+ | 0.006-0.015 |
Considerations For Different Fish
Choose your line based on the size and type of fish you want to catch. Stronger fish need stronger lines.
For small fish, light monofilament works well. For bigger fish, braided lines are better for strength and durability.
- Small fish: light monofilament, 4-8 lbs.
- Medium fish: medium strength monofilament or braided, 10-20 lbs.
- Large fish: heavy braided line, 30 lbs or more.
- Clear water: use thinner, less visible lines.
Preparing The Spinning Reel
Tying fishing line to a spinning reel needs careful preparation. This helps your fishing go smoothly.
Start by getting your reel ready. Clean it, open the bail arm, and position it properly.
Cleaning The Reel
Keep your reel clean to avoid problems. Dirt or salt can damage it.
- Use a soft cloth to wipe the reel.
- Remove old grease and dirt.
- Check for rust or damage.
- Apply light oil to moving parts.
Opening The Bail Arm
The bail arm guides the line onto the spool. You must open it before tying the line.
Lift the bail arm until it clicks in the open position. Do not force it, or you can break it.
Positioning The Reel For Line Attachment
Place the reel so you can easily tie the line. Keep the spool facing upward.
| Position | Purpose |
| Spool facing up | Prevents line tangles |
| Reel held steady | Easy to tie knots |
| Line spool nearby | Quick access to line |
Popular Knot Techniques
Tying a fishing line to a spinning reel needs a strong knot. The right knot keeps your line from slipping.
Here are three popular knots that anglers use often. Each has simple steps and good strength.
Improved Clinch Knot
The Improved Clinch Knot is common for attaching the line to the reel. It is simple and holds well.
- Thread the line through the reel eye.
- Wrap the tag end around the standing line five to seven times.
- Pass the tag end through the small loop near the reel eye.
- Pull the tag end to tighten the coils.
- Moisten the knot and pull both ends to secure.
Palomar Knot
The Palomar Knot is strong and easy to tie. It works well for braided and monofilament lines.
| Step | Action |
| 1 | Double about six inches of line and pass it through the reel eye. |
| 2 | Tie an overhand knot with the doubled line, but do not tighten it. |
| 3 | Pass the loop over the reel spool. |
| 4 | Pull the standing line to tighten the knot. |
| 5 | Trim the tag end close to the knot. |
Uni Knot
The Uni Knot is versatile and works well for many fishing setups. It is easy to adjust before tightening.
Follow these steps:
- Pass the line through the reel eye and double back parallel to the standing line.
- Make a loop by laying the tag end over the doubled line.
- Wrap the tag end around the doubled line and through the loop 5 to 6 times.
- Moisten the knot and pull the tag end to tighten the coils.
- Slide the knot down to the reel eye and pull both ends tight.
Step-by-step Knot Tying
Tying fishing line to a spinning reel is important for a strong connection. A good knot helps you catch fish without losing them.
Follow these simple steps to tie your line securely and avoid common problems like slipping or breaking.
Threading The Line
Start by threading the fishing line through the reel spool hole. Pull enough line out to work with comfortably.
Make sure the line is straight and does not twist as you pull it through. This helps the knot hold better.
Forming The Knot
Create a loop by passing the end of the line back toward the main line. Wrap the tag end around the main line several times.
- Pass the line end through the loop closest to the reel.
- Wrap the line end around the main line 5 times.
- Thread the line end back through the big loop you made.
- Hold the wraps and prepare to tighten the knot.
Tightening And Securing
| Action | Tip |
|---|---|
| Pull the tag end slowly | Prevents knot from slipping |
| Moisten the line | Reduces friction and line damage |
| Pull the main line tight | Secures the knot firmly on the spool |
| Trim the tag end | Leave 1/8 inch to avoid unraveling |
After tightening, test the knot by pulling firmly. If it holds, you are ready to fish.
Common Mistakes To Avoid
Tying fishing line to a spinning reel needs care and attention. Small errors can cause problems while fishing.
Learning about common mistakes helps you avoid losing fish or damaging gear. This guide covers three main issues to watch out for.
Loose Knots
Loose knots can slip or come undone during casting or fighting a fish. This causes lost catches and wasted time.
- Tighten the knot firmly before cutting excess line.
- Use wet hands to pull the knot tight to reduce friction.
- Practice knots like the Improved Clinch or Palomar for strength.
- Check the knot before every fishing session.
Line Twists
Line twists make casting difficult and cause tangles. Twists weaken the line and increase breakage risk.
| Cause | Effect |
| Improper spooling | Line twists on the reel |
| Using spinning reels with certain lures | Line spins and knots |
| Reeling against the drag | Line damage and tangles |
Insufficient Trimming
Leaving too much tag end after tying causes problems. The line can catch on weeds or gear, causing snags.
Tips for trimming:
- Cut close to the knot but leave about 3-5 mm of line.
- Use sharp scissors or line cutters for clean cuts.
- Avoid leaving long tag ends that can wrap around the spool.
- Check for frayed ends and trim them regularly.

Credit: www.youtube.com
Testing The Knot Strength
After tying your fishing line to a spinning reel, it is important to test the knot strength. This helps ensure the knot will hold during fishing. A strong knot prevents losing fish and gear.
Testing the knot strength is simple and can be done with a few easy methods. Each method checks if the knot can handle tension without slipping or breaking.
Pull Test Methods
Pull testing shows if the knot is tight and secure. Try pulling on the line with steady force. If the knot slips or loosens, it needs to be retied.
- Hold the rod and reel firmly.
- Pull the line with your hand slowly.
- Watch the knot for any movement.
- Apply pressure until you feel resistance.
- Stop if the knot slips or breaks.
Signs Of Weakness
Look for these signs to know if your knot is weak:
- The knot slides along the line when pulled.
- The line frays near the knot.
- The knot looks uneven or loose.
- The line breaks easily under pressure.
- You feel the knot tighten poorly when pulled.
When To Retie
Retie your knot in these situations:
| Condition | Action |
|---|---|
| Knot slips during pull test | Retie the knot immediately |
| Line shows frays near knot | Replace the line and retie |
| Knot looks loose or uneven | Tighten or retie for security |
| After catching a large fish | Retie to avoid damage failure |
| Regular fishing use (daily) | Check and retie as needed |
Maintaining Your Setup
Tying fishing line to a spinning reel is only the first step. Taking care of your setup helps it last longer and work well. Regular maintenance keeps your fishing experience smooth and enjoyable.
Checking your line and reel often helps avoid problems on the water. Small efforts keep your gear ready for every fishing trip.
Regular Line Inspection
Look at your fishing line for damage before each use. Check for cracks, frays, or weak spots that can cause breaks. Pay close attention near knots and the reel spool.
Replace the line if you see any signs of wear. This helps prevent losing fish or gear during a catch.
- Inspect line for nicks and abrasions
- Check for discoloration or stiffness
- Feel for rough or thin spots by running fingers along the line
- Examine knots closely for tightness and damage
Replacing Old Line
Old fishing line loses strength and flexibility. Replace it at least once a year or after heavy use. Remove all old line from the reel before adding new line.
Choose the correct line type and weight for your fishing style. Wind it evenly on the spool to avoid tangles and line twist.
- Cut off all old line before re-spooling
- Use the right line weight for your reel
- Wind line tightly and evenly on the spool
- Secure the line end with a small knot or clip
Reel Maintenance Tips
Clean your spinning reel regularly to keep it working smoothly. Remove dirt, sand, and salt from the reel after each fishing trip. Use a soft cloth and mild soap if needed.
Lubricate moving parts with reel oil or grease as recommended. Check the drag system and handle for proper function. Store your reel in a dry place to avoid rust and corrosion.
- Rinse reel with fresh water after use in saltwater
- Dry reel completely before storage
- Apply reel oil to bearings and handle joints
- Use reel grease on gears inside the reel
- Check drag washers and replace if worn

Credit: windrider.com
Frequently Asked Questions
How Do You Attach Fishing Line To A Spinning Reel?
To attach fishing line, thread it through the reel’s line guide. Tie a strong knot, like the arbor knot, around the spool. Pull tight and trim excess line. This secures the line firmly for smooth casting and retrieval.
What Is The Best Knot For Spinning Reel Fishing?
The arbor knot is best for tying line to a spinning reel. It is simple, strong, and reliable. This knot prevents slipping and ensures the line stays secure during casting and reeling.
How Much Fishing Line Should I Spool On A Spinning Reel?
Fill your spinning reel spool to about 1/8 inch below the rim. This prevents overfilling, which causes tangles and backlashes. Proper spooling improves casting distance and line management.
Can I Use Braided Line On A Spinning Reel?
Yes, braided line works well on spinning reels. It offers high strength and sensitivity. Use a backing line or nail knot to secure braided line properly to the spool.
Conclusion
Tying fishing line to a spinning reel is simple with practice. Follow the steps carefully for a strong, secure knot. A well-tied line helps avoid slips and lost fish. Take your time and check your work before fishing. Soon, this task will feel natural and easy.
Enjoy your fishing trips with confidence and peace of mind. Keep practicing to improve your skills every time you fish.