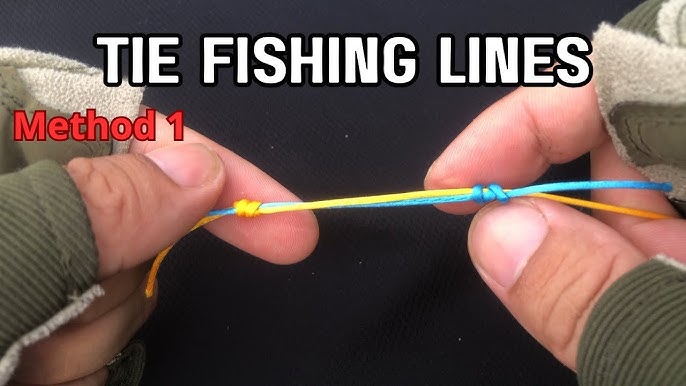
Have you ever been out fishing, only to realize your line is too short? Knowing how to tie two fishing lines together can save your day and keep you casting without interruption.
It’s a simple skill that can make a huge difference in your fishing experience. You’ll discover easy, reliable knots that you can master quickly. By the end, you’ll feel confident to join lines like a pro and never miss a catch because of a weak connection.
Ready to learn? Let’s dive in.
Choosing The Right Knot
Tying two fishing lines together is important for a strong connection. The knot you choose affects how well the lines hold.
Pick a knot that fits the line types and fishing conditions. A good knot keeps your lines from slipping or breaking.
Common Knots For Joining Lines
Some knots work better for joining two lines. These knots are easy to tie and strong under pressure.
- Blood Knot: Good for similar line sizes and smooth connection.
- Double Uni Knot: Works well for different line types and sizes.
- Albright Knot: Ideal for joining heavy to light lines.
- Surgeon’s Knot: Simple and strong for quick tying.
Factors Affecting Knot Selection
Choose a knot based on line thickness, material, and fishing type. Each factor changes how the knot holds.
- Line Diameter: Similar sizes tie better with some knots.
- Line Material: Monofilament and braided lines need different knots.
- Strength Needed: Use stronger knots for heavy fish or rough waters.
- Ease of Tying: Pick knots you can tie quickly and securely.

Credit: www.wikihow.com
Preparing The Fishing Lines
Before tying two fishing lines together, preparation is important. Proper preparation helps make a strong and reliable knot.
Start by getting the ends of both lines ready. This makes the tying process easier and the knot more secure.
Aligning The Line Ends
First, place the ends of the two fishing lines side by side. They should overlap by several inches.
Make sure both lines are straight and smooth. Avoid twists or kinks in the lines.
- Lay lines flat on a clean surface
- Overlap ends by 4 to 6 inches
- Keep lines taut but not stretched
Trimming And Cleaning Tips
Trim any frayed or damaged ends before tying. Use sharp scissors or a line cutter.
Clean the ends by wiping off dirt or water. Dry lines hold knots better and last longer.
- Cut ends cleanly and evenly
- Remove any loose fibers
- Wipe lines with a dry cloth
Step-by-step Knot Tying
Tying two fishing lines together is important to keep your line strong. Different knots work best for different fishing situations.
Here are easy steps for three popular knots used to join fishing lines safely and securely.
Double Uni Knot
The Double Uni Knot is strong and works well for lines of different sizes. It is simple and quick to tie.
To tie it, overlap the ends of the two lines. Make a loop with one line and wrap it around both lines five times. Pull the end through the loop. Repeat with the other line. Pull both standing lines to slide the knots together.
- Overlap line ends about 6 inches
- Make a loop with one line
- Wrap the line 5 times around both lines
- Pull the end through the loop
- Repeat steps for the other line
- Pull main lines to tighten knots together
Blood Knot
The Blood Knot is good for joining similar-sized lines. It holds well and stays slim, making it easy to pass through rod guides.
Overlap the lines about 6 inches. Twist one line around the other five times and tuck the tag end back between the two lines. Do the same with the other line. Pull both tag ends to tighten the knot.
- Overlap lines by 6 inches
- Twist one line 5 times around the other
- Pass tag end between both lines
- Repeat with the other line
- Pull both tag ends to tighten
- Trim extra tag ends
Improved Clinch Knot
The Improved Clinch Knot is often used to tie line to hooks, but it can also join lines in a pinch. It is easy to tie and strong.
Overlap the lines and make five wraps with one line around both lines. Pass the tag end through the loop near the eye, then through the big loop. Pull tight and trim the tag end.
- Overlap the two lines
- Wrap one line 5 times around both
- Pass tag end through small loop
- Pass tag end through larger loop
- Pull tight and trim tag end
Securing The Knot
When tying two fishing lines together, securing the knot is very important. A strong knot keeps the lines from slipping or breaking. This section explains how to tighten the knot properly and check its strength.
Tightening Techniques
After making the knot, you need to tighten it slowly and firmly. Pull both ends of the lines evenly to avoid twisting or weakening the knot. Wetting the lines before tightening can reduce friction and help the knot slide into place smoothly.
- Moisten the knot with water or saliva before pulling
- Pull both line ends evenly and slowly
- Avoid jerking or sudden strong pulls
- Make sure the knot tightens neatly without overlapping loops
- Trim any excess line close to the knot after tightening
Checking Knot Strength
After tightening, test the knot to ensure it holds under pressure. You can do this by pulling firmly on both lines. If the knot slips or the lines break, retie it. Using a simple table can help track knot tests for different line types.
| Line Type | Test Method | Result |
|---|---|---|
| Monofilament | Pull with hand force | Strong, no slip |
| Braid | Pull with pliers gently | Secure, no break |
| Fluorocarbon | Pull and check knot shape | Stable, tight knot |
Common Mistakes To Avoid
Tying two fishing lines together needs care and skill. Many beginners make simple errors. These mistakes can cause your knot to fail.
This guide explains common problems to watch out for. Fixing these will help you keep your lines strong and secure.
Loose Knots
One of the biggest mistakes is making the knot too loose. Loose knots slip and can come undone easily. Always pull the knot tight after tying.
- Do not leave slack in the knot.
- Make sure to wet the lines before tightening.
- Pull each line end firmly to secure the knot.
- Practice knot tying to improve your technique.
Incorrect Line Overlap
Incorrect line overlap weakens the connection. The lines must overlap evenly for the knot to hold well. Uneven overlap causes stress points.
| Mistake | Effect | How to Fix |
| Lines overlapped too short | Knot slips under tension | Overlap at least 6 inches before tying |
| Uneven line thickness overlap | Thicker line cuts thinner line | Adjust knot type for different line sizes |
| Lines crossed incorrectly | Knot jams and weakens | Align lines parallel before tying |
Tips For Different Line Types
Tying fishing lines correctly is important for a strong connection. Different lines need different knots and care. Knowing the right method helps avoid line breaks.
This guide covers tips for tying monofilament to monofilament, fluorocarbon to fluorocarbon, and braided to monofilament lines. Learn the best ways to join each type.
Monofilament To Monofilament
Monofilament lines are stretchy and easy to knot. The double uni knot works well for joining two monofilament lines. It keeps strength and stays tight.
- Overlap the lines by 6 inches
- Make a loop with one line and wrap it 5 times around the other line
- Pull the tag end through the loop
- Repeat with the other line
- Wet the knots and pull tight
Fluorocarbon To Fluorocarbon
Fluorocarbon is stiff and less stretchy. The blood knot is a good choice for joining fluorocarbon lines. It holds well but needs care to tie correctly.
| Step | Action |
| 1 | Overlap the lines by 8 inches |
| 2 | Wrap one line around the other 5 times |
| 3 | Pass the tag end through the center of the wraps |
| 4 | Repeat with the other line |
| 5 | Wet the knot and pull slowly to tighten |
Braided To Monofilament
Braided lines are thin and slippery. Use the double uni knot or the Albright knot to join braided to monofilament. These knots grip well and resist slipping.
Tips for tying braided to monofilament:
- Keep the braided line dry while tying
- Overlap lines by 6-8 inches
- Use plenty of wraps on the braided line
- Moisten knots before pulling tight
- Trim tag ends close to the knot
Testing Your Connection
After tying two fishing lines together, testing your connection is very important. This step ensures your knot will hold under pressure and not break during fishing.
There are different ways to test the strength of your knot. Knowing when to retie your lines can save you from losing fish and gear.
Pull Test Methods
The pull test is the simplest way to check your knot. Hold both ends of the line and pull hard. Feel if the knot slips or weakens.
- Pull the lines slowly at first, then increase the force.
- Check if the knot stays tight and secure.
- Look for any damage or fraying near the knot.
- Repeat the test a few times for confidence.
When To Retie
Retie your lines if you notice any of these signs after testing:
| Problem | Reason to Retie |
| Knot slips under pressure | Weak connection can fail |
| Line feels thin or worn near knot | Line may break easily |
| Knot looks uneven or loose | Improper tying reduces strength |
| Lines twisted or tangled | Can cause knot failure |

Credit: www.youtube.com

Credit: www.wikihow.com
Frequently Asked Questions
What Is The Best Knot For Tying Lines?
The Double Uni Knot is often recommended for tying two fishing lines. It’s strong and reliable. This knot works well with monofilament, fluorocarbon, and braided lines. Its ease of use and versatility make it a popular choice among anglers.
How Do You Tie A Double Uni Knot?
To tie a Double Uni Knot, overlap the two lines. Make a loop with one line and wrap it around both lines 4-6 times. Tighten by pulling both lines. Repeat with the other line. Pull all four ends to secure the knot.
Can You Tie Braided Line To Monofilament?
Yes, you can tie braided line to monofilament using the Double Uni Knot. This knot provides a strong connection. It ensures that both lines hold well under pressure. This is essential for successful fishing.
What Are Common Mistakes To Avoid?
Avoid crossing the lines incorrectly when tying the knot. This can weaken the connection. Ensure each wrap is tight and neat. Loose wraps can cause the knot to slip. Always moisten the knot before tightening to prevent friction damage.
Conclusion
Tying two fishing lines together is simple with the right steps. A strong knot keeps your lines secure and ready for fishing. Practice makes the process easier and faster over time. Use clean, dry lines to avoid slipping or weakening.
Try different knots to find what works best for you. This skill helps you handle longer lines or fix breaks quickly. Keep your fishing experience smooth and enjoyable with proper line joining. Stay patient and confident—it pays off on every fishing trip.