Imagine you’re planning a big dinner party, and you want everything to be perfect. You’ve got the recipes, the ingredients, and the enthusiasm.
But what about preserving those delicious homemade sauces and marinades ahead of time? Enter vacuum sealing—a game-changer for keeping liquids fresh and flavorful. You might be wondering, “How do you vacuum seal liquids without making a mess? ” The answer is simpler than you think.
In this guide, you’ll discover the secrets to effectively vacuum sealing liquids, ensuring your culinary creations stay fresh and ready to impress. Let’s unlock the mystery and elevate your kitchen skills to a whole new level. Keep reading to find out how!
Credit: business.walmart.com
Choosing The Right Vacuum Sealer
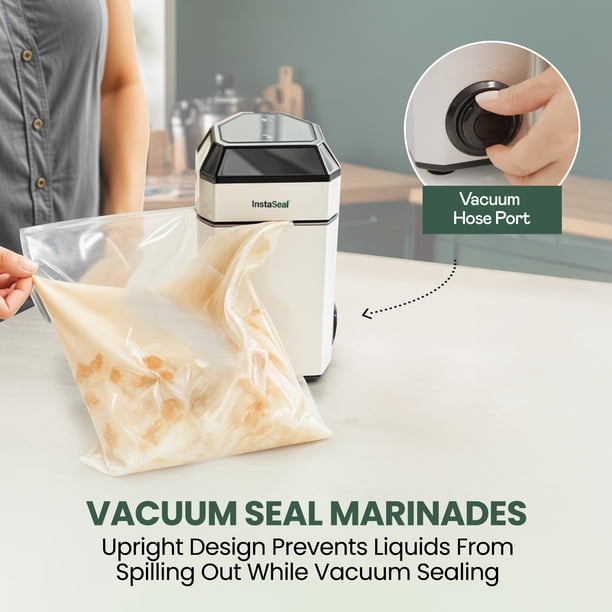
Choosing the right vacuum sealer is important for sealing liquids effectively. Not all sealers handle liquids well. Some models are designed to manage liquids without making a mess or ruining the seal. Selecting a sealer with the right features helps keep liquids fresh and prevents leaks.
Types Of Vacuum Sealers
Vacuum sealers come in different types. Each type suits different needs and budgets.
- External Vacuum Sealers:These are the most common. They work by sealing bags placed outside the machine. Good for dry foods but tricky for liquids.
- Chamber Vacuum Sealers:These machines seal bags inside a chamber. They handle liquids better because they remove air evenly. Ideal for soups and marinades.
- Handheld Vacuum Sealers:Small and portable. Best for quick sealing but not great for liquids.
Features For Sealing Liquids
Look for features that help seal liquids safely.
- Pulse or Manual Vacuum Mode:Allows control over suction to avoid sucking liquid into the machine.
- Seal Only Option:Lets you seal the bag without vacuuming, useful for liquids.
- Double Seal:Creates a stronger seal to prevent leaks.
- Removable Drip Tray:Catches any spills for easy cleaning.
- Adjustable Vacuum Strength:Helps control suction power based on liquid thickness.
Selecting Suitable Containers And Bags
Selecting the right containers and bags is key for vacuum sealing liquids effectively. The choice affects sealing quality and prevents leaks. Containers and bags must handle pressure and keep the liquid safe.
Material Considerations
Choose bags and containers made from strong, durable materials. Look for BPA-free plastics that are safe for food. Thick, multi-layered bags resist punctures and prevent air from entering. Containers should have airtight lids that seal tightly. Materials should be flexible enough to allow air removal but strong enough to hold liquids securely.
Sizes And Shapes
Select bags and containers that fit the amount of liquid perfectly. Avoid overfilling to prevent spills during sealing. Flat, wide bags work well for liquids because they spread the liquid thinly. Containers with wide openings make filling and cleaning easier. Use smaller containers for sauces or dressings, larger ones for soups or broths.
Preparing Liquids For Sealing
Preparing liquids for vacuum sealing requires careful attention to avoid messes and ensure a tight seal. Liquids can be tricky because they can spill or foam, which might interfere with the sealing process. Taking a few simple steps before sealing can make a big difference in preserving your liquids effectively.
Cooling And Pre-freezing
Warm liquids are more likely to spill and create foam during vacuum sealing. Cooling your liquid down to room temperature helps reduce this risk significantly. For even better results, try pre-freezing the liquid until it’s partially solid but still flexible. This firm texture prevents splashing and ensures the vacuum sealer works smoothly.
Think about juice or broth you want to store. Pouring it into a bag and freezing it for an hour or two before sealing can save you from cleaning up spills later. Have you ever noticed how thick ice cream is easier to seal than melted ice cream? The same principle applies here.
Avoiding Spills And Foam
Preventing spills starts with using the right containers or bags designed for liquids. Use heavy-duty vacuum seal bags with enough room to accommodate the liquid’s expansion if frozen. Avoid overfilling the bags—leave at least an inch of space at the top for sealing.
Foam is another challenge. Liquids like carbonated drinks or soups can foam up during vacuuming, causing air pockets. To minimize foam, gently pour the liquid into the bag, avoiding agitation. You can also pause the vacuum sealer mid-cycle to release pressure, then continue sealing.
Have you tried sealing liquids without these tips? It often leads to frustrating leaks or weak seals. By cooling liquids and managing foam, you protect your food and your vacuum sealer from damage.
Credit: www.vevor.com
Step-by-step Vacuum Sealing Process
Vacuum sealing liquids might seem tricky at first, but with the right approach, you can preserve soups, sauces, and even fresh juices without a mess. The key is to control the liquid’s placement and the sealer’s settings to avoid spills and ensure an airtight seal. Let’s break down the process into clear, manageable steps that you can try at home.
Setting Up The Sealer
Start by choosing a vacuum sealer that has a “moist” or “gentle” setting. These options slow down the suction to prevent liquids from being pulled into the machine. Make sure your sealer’s sealing strip is clean and dry to create a strong seal.
Place the sealer on a flat surface near your workspace. Keep a clean towel handy for quick wipe-ups, just in case some liquid escapes. Have your vacuum bags or rolls ready, ideally ones designed to handle liquids.
Filling And Positioning
Pour your liquid into the vacuum bag, but don’t fill it more than halfway. Leaving space at the top is crucial for proper sealing. If you’re sealing something very runny, consider freezing the liquid first until it’s solid or semi-solid. This prevents spills during vacuuming.
Place the open end of the bag inside the vacuum channel, making sure no liquid is near the sealing area. Position the bag so the edges lie flat and straight. This helps avoid wrinkles that can cause leaks or weak seals.
Sealing Techniques
Use the “pulse” or manual vacuum option if your machine has one. This lets you control how much air is removed and stops the process before the liquid is sucked out. Pause between pulses to check the liquid’s movement.
Once most of the air is out, activate the sealing function immediately to lock the bag. After sealing, wait a few seconds before removing the bag to ensure the seal is set. Double-check the seal by pressing gently around the edges; it should feel firm and airtight.
Tips For Safe Storage And Handling
Handling and storing vacuum-sealed liquids requires attention to detail to maintain freshness and avoid leaks or spoilage. Safe storage practices help you protect your food and save money by extending shelf life. Let’s look at practical tips that keep your sealed liquids safe and easy to identify.
Labeling And Dating
Label every vacuum-sealed bag with the contents and the date you sealed it. This simple step saves you from guessing what’s inside later, especially when you have multiple bags in your freezer.
Use waterproof markers or printed labels to avoid smudging. Write clearly and include important details like the type of liquid and any added ingredients.
Think about your last time digging through a freezer drawer—how much easier would it have been if everything was labeled? This small habit can prevent wasted food and confusion.
Freezing And Refrigeration Guidelines
Vacuum sealing liquids doesn’t make them immune to spoilage, so proper temperature control is crucial. Always freeze liquids if you plan to store them longer than a few days.
Leave some space in the bag for liquids to expand as they freeze. This prevents the bag from bursting and causing a mess.
Refrigerate vacuum-sealed liquids only if you plan to use them within a couple of days. Otherwise, freezing is safer and keeps flavors intact.
Do you know how long your homemade broth or sauces last after sealing? Checking storage times can help you avoid unpleasant surprises and keep your kitchen running smoothly.
Common Mistakes To Avoid
Vacuum sealing liquids can save time and prevent spills, but it’s easy to make mistakes that ruin your efforts. Knowing what to avoid helps you get the best results every time. Let’s look at some common pitfalls that might be holding you back.
Overfilling Bags
Filling the bag too much is a common error that leads to leaks and failed seals. Liquids need space to move slightly during sealing, so leave at least 2-3 inches of headspace at the top.
Overstuffed bags put pressure on the seal, causing it to break or trap liquid inside the sealing strip. Have you ever opened a vacuum bag only to find liquid everywhere? This usually happens because the bag was overfilled.
Try portioning your liquids into smaller amounts before sealing. This simple habit prevents mess and saves your vacuum sealer from damage.
Sealing Warm Liquids
Sealing liquids that are still warm or hot is a recipe for disaster. Heat creates steam, which can interfere with the vacuum process and cause the bag to collapse unevenly.
Steam also increases the risk of liquid being sucked into the vacuum pump, damaging your machine. Allow your liquids to cool completely before sealing to avoid these issues.
Have you noticed steam buildup inside your vacuum bags before? Cooling your liquids first ensures a strong seal and protects your equipment.
Cleaning And Maintenance Of Equipment
Keeping your vacuum sealing equipment clean and well-maintained is key to sealing liquids effectively and safely. Residue from liquids can cause odors, clog the machine, or even lead to mold growth if left unattended. Taking care of your device after each use not only extends its life but also ensures every seal is airtight and reliable.
Post-sealing Cleanup
Right after sealing liquids, wipe down the sealing area with a damp cloth to remove any spills or splashes. Pay special attention to the gasket and sealing strip, as liquid buildup here can interfere with the vacuum process. If your machine has a removable drip tray, empty and wash it immediately to avoid sticky residue.
Have you noticed a sticky film forming inside your vacuum sealer? This often happens if liquids are not cleaned up quickly. Use a mild detergent and warm water to clean stubborn spots, then dry everything thoroughly before storing the machine.
Regular Maintenance Tips
- Check the gasket regularly for cracks or wear. A damaged gasket can cause poor seals and let liquids leak out.
- Lubricate moving parts if your manual recommends it, to keep the machine running smoothly.
- Run a few test seals without bags occasionally to ensure the heating element works properly and isn’t coated with debris.
- Store your vacuum sealer in a cool, dry place away from dust and moisture to prevent damage.
Have you ever skipped maintenance and ended up with a failed seal? It’s frustrating but avoidable. Routine care is quick and saves you from wasting food and bags in the long run.

Credit: avidarmor.com
Frequently Asked Questions
How Do You Vacuum Seal Liquids Safely?
To vacuum seal liquids safely, freeze them first. This prevents the liquid from being sucked into the vacuum machine. Use a container or bag designed for liquids and seal quickly to avoid spills or messes.
Can You Vacuum Seal Soups And Sauces?
Yes, you can vacuum seal soups and sauces. Freeze them in a flat layer before sealing. This keeps the liquid solid and protects the vacuum sealer from damage.
What Is The Best Vacuum Sealer For Liquids?
The best vacuum sealers for liquids have a “moist” or “pulse” mode. These settings prevent liquid from being sucked into the machine. Popular brands include FoodSaver and VacMaster.
Why Should Liquids Be Frozen Before Vacuum Sealing?
Freezing liquids prevents them from being drawn into the sealer. It also helps maintain the seal quality. This method reduces the risk of damage and contamination.
Conclusion
Vacuum sealing liquids takes care and the right method. Avoid spills by freezing liquids first or using special bags. This keeps food fresh longer and saves space. You can store soups, sauces, and juices safely. Practice a few times to get comfortable with the process.
Sealing liquids well helps reduce waste and saves money. Try different ways to see what works best for you. Keep your kitchen organized and enjoy fresh flavors every day.