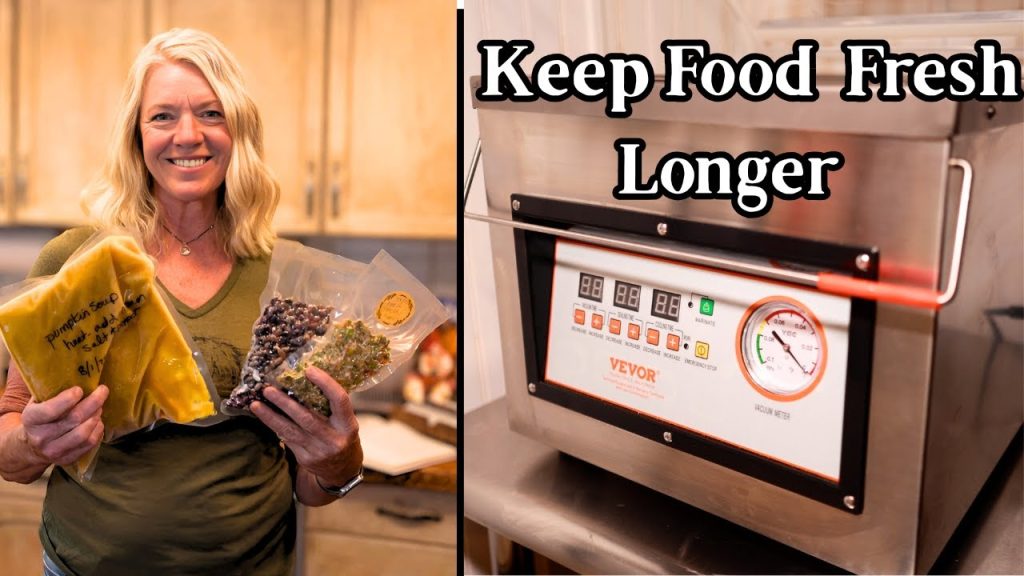
Are you tired of your delicious homemade soup losing its flavor and freshness too quickly? Imagine savoring a bowl of your favorite soup weeks after you first made it, with all the taste and nutrients perfectly preserved.
The secret? Vacuum sealing. This simple yet effective method can keep your soup fresh for longer, save you precious fridge space, and make meal prep a breeze. In this guide, you’ll discover the step-by-step process to vacuum seal soup like a pro.
Get ready to transform your kitchen game and never let a drop of your culinary masterpiece go to waste. Dive in to learn how you can make this magic happen.

Credit: www.amazon.com
Benefits Of Vacuum Sealing Soup
Vacuum sealing soup keeps it fresh and tasty for longer periods. It removes air, which slows down spoilage and prevents freezer burn. This method helps preserve the soup’s flavor, texture, and nutrients effectively.
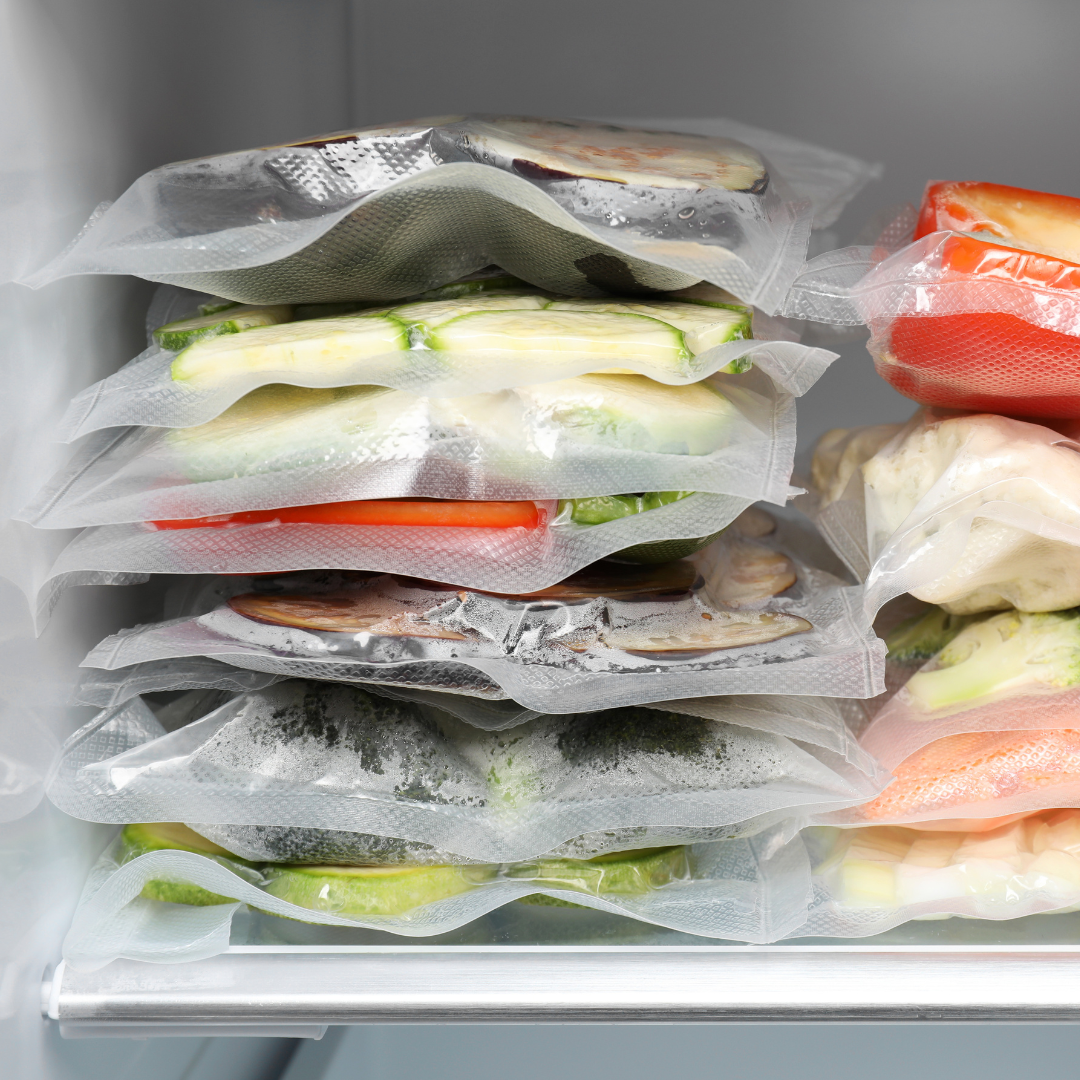
Vacuum sealing also saves space in your freezer or fridge. It creates compact packages that stack easily. This organization reduces clutter and makes meal prep faster.
Extends Shelf Life
Removing air slows down bacteria growth. Soup stays fresh for weeks or months. This means less food waste and more meals ready to eat.
Prevents Freezer Burn
Air causes ice crystals to form on frozen soup. Vacuum sealing stops this by sealing out air. Your soup keeps its original texture and taste.
Keeps Nutrients And Flavor
Air exposure causes nutrient loss and flavor changes. Vacuum sealing blocks air, locking in vitamins and taste. Your soup stays healthy and delicious.
Saves Storage Space
Vacuum-sealed soup packs tightly. It takes less room in your freezer or fridge. This makes storing multiple soups easier.
Makes Meal Prep Easy
Pre-packaged soup portions are quick to use. Just thaw and heat. This saves time for busy days and helps with portion control.
Choosing The Right Soup For Sealing
Choosing the right soup for vacuum sealing is essential to maintain flavor, texture, and safety. Not all soups handle the sealing and freezing process equally well. Understanding which soups work best can save you time and avoid disappointing results.
Soups With Low Acidity And Thick Consistency
Soups that have a thicker consistency and low acidity seal better. Cream-based soups, pureed vegetable soups, and hearty stews usually hold their shape and texture after sealing and freezing. These types of soups are less likely to separate or lose flavor.
Think about your favorite creamy tomato bisque or a rich mushroom soup. They often freeze well without becoming watery.
Soups To Avoid For Vacuum Sealing
High-acid soups, like those with a lot of tomatoes or citrus, may not seal as well. Acid can break down the bag material or affect shelf life. Broth-heavy soups with lots of water content also tend to lose texture and become watery after thawing.
Have you noticed how clear broths sometimes separate after freezing? These are best consumed fresh or frozen using other methods.
Consider The Ingredients’ Freeze-thaw Behavior
Ingredients like potatoes, pasta, or rice can change texture after freezing. They often become mushy or absorb too much liquid. If your soup contains these, consider adding them after thawing rather than before sealing.
I once sealed a chicken noodle soup with pasta inside and ended up with soggy noodles. Next time, I added pasta fresh after reheating, which made a big difference.
Safety Tips For Vacuum Sealing Soup
Always cool your soup completely before sealing to prevent bacteria growth. Hot liquids can create steam and interfere with the vacuum process. Additionally, leave some space at the top of the bag to allow for expansion during freezing.
Have you ever had a bag burst in your freezer? Leaving space helps avoid that messy surprise.
Preparing Soup For Vacuum Sealing
Preparing your soup correctly before vacuum sealing is key to preserving its freshness and flavor. Taking the right steps ensures your soup stays safe to eat and maintains its texture after freezing. Let’s look at how to get your soup ready for vacuum sealing so you can enjoy it later without any hassle.
Cooling Soup Properly
Hot soup can damage vacuum seal bags and increase the risk of bacterial growth. Allow your soup to cool down to room temperature before sealing. To speed this up, divide the soup into smaller containers and place them in an ice bath, stirring occasionally.
Have you ever sealed hot food only to find the bag melted or the seal ruined? Cooling first avoids that problem and keeps your vacuum sealer working smoothly.
Straining Solids If Needed
If your soup has large chunks of vegetables, meat, or pasta, consider straining or breaking them down. Large solids can create air pockets, making it harder for the vacuum sealer to remove all the air. This can lead to freezer burn or loss of flavor.
Use a fine mesh strainer or chop ingredients into smaller pieces. This helps the soup freeze evenly and seals tightly, so your meal tastes just like fresh when reheated.
Portioning Soup
Decide how much soup you want in each vacuum seal bag before sealing. Portioning helps you thaw only what you need, reducing waste and saving time. Use freezer-safe containers or bags that match your meal size.
Think about your typical serving size or how many people you usually cook for. Portioning also makes stacking and organizing in the freezer much easier.
Selecting Vacuum Seal Bags
Choosing the right vacuum seal bags is key for sealing soup effectively. The bag must hold liquids without leaking or bursting. Good bags protect flavor and freshness during storage. Knowing what type of material and size to pick helps avoid waste and mess.
Material Types
Vacuum seal bags come in different materials. The most common are:
- Plastic nylon:Strong and puncture-resistant. Good for thick soups.
- Polyethylene:Flexible and safe for liquids. Works well with most vacuum sealers.
- Multi-layered bags:Combine materials for extra durability and air barrier.
Choose bags that are designed for liquids. Some bags have special channels to help air escape. This prevents suction problems and spills.
Size Considerations
Select a bag size that fits the amount of soup you want to seal. Too large bags waste space and plastic. Too small bags risk overflow and poor sealing.
- Small bags (quart size) work for single servings.
- Medium bags suit a few cups of soup.
- Large bags fit bigger batches or family meals.
Measure your soup before sealing. Leave some space at the top for sealing and expansion when freezing.
Step-by-step Vacuum Sealing Process
Vacuum sealing soup might sound tricky, but breaking the process down makes it manageable and efficient. Each part of the process ensures your soup stays fresh, flavorful, and free from freezer burn. Let’s walk through how to vacuum seal soup properly, so you can enjoy your homemade meals anytime.
Filling The Bags
Start by letting your soup cool completely. Hot liquids can create steam that affects the vacuum seal and may damage your machine. Pour the soup into vacuum seal bags, leaving enough space at the top—about 2 to 3 inches—to allow proper sealing.
Be careful not to overfill the bags. If you add too much, the liquid might spill out during sealing. Consider dividing larger batches into smaller portions to make sealing easier and more effective.
Removing Air Effectively
Removing air is crucial to prevent freezer burn and keep your soup fresh longer. Place the open end of the bag into the vacuum sealer’s chamber or use a handheld vacuum sealer designed for liquids.
If your machine has a “moist” or “liquid” setting, use it to avoid sucking up the soup. Alternatively, you can freeze the soup in the bag for an hour until it’s partially solid, then vacuum seal to minimize liquid intake.
Sealing And Checking
Once the air is removed, seal the bag tightly. Pay attention to the seal line—it should be straight and fully closed without wrinkles or gaps. A weak seal can let air in and ruin your soup over time.
After sealing, inspect the bag for leaks by gently pressing around the seal. If you spot any issues, reseal the bag or use a new one. Your soup is now ready to store safely in the freezer or refrigerator.
Credit: packfreshusa.com
Storing Vacuum Sealed Soup
Storing vacuum sealed soup preserves freshness and extends its usability. Proper storage keeps flavor and nutrients intact. It also prevents freezer burn and contamination. Vacuum sealing removes air, slowing down spoilage effectively.
Freezer Storage Tips
- Cool soup completely before sealing to avoid moisture buildup.
- Use heavy-duty vacuum bags designed for freezing.
- Seal bags tightly to remove all air pockets.
- Label each bag with the date and type of soup.
- Lay bags flat in the freezer for even freezing and easy stacking.
- Keep the freezer at 0°F (-18°C) or lower for best results.
Shelf Life Expectations
Vacuum sealed soup lasts longer than regular storage. Most soups stay fresh for up to 6 months in the freezer. Cream-based soups may last around 3 months for best taste. Thaw soup in the refrigerator overnight before reheating. Avoid refreezing thawed soup to maintain quality. Always check for off smells or changes in texture before use.
Reheating Vacuum Sealed Soup Safely
Reheating vacuum sealed soup safely is key to preserving both its flavor and your health. Improper thawing or heating can cause uneven temperatures, encouraging bacteria growth. Taking the right steps helps keep your soup delicious and safe to eat every time.
Thawing Methods
Thawing vacuum sealed soup properly prevents sudden temperature changes that can spoil the food. The safest way is to move the sealed bag from the freezer to the refrigerator and let it thaw slowly overnight. This keeps the soup at a safe temperature and maintains the texture.
If you’re short on time, place the vacuum sealed bag in a bowl of cold water. Change the water every 30 minutes until the soup softens. Avoid using hot water, as it can partially cook the soup and create hot spots.
Have you ever accidentally thawed soup at room temperature and noticed a strange smell? That’s a clear warning sign that bacteria may have started to grow. Always opt for controlled thawing to avoid this risk.
Heating Techniques
Once thawed, heating soup evenly is crucial to avoid cold spots where bacteria can hide. You can heat vacuum sealed soup directly in boiling water by submerging the sealed bag for 5-10 minutes. Just make sure the bag is designed to withstand boiling temperatures.
If you prefer, cut open the bag and pour the soup into a pot. Heat it on medium, stirring occasionally to distribute heat evenly. This method gives you control over texture and seasoning adjustments.
Microwaving is quick but requires caution. Transfer soup to a microwave-safe container, cover it loosely, and heat in short bursts, stirring in between. This prevents overheating some areas while leaving others cold.
Common Mistakes To Avoid
Vacuum sealing soup can be a game-changer for meal prep, but it’s easy to slip up if you’re not careful. Some common mistakes can ruin the texture, flavor, or even safety of your soup. Avoiding these pitfalls will help you enjoy your soup just as much after freezing as when it’s freshly made.
Not Cooling The Soup Properly Before Sealing
Sealing hot soup right away might seem convenient, but it’s risky. Heat can create steam inside the bag, which interferes with the vacuum seal and can cause bacterial growth. Always let your soup cool to room temperature or chill it in the fridge before vacuum sealing.
Using The Wrong Type Of Vacuum Bag
Not all vacuum bags are designed for liquids like soup. Thin or non-freezer bags can leak or puncture easily. Choose bags labeled as suitable for liquids or freezer-safe to ensure your soup stays fresh and mess-free.
Overfilling The Bags
It’s tempting to pack the bag to the brim to save space, but overfilling can cause leaks or make sealing difficult. Leave at least 1 to 2 inches of space at the top of the bag to allow for proper sealing and expansion when freezing.
Not Removing Enough Air
Air left inside the bag causes freezer burn and spoils the soup faster. Make sure your vacuum sealer is working properly and that the bag edges are clean to get a strong, airtight seal. Have you checked your vacuum sealer’s suction lately?
Sealing Soup Without Portioning
Vacuum sealing one large batch might seem efficient, but it can be inconvenient when you only want a small serving. Divide your soup into meal-sized portions before sealing. This saves time later and reduces food waste.
Tools And Accessories To Enhance Sealing
Vacuum sealing soup keeps it fresh and tasty for longer. Using the right tools and accessories makes sealing easier and more effective. These items help prevent leaks, maintain flavor, and extend storage time. They also simplify the process, saving time and effort.
Vacuum Sealer Machine
A vacuum sealer machine is the main tool for sealing soup. It removes air from bags, creating a tight seal. Choose a model with adjustable settings for liquids. This prevents spills and ensures a strong seal.
Vacuum Seal Bags And Rolls
Use high-quality vacuum seal bags or rolls. These are made to handle liquids without breaking. Choose thick, BPA-free bags for safety and durability. Rolls allow custom bag sizes to reduce waste.
Sealing Clips And Stands
Sealing clips hold bags upright during sealing. This stops soup from spilling inside the machine. Bag stands also support bags for easy filling and sealing. They keep your workspace clean and organized.
Jar Sealer Attachments
Jar sealer attachments fit some vacuum sealers. They allow sealing soup in glass jars. This is good for small portions and gifts. Jars protect soup from damage during storage.
Freezer Trays And Containers
Freezer trays help portion soup before sealing. Freeze soup in trays, then seal in bags. This method avoids mess and speeds freezing. Use airtight containers designed for vacuum sealing to keep soup fresh.
Credit: lemproducts.com
Frequently Asked Questions
How Do You Prepare Soup For Vacuum Sealing?
Cool soup completely before sealing to prevent steam buildup. Pour soup into freezer-safe bags, leaving space for expansion. Seal using a vacuum sealer, removing as much air as possible to preserve freshness.
Can You Vacuum Seal Hot Soup Directly?
No, vacuum seal hot soup can cause steam and damage the sealer. Always cool soup to room temperature before sealing. This prevents moisture from interfering with the vacuum process.
What Bags Are Best For Vacuum Sealing Soup?
Use heavy-duty, BPA-free vacuum seal bags designed for liquids. These bags prevent leaks and freezer burn. Avoid thin or non-freezer safe bags for best results.
How Long Does Vacuum-sealed Soup Last In The Freezer?
Vacuum-sealed soup lasts up to 6 months in the freezer. Proper sealing prevents air exposure and freezer burn. Label bags with dates for easy tracking.
Conclusion
Vacuum sealing soup helps keep it fresh longer. It stops air and bacteria from spoiling food. You can store soup safely in the freezer or fridge. This method saves space and reduces waste. Always cool the soup before sealing to avoid damage.
Use strong vacuum bags for best results. Sealed soup stays tasty and ready to eat anytime. Try this simple step to enjoy homemade soup later. Easy, safe, and smart food storage.