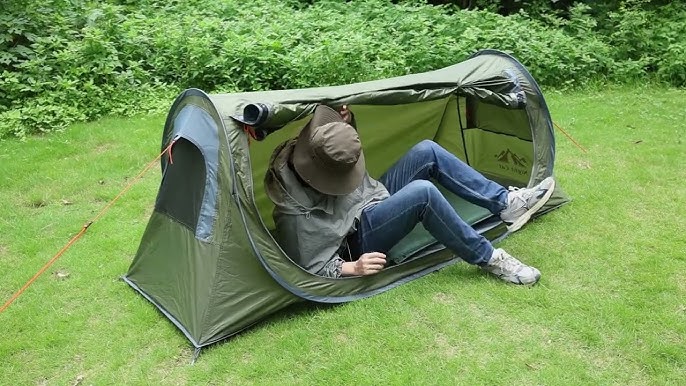
Imagine waking up in the middle of the night to the sound of rain tapping on your tent. You feel a drop of water, and suddenly your cozy shelter turns into a damp, uncomfortable mess.
You don’t want that to happen to you. So, how do you waterproof a tent to keep yourself dry and comfortable no matter the weather? This guide will show you simple, effective ways to protect your tent from leaks and moisture.
By the end, you’ll know exactly what to do before your next adventure, ensuring your tent stays dry and your trip stays enjoyable. Keep reading—you’ll thank yourself when the rain starts falling.
Choosing Waterproof Tents
Choosing the right waterproof tent keeps you dry during rain. It helps you enjoy your outdoor trips without worry.
Look closely at tent materials, seams, and waterproof ratings. These factors decide how well your tent stops water.
Fabric Types And Coatings
Tent fabrics come in nylon or polyester. Both are light and strong. Coatings make fabric waterproof.
Common coatings include polyurethane and silicone. Silicone is more durable and flexible. Polyurethane is cheaper and good for light rain.
- Nylon: strong but may stretch when wet
- Polyester: resists stretching and UV damage
- Polyurethane coating: water-resistant and affordable
- Silicone coating: very water-resistant and lasts longer
Seam Construction
Seams are where tent parts join. Water can leak if seams are weak. Look for sealed or taped seams.
Seam sealing uses special tape or glue to cover needle holes. This stops water from entering the tent.
- Double-stitched seams add strength
- Taped seams cover holes for water protection
- Seam sealant can be applied after purchase
- Check seams regularly for damage
Waterproof Ratings Explained
Waterproof ratings show how much water fabric can hold before leaking. Ratings are in millimeters (mm).
A higher rating means better waterproofing. Most tents have ratings from 1000 mm to 5000 mm or more.
| Rating (mm) | Waterproof Level | Use |
|---|---|---|
| 1000 – 1500 | Basic | Light rain and short trips |
| 1500 – 3000 | Good | Regular rain and camping |
| 3000 – 5000 | Very Good | Heavy rain and long trips |
| 5000+ | Excellent | Extreme weather and mountaineering |
Credit: www.battlbox.com
Essential Waterproofing Gear
Keeping your tent dry is key for a good camping trip. Waterproofing gear helps protect your shelter from rain and moisture. These tools and materials make your tent last longer and keep you comfortable.
Below are important items to help waterproof your tent effectively.
Tent Footprints And Tarps
Tent footprints and tarps go under your tent. They stop water from seeping up from the ground. A footprint is made to fit your tent’s shape. Tarps are larger and can cover more area.
- Protect tent floor from moisture and dirt
- Prevent damage from rocks and sticks
- Help extend tent lifespan
- Easy to clean and dry
Seam Sealers And Sprays
Seams are weak spots where water can leak. Seam sealers fill these gaps to block water. Waterproof sprays add a protective coating to the tent fabric. Both keep your tent dry in wet weather.
| Product Type | Use | Effect |
| Seam Sealer | Apply on tent seams | Stops water from leaking |
| Waterproof Spray | Spray on tent fabric | Adds water-resistant layer |
Waterproofing Repair Kits
Small tears or holes reduce waterproofing. Repair kits fix these spots quickly. They usually include patches, glue, and instructions. Carry one kit to handle emergencies and keep your tent dry.
- Self-adhesive patches for easy fixes
- Strong glue for fabric repair
- Instructions for quick application
- Compact and easy to carry
Preparing Your Tent For Waterproofing
Waterproofing your tent keeps you dry during rain. Proper preparation helps the waterproofing last longer.
Start by getting your tent clean and ready. Check for damage and remove old sealants before applying new ones.
Cleaning And Drying
Cleaning your tent removes dirt and oils that stop waterproof coatings from sticking. Always dry your tent completely to avoid mold.
- Set up the tent outdoors or in a large space.
- Use mild soap and warm water with a soft sponge.
- Gently scrub the fabric without harsh chemicals.
- Rinse well to remove all soap residues.
- Let the tent air dry fully before the next step.
Inspecting For Damage
Look closely at the tent fabric and seams. Small tears or holes can let water in. Fix these before waterproofing.
| Damage Type | Signs to Check | Fix Needed |
| Tears | Visible cuts or rips in fabric | Patch with repair tape or fabric |
| Seam Wear | Loose threads or gaps | Re-sew or apply seam sealer |
| Holes | Small punctures or holes | Use patch kits or sealant |
Removing Old Sealants
Old sealants can peel or crack and reduce new waterproofing’s effect. Remove them carefully before applying fresh sealant.
Use warm water and a soft cloth to rub the sealant areas. Avoid strong solvents that may damage the fabric.
Applying Seam Sealant
Waterproofing your tent is important to keep you dry during wet weather. Applying seam sealant helps stop water from leaking through the stitched seams. This guide explains how to choose and apply the right seam sealer for your tent.
Seam sealant works by creating a waterproof layer over the needle holes made during sewing. It is a simple process but requires care to get the best results. Read on to learn about the best products and steps to apply them.
Selecting The Right Seam Sealer
Not all seam sealers are the same. You must pick one that fits your tent fabric and use case. Here are the main types:
- Water-based sealers:Easy to clean and safe for most fabrics. They dry clear and stay flexible.
- Solvent-based sealers:Stronger and more durable but have a strong smell and need good ventilation.
- Silicone-based sealers:Waterproof and flexible but may not stick well to some fabrics.
- Polyurethane sealers:Provide a tough, long-lasting barrier but can be harder to apply evenly.
Step-by-step Application
Follow these steps to seal your tent seams properly:
- Clean the seams with rubbing alcohol and let dry.
- Lay the tent flat and stretch the seam slightly.
- Apply seam sealant evenly along the stitched seam using a brush or applicator.
- Make sure to cover all needle holes and overlap the fabric edges.
- Wipe off any excess sealant to avoid sticky spots.
Curing Time And Tips
After applying seam sealant, curing time is important to get a full waterproof seal. Most sealants need 12 to 24 hours to dry completely.
| Sealant Type | Typical Drying Time | Recommended Conditions |
| Water-based | 12 hours | Dry, well-ventilated area |
| Solvent-based | 24 hours | Warm, ventilated space |
| Silicone-based | 18 hours | Room temperature, no direct sun |
| Polyurethane | 24 hours | Cool, dry place |
Keep the tent flat and avoid folding or packing it until the sealant cures. Check the product label for any special instructions. Reapply sealant after heavy use or cleaning to maintain waterproofing.
Using Waterproof Sprays
Waterproof sprays help protect your tent from rain and moisture. They add a protective layer that repels water and keeps your tent dry.
Applying these sprays correctly extends the tent’s life. It also improves comfort during camping trips by preventing leaks.
Types Of Waterproof Sprays
There are several waterproof sprays for tents. Each type has unique ingredients and benefits.
- Silicone-based sprays:These provide strong water resistance and last long.
- Fluoropolymer sprays:They create a durable, breathable barrier against water.
- Wax-based sprays:These add a natural waterproof layer but may reduce breathability.
- Acrylic sprays:They offer moderate water resistance and dry quickly.
Proper Application Techniques
Applying waterproof spray the right way ensures the best protection. Follow these steps to get good results.
- Clean your tent well. Remove dirt and dust before spraying.
- Set up the tent in a well-ventilated area or outdoors.
- Shake the spray can well to mix the ingredients.
- Hold the spray about 6 to 8 inches from the fabric.
- Spray evenly in a sweeping motion to cover all areas.
- Let the tent dry completely before packing or using it.
Frequency Of Reapplication
Waterproof sprays do not last forever. You need to reapply them to keep your tent protected.
| Condition | Reapplication Time |
|---|---|
| Regular use in dry weather | Every 1 year |
| Heavy rain or wet conditions | Every 6 months |
| Frequent washing or cleaning | After each wash |
| Visible water absorption or leaks | Immediately |

Credit: sheltent.com
Setting Up For Dry Camping
Keeping your tent dry is key for a good camping trip. You need to prepare well before rain comes.
This guide helps you set up a dry campsite. You will learn how to pick a spot and pitch your tent.
Choosing A Campsite
Pick a high spot to avoid water pooling around your tent. Stay away from low areas and valleys.
Look for natural windbreaks like trees or bushes. Make sure the ground is flat and firm for your tent.
- Avoid spots near rivers or streams
- Check for slopes to drain water away
- Clear debris and sharp objects from ground
- Choose spots with good natural shelter
Tent Pitching Tips
Tighten the tent fabric to stop water from pooling on top. Use all the stakes and guylines for support.
Face the tent door away from wind and rain. Place a groundsheet under your tent to keep moisture out.
- Stretch the tent floor flat before pitching
- Secure all corners and guylines firmly
- Keep tent fabric tight and wrinkle-free
- Use a footprint or groundsheet under the tent
Using Rain Flies And Ventilation
Attach the rain fly fully to cover the tent. This layer keeps rain out and protects the tent fabric.
Ventilate your tent by opening vents or windows. Good airflow stops condensation inside the tent.
- Make sure rain fly covers all mesh areas
- Use guy lines to keep rain fly tight
- Open vents to allow fresh air inside
- Avoid sealing the tent completely to reduce moisture
Maintaining Waterproofing Over Time
Keeping your tent waterproof is key for a dry and comfortable camping trip. Over time, tents lose their water resistance due to dirt, wear, and weather. Regular care helps keep the waterproof layer strong.
This guide covers how to clean your tent, apply waterproof sprays, and store it properly to extend its life.
Regular Cleaning
Dirt and grime can break down a tent’s waterproof coating. Clean your tent after every trip to keep it in good shape.
- Use a soft brush or cloth to remove loose dirt.
- Wash with mild soap and cold water only.
- Do not use harsh detergents or bleach.
- Rinse well to remove all soap.
- Let the tent dry fully before packing it away.
Reapplying Sealants And Sprays
Waterproof sprays and seam sealants restore the tent’s protective layer. Reapply these products regularly to keep the tent water-tight.
| Product | Use Frequency | Application Tips |
| Seam Sealant | Every 1-2 years | Apply on clean, dry seams only |
| Waterproof Spray | Before each camping season | Spray evenly on tent surface |
| Silicone Spray | As needed for extra protection | Test on small area first |
Storage Best Practices
Proper storage stops damage and keeps waterproofing intact. Store your tent in a dry, cool place away from direct sunlight.
- Make sure the tent is fully dry before folding.
- Keep it loose in a large storage bag, not compressed in a small stuff sack.
- Avoid damp or humid areas to prevent mold growth.
- Check the tent occasionally during long storage periods.

Credit: www.amazon.com
Troubleshooting Common Issues
Waterproofing a tent is crucial for camping in wet conditions. Sometimes, issues arise that need fixing.
Common problems include leaks, mold, and tears. Address these to ensure a dry and safe shelter.
Fixing Leaks
Leaks can occur at seams or fabric. Check these areas first. Use seam sealer to fix leaks along the seams. Apply a waterproof spray on the fabric.
Ensure the tent is dry before applying any products. Allow time for the products to cure completely.
Handling Mold And Mildew
Mold and mildew grow in damp tents. Clean with a mixture of water and white vinegar. Scrub gently to remove the growth.
Let the tent dry completely in the sun. Sunlight helps kill remaining spores.
- Use a soft brush for cleaning
- Ventilate the tent properly afterward
- Store in a dry place
Repairing Tears And Holes
Small tears can let water in. Use a tent repair kit to fix these. Cut a patch slightly larger than the tear.
Apply adhesive around the tear. Place the patch firmly over it. Allow to dry fully before use.
| Material | Use |
| Patch kit | Fixes small tears |
| Seam sealer | Seals seams against leaks |
| Waterproof spray | Repels water from fabric |
Frequently Asked Questions
How Do You Waterproof A Tent Effectively?
To waterproof a tent, clean it first, then apply a waterproof spray or seam sealer. Focus on seams, zippers, and fabric. Allow it to dry fully before use. This process prevents water leaks and keeps you dry during rain.
What Materials Are Best For Waterproofing Tents?
Silicone and polyurethane-based sprays are best for waterproofing tents. They create a durable, water-resistant layer. Seam sealers specifically protect stitching areas. Always choose products compatible with your tent fabric to avoid damage.
How Often Should I Waterproof My Tent?
Waterproof your tent at least once a year or before each camping season. Frequent use or harsh weather may require more frequent treatment. Regular waterproofing maintains tent performance and extends its lifespan.
Can I Waterproof A Tent Without Removing The Rainfly?
Yes, you can waterproof a tent without removing the rainfly. However, removing it allows better access to seams and fabric for thorough application. For best results, treat both the tent body and rainfly separately.
Conclusion
Waterproofing a tent keeps you dry and comfortable outdoors. Use a good waterproof spray and seal all seams well. A rainfly adds extra protection from heavy rain. Remember to set up your tent on high, dry ground. Check your tent regularly for holes or damage.
Small fixes now stop big problems later. Enjoy your camping trip without worrying about rain. Stay prepared, stay dry, and have fun outside.