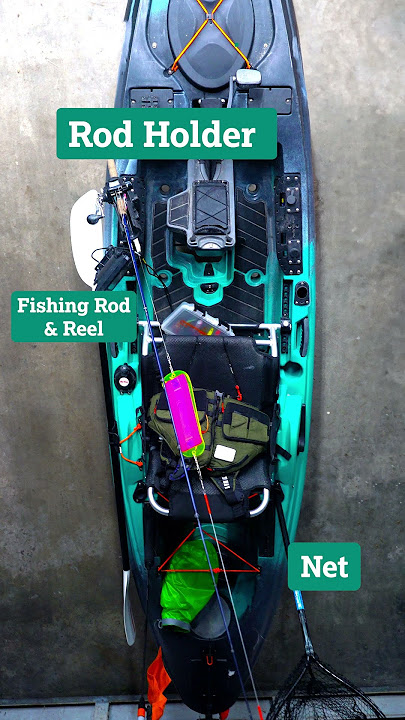
If you love fishing from your kayak, adding a fishing rod holder can change everything. Imagine having your rod secure and ready, freeing your hands for paddling or grabbing a catch.
You might wonder how to add one without hassle or extra gear cluttering your space. This guide will show you simple, practical steps to install a fishing rod holder that fits your kayak perfectly. By the end, you’ll be ready to fish smarter and enjoy every trip on the water even more.
Keep reading to discover how easy it is to upgrade your kayak for better fishing adventures.
Choosing The Right Rod Holder
Adding a fishing rod holder to your kayak helps keep your rod safe. It also frees your hands for other tasks.
Picking the right rod holder is important. It should fit your kayak and fishing style well.
Types Of Rod Holders
There are several types of rod holders. Each type works best in different situations.
- Flush Mount: Fits into the kayak’s surface for a clean look.
- Clamp-on: Attaches easily without drilling holes.
- Rail Mount: Fixes to kayak rails or bars.
- Adjustable: Allows you to change the rod’s angle.
Material Considerations
Rod holders come in different materials. Each material has its own strengths and weaknesses.
- Plastic: Lightweight and affordable but less durable.
- Aluminum: Strong and rust-resistant, good for saltwater.
- Stainless Steel: Very durable but heavier and more expensive.
- Composite: Combines strength and light weight.
Size And Compatibility
Check the size of your fishing rods before choosing a holder. The holder must fit your rod’s handle and length.
Make sure the rod holder works with your kayak model. Some holders need specific mounts or space.
- Measure the rod handle diameter for a good fit.
- Check the kayak’s mounting options.
- Consider how many rods you want to carry.
- Think about the holder’s position for easy reach.

Credit: www.youtube.com
Gathering Tools And Materials
Adding a fishing rod holder to your kayak makes fishing easier and more fun. Before starting, you need to collect the right tools and materials. This helps the installation go smoothly.
Gathering everything first saves time and avoids interruptions. Below are the essential tools and extra supplies you might need.
Essential Tools
You need some basic tools to attach the rod holder securely. These tools help you drill holes and fix the holder firmly.
- Power drill with drill bits
- Screwdriver (Phillips or flathead)
- Measuring tape or ruler
- Marker or pencil for marking spots
- Wrench or pliers for tightening bolts
Additional Supplies
Besides tools, some extra supplies make the installation strong and safe. These materials protect your kayak and keep the holder steady.
- Fishing rod holder kit
- Marine-grade sealant or silicone
- Stainless steel screws or bolts
- Washers to spread pressure
- Sandpaper to smooth drilled areas
Selecting The Best Location On Your Kayak
Adding a fishing rod holder to your kayak makes fishing easier. Choosing the right spot for the holder is important. It should be easy to reach and not disturb your paddling.
Think about where the rod holder will fit best. The right place keeps your kayak balanced and lets you fish comfortably.
Accessibility And Comfort
Place the fishing rod holder where you can easily grab your rod without stretching. It should not block your paddling or movement. Comfort helps you enjoy fishing for longer.
- Near your seat but out of the way of your legs
- Within arm’s reach so you don’t have to lean forward
- Not too close to other gear that might block access
Balancing Weight
Keep your kayak balanced by placing the rod holder where it won’t tip the boat. Too much weight on one side can make paddling hard and unsafe.
| Location | Effect on Balance |
| Center near the seat | Maintains good balance |
| Far left or right side | May cause tipping |
| Front or back | Can affect steering and stability |
Avoiding Interference
Do not place the holder where it can get in the way. Avoid blocking paddle strokes or gear storage. It should not catch on ropes or straps.
- Clear path for paddling on both sides
- No blockage of kayak handles or hatches
- Rod holder does not hit your knees or feet
- Easy to mount and remove without tools
Preparing The Kayak Surface
Adding a fishing rod holder to your kayak requires good surface preparation. This ensures the holder stays secure while you fish.
Focus on cleaning, drying, and carefully marking drill points before installation. These steps make your work easier and safer.
Cleaning And Drying
Start by cleaning the kayak surface where you want to attach the rod holder. Remove all dirt, grease, and salt residue.
- Use mild soap and water with a soft cloth.
- Rinse thoroughly with clean water.
- Dry the area completely with a clean towel.
- Let it air dry for at least 30 minutes to remove moisture.
Marking Drill Points
Mark the exact spots on the kayak where you will drill to install the rod holder. Accurate marking prevents mistakes and damage.
| Tool | Purpose | Tip |
| Measuring tape | Measure distances for placement | Double-check measurements |
| Marker or pencil | Mark drill points | Use a fine tip for accuracy |
| Level | Ensure rod holder will be straight | Check both horizontal and vertical alignment |
Installing The Rod Holder
Adding a fishing rod holder to your kayak makes fishing easier and safer. You can keep your hands free while you paddle or manage other gear.
This guide covers how to install the rod holder properly. Follow these steps to attach it securely and avoid damage.
Drilling Holes Safely
Before drilling, check the kayak’s material and thickness. Avoid drilling into areas with structural support or wiring.
Use a small drill bit first to create a pilot hole. This helps prevent cracking or slipping. Wear safety glasses to protect your eyes.
- Mark the spot clearly with a pencil
- Use tape over the drill area to reduce splintering
- Drill slowly and steadily
- Keep the drill perpendicular to the surface
Attaching The Holder
Place the rod holder base on the drilled holes. Make sure it fits flush against the kayak’s surface.
Align the holder so it points in the right direction for easy access. Check that it will not interfere with paddling or other equipment.
- Position holder for comfort and convenience
- Double-check hole alignment before securing
- Test fit without tightening first
Securing With Hardware
Use stainless steel screws or bolts to resist rust from water. Tighten the hardware evenly to avoid cracking the kayak hull.
Apply waterproof sealant around holes to stop leaks. Check tightness regularly, especially after your first few trips.
- Choose corrosion-resistant screws or bolts
- Use a washer under each screw for better hold
- Apply marine sealant to all drilled holes
- Do not overtighten to avoid damage
Testing And Adjusting
After installing a fishing rod holder on your kayak, you must test and adjust it. This ensures safety and comfort during your fishing trips.
Proper testing helps avoid accidents and makes your fishing experience better. Focus on stability and the holder’s angle and position.
Checking Stability
Check if the fishing rod holder stays firmly in place. It should not wobble or shift while paddling or casting your line.
- Press down on the holder to test tightness.
- Try to move the holder side to side.
- Make sure all screws and clamps are secure.
- Adjust or tighten parts if you find any looseness.
- Test again after adjustments to confirm stability.
Adjusting Angle And Position
Set the holder’s angle and position for easy access to your rod. This reduces strain and improves your fishing efficiency.
| Adjustment | Purpose | How to Check |
| Angle | Comfortable rod reach | Hold rod in holder and try casting |
| Position | Easy to grab and secure | Sit in kayak and reach holder easily |
| Height | Avoid interference with paddling | Check clearance while paddling |
Maintenance Tips
Adding a fishing rod holder to your kayak is a great idea. To keep it working well, you need to care for it regularly. Proper maintenance makes your fishing trips safer and more fun.
Below are some simple tips to help you maintain your kayak’s fishing rod holder. Follow these to keep it in good shape for a long time.
Regular Inspections
Check your rod holder often for any signs of damage or wear. Look for cracks, loose parts, or rust. Catching problems early stops bigger damage later.
- Inspect mounting bolts and screws for tightness
- Look for cracks in plastic or metal parts
- Check for corrosion or rust spots
- Test the holder’s grip to ensure it holds rods firmly
Cleaning And Care
Clean your fishing rod holder after each use. Saltwater and dirt can cause damage if not removed. Use mild soap and fresh water for cleaning.
| Cleaning Task | Recommended Action |
| Remove salt and dirt | Rinse with fresh water after each trip |
| Clean tight spots | Use a soft brush or cloth |
| Dry the holder | Wipe with a dry towel to avoid rust |
| Lubricate moving parts | Apply silicone spray or light oil monthly |

Credit: www.youtube.com

Credit: www.reddit.com
Frequently Asked Questions
What Tools Do I Need To Install A Kayak Rod Holder?
You need a drill, screws, mounting brackets, measuring tape, and a pencil for installation. These tools help secure the holder safely on your kayak.
Where Is The Best Spot To Mount A Rod Holder On A Kayak?
Mount the rod holder near your seating area for easy access. Ensure it doesn’t interfere with paddling or kayak balance.
Can I Install A Rod Holder Without Drilling Holes?
Yes, you can use clamp-style or adhesive rod holders. These options avoid drilling and prevent damage to your kayak’s surface.
How Do I Secure A Rod Holder To Prevent Movement?
Use proper mounting hardware and tighten screws firmly. Adding marine-grade adhesive can improve stability and resist water exposure.
Conclusion
Installing a fishing rod holder on your kayak is simple and rewarding. It saves space and makes fishing more convenient. Secure your rod holder properly for a stable setup. Choose a spot that’s easy to reach. Use the right tools and follow instructions carefully.
This ensures safety and effectiveness. Enjoy more fishing time with this easy upgrade. With a little effort, your kayak becomes more versatile. Happy fishing adventures await!