
Are your car headlights shining too high or too low? This can make night driving dangerous and tiring for your eyes.
Adjusting your car headlights isn’t as hard as you might think. With a few simple steps, you can improve your visibility and keep yourself and others safer on the road. Keep reading to learn exactly how to adjust your car headlights quickly and easily—so you can drive confidently every time you hit the road.

Credit: www.familyhandyman.com
Tools Needed
Adjusting car headlights requires the right tools. Using proper tools helps you fix the lights safely and correctly.
Gather all necessary items before starting. This makes the process smooth and faster.
Screwdrivers
Screwdrivers help you access the headlight housing. Most cars use either a flathead or Phillips screwdriver for adjustments.
Wrench Or Socket Set
A wrench or socket set is needed to loosen bolts. These bolts hold the headlights in place and allow you to move them.
Measuring Tape
Use a measuring tape to check the height and distance of the headlight beams. This ensures the lights are aimed correctly.
Masking Tape And Wall
You need a flat wall and masking tape to mark the beam positions. This helps you see where the lights hit and adjust them properly.
Tools Checklist
- Flathead and Phillips screwdrivers
- Wrench or socket set
- Measuring tape
- Masking tape
- Flat wall or garage door

Credit: classicbroncos.com
Preparing Your Vehicle
Adjusting car headlights starts with proper vehicle preparation. This makes sure your lights are aimed correctly for safe driving.
Follow these steps to get your car ready before adjusting the headlights.
Park On Level Ground
Find a flat and level surface to park your car. Uneven ground can cause wrong headlight alignment.
Make sure the car faces a wall or garage door about 25 feet away. This helps you see the headlight beams clearly.
Check Tire Pressure
Check all tires for the correct pressure. Uneven tire pressure can tilt your car and affect headlight aim.
Use a tire pressure gauge and fill tires to the recommended levels found in your car manual.
- Check front left tire
- Check front right tire
- Check rear left tire
- Check rear right tire
Ensure Proper Load
Remove extra weight inside the car. Heavy loads can change how the car sits and alter headlight direction.
Make sure the gas tank is half full for the most accurate headlight adjustment.
Locate Headlight Adjustment Screws
Adjusting your car headlights starts with finding the adjustment screws. These screws let you change the direction of the light beam.
Knowing where the screws are helps you aim the headlights correctly for safe driving at night.
Check Under The Hood
Open the car’s hood to see the back of the headlight assembly. Most adjustment screws are located here.
You may need a flashlight to spot the screws in darker areas behind the headlights.
Look For Two Types Of Screws
Cars usually have two screws per headlight. One controls vertical aim and the other controls horizontal aim.
- Vertical screw moves light up and down
- Horizontal screw moves light left and right
Use Your Owner’s Manual
The owner’s manual shows the exact location of adjustment screws for your car model. It can save time.
Look for diagrams or pictures that point to the screws near your headlights.
Identify Screw Types
Adjustment screws can be different shapes. Some need a Phillips screwdriver, others need a flathead or a hex key.
- Phillips screws have a cross shape
- Flathead screws have a single slot
- Hex screws require an Allen wrench
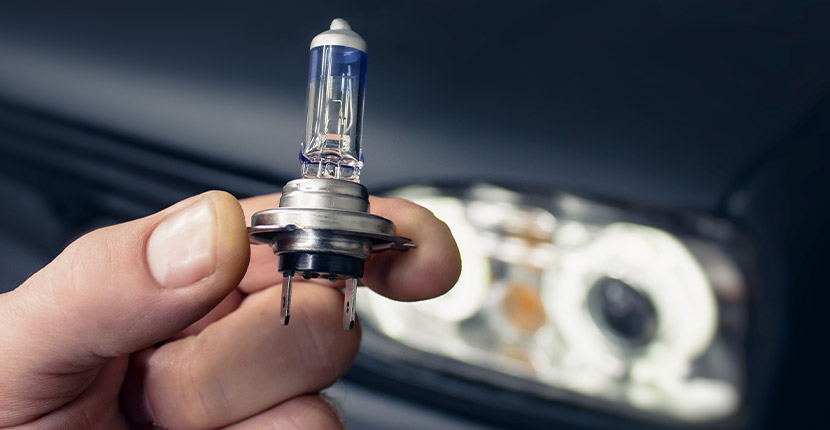
Credit: www.batteriesplus.com
Marking The Wall For Alignment
Properly marking the wall helps you align car headlights accurately. It guides you to adjust headlights to the correct height and direction.
This process requires clear marks on the wall that match your car’s headlight positions. Follow the steps carefully for best results.
Measure Distance From Wall
Park your car on a flat surface facing a wall. The distance from the wall should be even and measured precisely.
- Measure 25 feet (7.6 meters) from the wall to the front of your car.
- Mark the spot where the car’s front tires will rest.
- Make sure the car is level and not tilted.
- Turn off your headlights before marking the wall.
Mark Horizontal And Vertical Lines
Marking lines on the wall helps you check headlight alignment in two directions. Use tape or chalk to mark the lines clearly.
| Line Type | Purpose | How to Mark |
|---|---|---|
| Horizontal Line | Matches headlight height | Measure from ground to center of headlights. Mark this height on the wall. |
| Vertical Lines | Align each headlight left to right | Mark vertical lines on the wall in front of each headlight center. |
Adjusting The Vertical Aim
Properly aimed headlights help you see the road better at night. Vertical aim means adjusting how high or low the light shines.
If headlights point too high, they can blind other drivers. If too low, your view of the road is limited. Adjusting vertical aim fixes this.
Prepare Your Car And Tools
Park your car on a flat surface facing a wall. Keep the car about 25 feet from the wall. Make sure the tires are straight.
You need a tape measure, screwdriver, and masking tape. Also, check your car manual for headlight adjustment points.
- Park 25 feet (7.6 meters) from a flat wall
- Keep tires straight and car on level ground
- Gather tape measure, screwdriver, and masking tape
- Find adjustment screws in your car manual
Mark The Headlight Center On The Wall
Turn on your low beam headlights. Use masking tape to mark the vertical and horizontal center points of each light on the wall.
Measure the height from the ground to the center of the headlight. Use this to place horizontal tape lines on the wall.
- Turn on low beam headlights
- Mark vertical center of each light on the wall
- Measure headlight height from ground
- Place horizontal tape line at headlight height
Adjust The Vertical Aim Of Headlights
Locate the vertical adjustment screw near the headlight. Turn it slowly to raise or lower the beam until it aligns with the tape mark.
The top of the brightest part of the beam should be just below the horizontal tape line. This prevents blinding other drivers.
- Find vertical adjustment screw near headlight
- Turn screw slowly to raise or lower beam
- Align beam top with tape line on wall
- Keep beam slightly below horizontal tape mark
Test Your Adjustments
After adjusting, test your headlights by driving on a dark road. Check if you can see clearly without glare oncoming drivers.
If needed, repeat the adjustment steps until the light aim is correct. Proper aim improves safety for everyone.
Adjusting The Horizontal Aim
Properly aimed headlights improve road visibility at night. Adjusting the horizontal aim helps prevent blinding other drivers.
This guide explains how to adjust the horizontal aim of your car headlights safely and effectively.
Prepare Your Car And Tools
Find a level surface facing a wall or garage door. Park your car about 25 feet (7.5 meters) away. Make sure the tires are properly inflated and the car has a half tank of fuel.
Mark The Headlight Position On The Wall
Turn on your low beam headlights. Use masking tape to mark the center of each headlight beam on the wall. Mark a vertical line for each headlight beam’s center and a horizontal line at the same height as the headlight center.
Locate The Horizontal Adjustment Screw
Open the hood and find the adjustment screws on the headlight assembly. The horizontal aim screw usually moves the beam left or right. Check your car manual if you are not sure.
Adjust The Horizontal Aim
Use a screwdriver to turn the horizontal adjustment screw slowly. Move the beam so its center aligns with the vertical tape line on the wall. Turn the screw clockwise or counterclockwise as needed.
- Turn the screw a small amount.
- Step back and check the beam position.
- Repeat until the beam aligns with the tape line.
Test Your Adjustment
After adjusting both headlights, test them on a dark road. Check that the beams point straight ahead and do not blind other drivers.
| Common Issues | What to Do |
| Beam too far left | Turn adjustment screw to move beam right |
| Beam too far right | Turn adjustment screw to move beam left |
| Beam not level | Adjust vertical screw or seek professional help |
Testing The New Alignment
After adjusting your car headlights, you need to test the new alignment. This ensures your lights point in the right direction. Proper alignment improves your visibility and safety on the road.
Testing is simple and requires only a few tools. You can do it in your driveway or a quiet street at night. Follow these checks to confirm your headlights are correctly adjusted.
Prepare Your Vehicle For Testing
Park your car on a flat surface facing a wall or garage door. Make sure the car is about 25 feet from the wall. Remove any extra weight from the vehicle and ensure the tires are properly inflated.
Mark The Headlight Positions
Turn on your low beam headlights. Use masking tape to mark the center of each light on the wall. Place vertical and horizontal tape strips to create crosshairs at the light’s center point.
Check Light Patterns And Aim
Look at the light beams on the wall. The bright spots should be slightly below and to the right of the marks. This prevents blinding other drivers and lights the road ahead.
- Both beams should be level horizontally.
- The top of the beam should be below the tape’s horizontal line.
- The brightest point should be near the vertical line but slightly right.
Use A Headlight Alignment Chart
| Measurement | Proper Alignment |
| Distance from wall | 25 feet (7.6 meters) |
| Height of headlight center | Measured and marked on wall |
| Vertical aim | Light beam top 2 inches (5 cm) below center mark |
| Horizontal aim | Bright spot 2 inches (5 cm) right of center mark |
Common Mistakes To Avoid
Adjusting car headlights is important for safe driving at night. Many people try to do it themselves but make errors. These mistakes can reduce visibility and cause glare for other drivers.
Knowing what to avoid helps you fix headlights the right way. This guide explains common errors and how to prevent them.
Not Preparing The Car Properly
Many drivers skip preparing their car before adjusting headlights. This can lead to wrong alignment results. The car should be on a flat surface with correct tire pressure and a half tank of fuel.
Ignoring Manufacturer Instructions
Car makers provide specific steps for headlight adjustment. Ignoring these can cause mistakes. Always check your car’s manual for the right procedure and tools.
Using Wrong Tools
Adjusting headlights with improper tools can damage parts or cause poor alignment. Use the correct screwdrivers or adjustment keys recommended for your vehicle.
Adjusting Headlights Without A Target
One common mistake is adjusting headlights without a clear target. You need a wall or garage door and a tape measure to set the beam at the right height and direction.
- Park the car 25 feet from a flat wall
- Mark the center of the headlight beams on the wall
- Use these marks to guide your adjustments
Over-adjusting The Headlights
Turning the adjustment screws too much can misalign headlights. This causes poor road illumination or blinds other drivers. Make small changes and check results often.
Failing To Check Both Headlights
Some people adjust only one headlight and forget the other. This creates uneven light beams. Both headlights need to be adjusted to the same level.
| Common Mistake | Why It Happens | How to Avoid |
| Not preparing the car | Rushing the job | Check tire pressure and surface |
| Ignoring manual | Skipping instructions | Read the car guide first |
| Wrong tools | Using random tools | Use recommended tools |
| No target for beam | Adjusting by feel | Use wall and marks |
| Over-adjusting | Trying to fix quickly | Make small changes |
| One headlight only | Not checking both | Adjust both headlights |
When To Seek Professional Help
Adjusting car headlights can improve your night driving safety. Sometimes, the problem is more complex than simple adjustment.
Knowing when to get help from a professional can save you time and prevent damage to your car.
Headlights Are Not Aligning Correctly
If your headlights do not point in the right direction after adjustment, it may indicate a bigger issue. This can cause poor road visibility and blind other drivers.
A professional can check for damaged parts or broken mounts that affect headlight alignment.
Headlight Beam Flickers Or Goes Out
If your headlights flicker or stop working after adjustment, the problem may be electrical. Loose wiring or a faulty bulb socket can cause this.
An expert can inspect the electrical system and fix wiring or replace parts safely.
You Cannot Access Adjustment Screws
Some cars have hard-to-reach adjustment screws. Trying to force them can cause damage.
A professional has the right tools and knowledge to adjust headlights without harming your vehicle.
Headlight Lens Is Cloudy Or Damaged
Cloudy or cracked lenses reduce light output even if the headlights are aligned well. Cleaning or replacing lenses may be needed.
A technician can restore or replace lenses to improve your headlights’ brightness and safety.
After A Car Accident
Collisions can damage headlight mounts or wiring inside the car. Even small impacts may misalign headlights.
Have a professional inspect your headlights after any accident to ensure proper function and safety.
Frequently Asked Questions
How Do I Know When To Adjust My Car Headlights?
Check if headlights are misaligned, causing poor road visibility. Signs include uneven light patterns and glare for other drivers. Regularly inspect after hitting bumps or replacing bulbs to ensure safe driving conditions.
What Tools Do I Need To Adjust Car Headlights?
You need a screwdriver, masking tape, measuring tape, and a flat surface. Some cars require specific adjustment tools. Always consult your vehicle’s manual before starting the headlight adjustment process.
Can I Adjust Headlights Without Professional Help?
Yes, many cars allow DIY adjustment using simple tools and a wall. Follow step-by-step guides carefully for accurate alignment. However, if unsure, seek professional assistance for safety and precision.
How High Should Car Headlights Be Adjusted?
Headlights should be level with the ground or slightly downward. Proper height avoids blinding other drivers and ensures optimal road illumination. Use a wall and measure light beam height for precise adjustment.
Conclusion
Properly adjusting car headlights improves road safety at night. It helps you see clearly and avoid accidents. Regular checks keep your lights bright and aimed correctly. Small steps can save lives and reduce repair costs. Take time to adjust headlights for a safer drive.
Clear vision makes every trip easier and safer. Don’t ignore your headlights; they matter a lot. Bright, well-aligned lights protect you and others on the road.