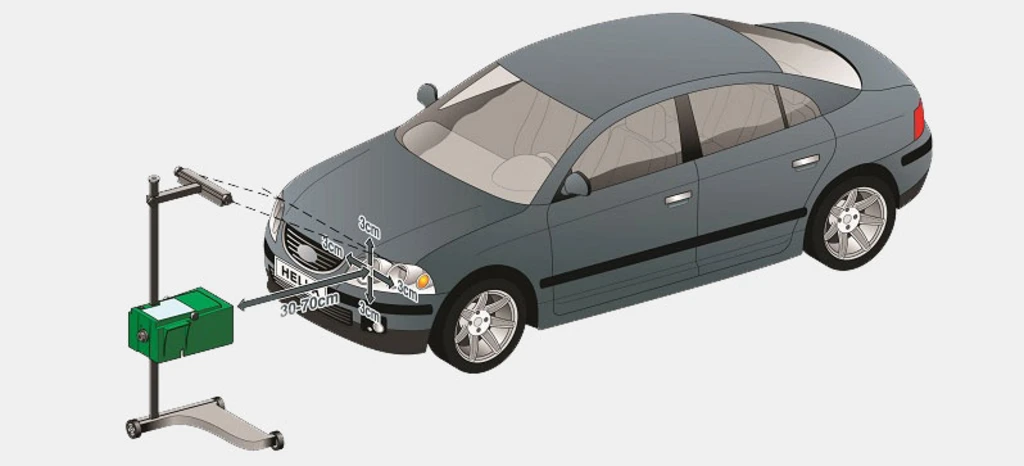
Are your car’s headlights shining too low or blinding other drivers? Adjusting your headlights might seem tricky, but it’s easier than you think—and it can make a big difference in your safety on the road.
If your lights aren’t aimed right, you might miss important details while driving at night, or you could be causing problems for others. In this guide, you’ll learn simple steps to adjust your headlights yourself, saving you time and money.
Keep reading, and by the end, you’ll feel confident making sure your headlights are lighting the way just right.

Credit: www.familyhandyman.com
Tools Needed
Adjusting your car headlights needs some basic tools. These tools help you aim the lights correctly. Properly aimed headlights improve night visibility and safety.
Before starting, gather all the tools you need. This saves time and makes the job easier.
Screwdriver
You need a screwdriver to turn the adjustment screws on your headlights. Some cars use a Phillips head, while others use a flathead screwdriver.
Tape Measure
A tape measure helps you measure the distance between the car and the wall. This distance is important for proper headlight alignment.
Masking Tape And Marker
Masking tape and a marker are useful to mark spots on the wall. These marks show where your headlights should aim.
Flat Surface And Wall
You need a flat surface and a plain wall to test the headlights. Park your car facing the wall at a set distance for correct adjustment.
Headlight Adjustment Chart
This chart shows the correct headlight height and angle for your car model. Use it to match your adjustments perfectly.
- Screwdriver (Phillips or flathead)
- Tape measure
- Masking tape
- Marker
- Flat surface and wall
- Headlight adjustment chart
Preparing Your Car
Adjusting your car headlights needs careful preparation. Proper setup helps you get accurate alignment.
Start by readying your vehicle with these important checks. This makes the adjustment process smooth and safe.
Check Tire Pressure
Uneven tire pressure can tilt your car, causing incorrect headlight aim. Check all tires before adjusting headlights.
- Use a reliable tire pressure gauge.
- Compare pressure to the manufacturer’s recommended levels.
- Adjust tires to the correct pressure if needed.
- Don’t forget the spare tire.
Ensure Proper Load
Your car’s weight affects headlight height. Make sure to carry normal weight for correct adjustment.
| Load Condition | Description |
| Empty | No passengers or cargo inside the car |
| Normal | Driver and typical passenger weight included |
| Full Load | Driver, passengers, and heavy cargo |
Adjust headlights with the car at normal load to avoid aiming too high or low.
Find A Level Surface
Park your car on a flat, level surface. This helps you see the true headlight beam position.
Look for:
- A flat driveway or garage floor
- No steep slopes or hills
- A place with a plain wall or garage door to project light
Locate Headlight Adjustment Screws
Adjusting your car’s headlights helps improve night driving safety. The first step is to find the adjustment screws.
These screws control the headlight beam’s direction. Knowing their location makes the adjustment process easier.
Check Under The Hood
Open the car’s hood to access the back of the headlight assembly. The adjustment screws are usually near the headlight bulb.
Look For Two Types Of Screws
- Vertical adjustment screw: moves the beam up or down
- Horizontal adjustment screw: moves the beam left or right
Use Your Vehicle Manual
The owner’s manual often shows the exact location of the adjustment screws. It can save time and prevent mistakes.
Identify Screw Types And Tools Needed
| Screw Type | Common Tool |
| Phillips head | Phillips screwdriver |
| Slotted head | Flathead screwdriver |
| Hex head | Socket wrench or Allen key |

Credit: classicbroncos.com
Marking The Wall
Marking the wall helps you adjust your car headlights correctly. It shows where the light beams hit.
Use a flat wall and a level surface to get the best marks for your headlights.
Measure Distance From Wall
Park your car straight in front of the wall. Measure the distance from the car’s headlights to the wall.
The ideal distance is usually 25 feet. Check your car manual for exact details.
Mark Headlight Height
Measure the height from the ground to the center of your headlights. Use a tape measure for this.
Make a small mark on the wall at this height for each headlight. This helps align the beams properly.
Draw Vertical Lines
Draw vertical lines on the wall at the same width as your headlights. These lines help center the beams.
Use a pencil and a level to make sure the lines are straight and accurate.
Adjusting The Headlights
Properly adjusted headlights improve your vision at night. They also help other drivers see you.
Adjusting headlights is simple and can be done at home with basic tools.
Vertical Adjustment
Vertical adjustment controls the up and down aim of the headlights. Incorrect height can blind other drivers or reduce your visibility.
To adjust vertically, park your car on a flat surface facing a wall. Mark the current light beam height on the wall.
- Locate the vertical adjustment screw near the headlight.
- Turn the screw clockwise to raise the beam.
- Turn the screw counterclockwise to lower the beam.
- Adjust until the beam matches the marked height on the wall.
Horizontal Adjustment
Horizontal adjustment moves the headlights left or right. Proper side-to-side aim prevents blinding oncoming traffic.
Use the horizontal adjustment screw to align the beam with your vehicle’s centerline or slightly to the right.
- Find the horizontal adjustment screw on the headlight assembly.
- Turn it clockwise to move the beam right.
- Turn it counterclockwise to move the beam left.
- Check alignment using marks on the wall or road lines.
Credit: www.mdxers.org
Testing Your Adjustments
After adjusting your car headlights, testing is key to ensure they shine correctly. Proper testing helps you avoid blinding other drivers and improves your night driving safety.
This section covers how to check your beam alignment and perform a drive test to confirm the adjustments.
Check Beam Alignment
Stand about 25 feet from a flat wall in a dark area. Turn on your headlights and look at the light beams on the wall. The brightest parts should be level with the car’s centerline and slightly right of center.
- Measure the height of your headlights from the ground.
- Mark this height on the wall with tape or chalk.
- Check that the top of the bright beam hits the marks.
- Adjust if the beam is too high, too low, or off to the side.
Drive Test
Take your car for a short night drive on an empty road. Watch how the headlights light up the road and roadside objects. Look for any dark spots or glare that could cause issues.
| Test Aspect | What to Look For | Action if Needed |
| Visibility Range | Road is well lit up to a safe distance | Adjust beam higher or stronger |
| Beam Spread | Light covers road width evenly | Adjust horizontal aim |
| Glare to Others | No blinding glare to oncoming cars | Lower or realign beam |
| Roadside Illumination | Clear view of signs and obstacles | Fine-tune vertical aim |
Common Mistakes To Avoid
Adjusting your car headlights helps you see better at night. It also makes your car safer for others on the road. Many people make mistakes that cause poor headlight aim.
Avoid these common errors to get the best results when you adjust your headlights.
Not Parking On A Level Surface
Always park your car on flat ground before adjusting headlights. If the surface is sloped, your headlights will not aim correctly. This leads to poor visibility or blinding other drivers.
Forgetting To Check Tire Pressure
Uneven tire pressure can tilt your car. This changes the angle of your headlights. Check and fix tire pressure before adjusting your lights to get accurate results.
Adjusting Headlights Without The Owner’s Manual
Your car’s manual shows the right way to adjust headlights. It tells you where the screws are and how much to turn them. Skipping the manual can cause wrong adjustments and damage.
Using Incorrect Tools
Use the right tools to adjust your headlights. Using the wrong screwdriver or wrench can strip screws or break parts. Always match tools to the screws or bolts on your car.
Not Measuring Headlight Height Correctly
Measure the headlight height from the ground before adjusting. This helps you line up the lights properly on the wall or screen. Guessing the height can lead to bad aiming.
Adjusting Headlights With Engine Off
Headlights can change position when the engine runs. Always adjust your headlights with the engine on. This gives a true idea of the beam direction when driving.
Ignoring Headlight Cleanliness
Dirty headlights reduce light output. Clean your headlight lenses before adjusting. Dirt or fog can make the lights look dim or misaligned.
Not Testing The Lights After Adjustment
After adjusting, test the headlights on the road. Check if the lights cover the road well and do not blind other drivers. Repeat adjustments if needed.
Frequently Asked Questions
How Do I Know If My Headlights Need Adjustment?
If your headlights are misaligned, you may notice uneven light patterns or glare. Check for dim spots or low visibility at night. Uneven road illumination or complaints from other drivers also indicate a need for adjustment.
What Tools Are Required To Adjust Car Headlights?
You typically need a screwdriver, masking tape, and a flat surface near a wall. Some cars may require specific adjustment tools found in the owner’s manual. These simple tools help you align headlights accurately.
Can I Adjust Headlights Without Professional Help?
Yes, adjusting headlights yourself is possible with basic tools and clear instructions. Ensure your car is on level ground and use a wall to guide alignment. Follow the manual or trusted guides for safe and effective results.
How Often Should Headlights Be Adjusted?
Headlights should be checked and adjusted at least once a year or after any front-end collision. Regular adjustment ensures safety and optimal visibility while driving at night or in poor weather.
Conclusion
Adjusting your car’s headlights ensures better visibility at night. It keeps you safe on the road. Start by gathering the right tools. Park on a level surface. Follow the steps for alignment. Check the beams’ height and direction. Make necessary tweaks using adjustment screws.
Test the lights on the road. Repeat adjustments if needed. Properly aligned headlights reduce glare for other drivers. This simple task boosts driving safety. It doesn’t require expert skills. So, check your headlights regularly. Keep them well-adjusted for a safer drive.