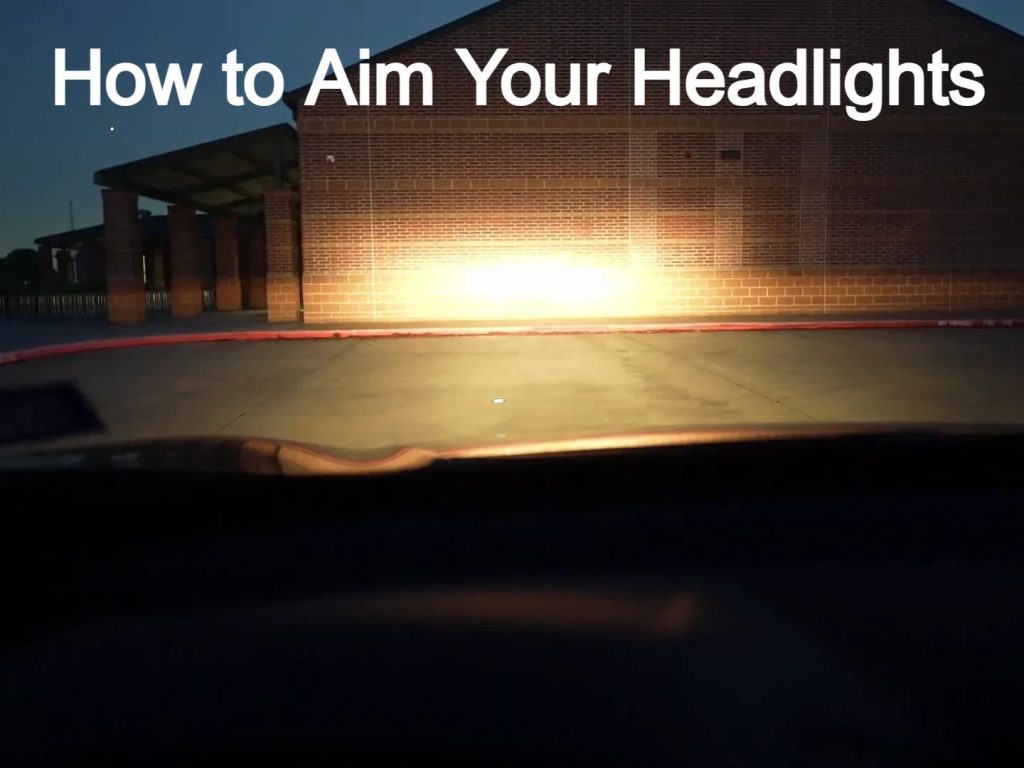
Are your car headlights shining too high or too low? Misaligned headlights can make driving at night unsafe for you and others on the road.
You might not realize it, but even a small adjustment can make a big difference in visibility and safety. You’ll learn simple, step-by-step tips to aim your car headlights correctly—no expensive tools or professional help needed. Keep reading to discover how easy it is to improve your night driving experience and protect yourself on every trip.

Credit: www.youtube.com
Importance Of Proper Headlight Aim
Aiming car headlights correctly is important for safe driving. Proper aim helps drivers see the road clearly at night.
Incorrect headlight aim can cause accidents or trouble with other drivers. It is a simple step that improves safety.
Safety Benefits
Properly aimed headlights make the road visible without blinding other drivers. This reduces the chance of crashes.
Good headlight aim helps you see signs, obstacles, and pedestrians early. This gives time to react and avoid danger.
- Prevents glare for oncoming traffic
- Improves your reaction time
- Makes night driving safer for everyone
Legal Requirements
Many places have rules about headlight aim. Cars must meet these rules to pass inspections.
Incorrect headlight aim can lead to fines or failed vehicle tests. Following the law keeps your car road-legal.
- Headlights must not blind other drivers
- There are set angles for headlight aim
- Regular checks are required in some areas
Improved Visibility
Correct headlight aim lights up the road where you need it most. This helps you see curves, signs, and hazards.
Better visibility reduces eye strain and fatigue during night driving. It makes driving more comfortable and less risky.
- Lights focus on the road ahead
- Reduces dark spots and shadows
- Helps spot animals or objects early
Tools Needed For Headlight Adjustment
Adjusting car headlights requires some basic tools. These tools help you set the lights at the right angle. Properly aimed headlights improve your night driving safety.
You may also use optional tools that make the process easier. Some drivers prefer extra equipment for more precise adjustments.
Basic Tools
Start with these basic tools to adjust your headlights correctly. They are easy to find and use for most cars.
- Screwdriver or socket wrench for adjustment screws
- Measuring tape to check headlight height
- Masking tape to mark the wall or garage door
- Flat surface near a wall to align the headlights
- Car owner’s manual for specific adjustment points
Optional Equipment
Optional tools can help you get more accurate results. These are useful if you want precise headlight aim or adjust lights often.
| Tool | Use |
| Headlight aiming tool | Measures beam pattern and angle |
| Level | Ensures the car is on a flat surface |
| Laser level | Projects straight lines for exact alignment |
| Headlight alignment chart | Guides where to aim the headlights |
Preparing Your Vehicle
Aiming your car headlights correctly helps you see the road better. It also makes driving safer at night.
Before adjusting the headlights, prepare your vehicle well. This ensures the aim is accurate and reliable.
Check Tire Pressure
Check the tire pressure on all four tires. Uneven pressure can tilt your car and affect headlight aim.
Use a tire pressure gauge to measure pressure. Inflate tires to the pressure recommended in your car manual.
Ensure Proper Load
Remove extra weight from your car. Heavy loads change how your car sits and can misalign headlights.
Make sure only the driver and necessary items are inside. This keeps your car level for accurate aiming.
Park On Level Ground
Park your car on a flat, level surface. Slopes can cause wrong headlight angles.
A level ground helps you see the true direction of the light beams. Use a garage floor or driveway if possible.
Credit: medium.com
Locating Headlight Adjustment Screws
Adjusting your car headlights helps you see better at night. It also makes your car safer for other drivers. To aim headlights correctly, first find the adjustment screws.
These screws let you change the direction of the light beam. They are usually near the headlight housing. Knowing their location makes aiming easier and faster.
Common Screw Locations
Most cars have headlight adjustment screws in a few common spots. These screws control the vertical and horizontal aim of the headlights.
- On top of the headlight housing
- At the back of the headlight assembly
- Near the side of the headlight, close to the fender
- Inside the engine bay, behind the headlight
- Below the headlight, near the bumper
Types Of Adjustment Mechanisms
Headlight adjustment screws come in different styles. Each type works in its own way to move the light beam.
| Type | Description | Common Location |
| Phillips Screw | Cross-shaped head, turned with a screwdriver | Top or back of headlight housing |
| Flathead Screw | Single slot, adjusted with flat screwdriver | Side or bottom of the assembly |
| Hex Bolt | Six-sided bolt, turned with a wrench | Behind the headlight or inside engine bay |
| Plastic Knob | Hand-turn knob, no tools needed | On top or side of headlight housing |
Setting Up A Target For Alignment
Aiming car headlights requires a clear target to ensure the lights point correctly. Setting up a target helps you see where the headlights shine. This guide shows how to prepare a target for accurate headlight alignment.
You will need a flat wall and a smooth surface to park your car. The target setup includes marking the wall, measuring the headlight height, and determining the distance from the wall.
Marking The Wall
Find a flat, vertical wall with space in front for your car. The wall should be clean and free of obstacles. Use masking tape or painter’s tape to mark points for the headlights.
Mark the center of each headlight beam on the wall. This helps you adjust the lights correctly during alignment.
- Park the car straight in front of the wall.
- Turn on the low beam headlights.
- Place tape at the center of each light beam on the wall.
Measuring Headlight Height
Measure the height of your headlights from the ground. This helps you set the tape marks at the correct level on the wall.
Use a tape measure or ruler. Measure from the ground to the center of each headlight lens.
- Ensure the car is on a flat surface.
- Measure straight up from the ground to the center of the headlight.
- Write down the height for both headlights.
Determining Distance From Wall
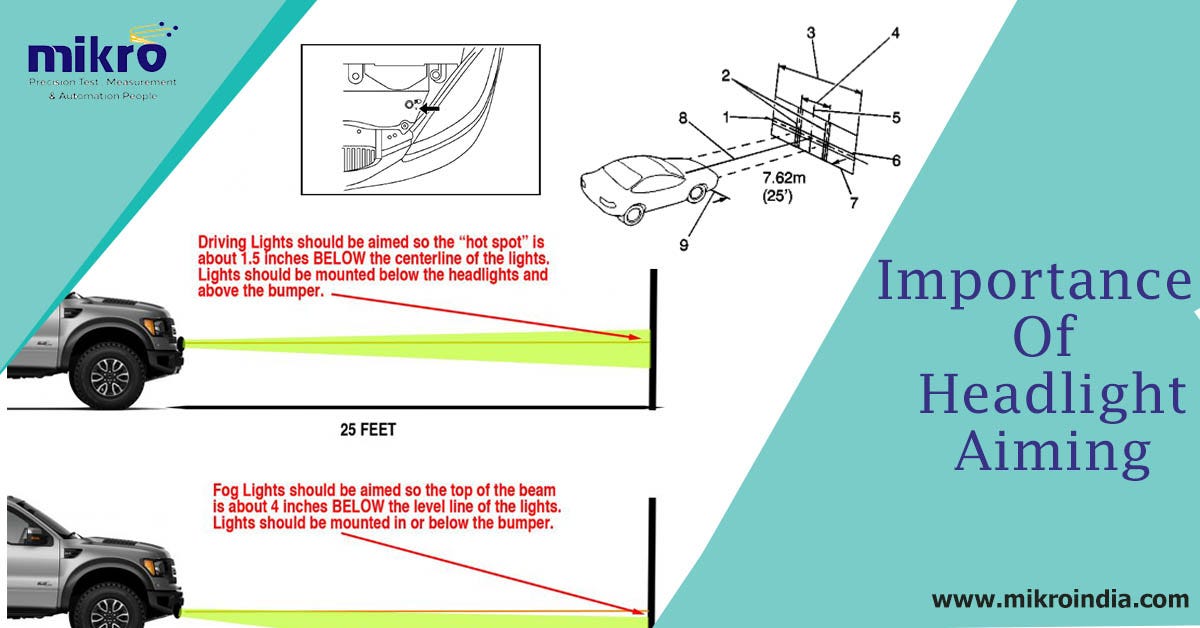
Position your car a certain distance from the wall. This distance is usually about 25 feet (7.5 meters). It helps give an accurate reflection of the headlight beam pattern.
Mark the spot on the ground where the front tires sit. Keep the car steady and straight during the process.
- Measure 25 feet from the wall to the front of the car.
- Use chalk or tape to mark the parking spot.
- Keep the car straight and stable at this distance.
Adjusting Vertical Aim
Proper vertical aim of your car headlights improves night driving safety. It prevents glare for other drivers and helps you see the road clearly.
This guide explains how to adjust the vertical aim step-by-step. You will learn to loosen screws, align beam height, and test the aim.
Loosening Adjustment Screws
Locate the vertical adjustment screws near your headlights. These screws control the up and down movement of the beam.
- Use a screwdriver that fits the screw head.
- Turn the screw counterclockwise to loosen it slightly.
- Do not remove the screws completely.
- Loosen both screws evenly if there are two.
Aligning Beam Height
Park your car on a flat surface facing a wall about 25 feet away. Turn on the headlights and mark the beam’s center height on the wall.
| Vehicle Distance from Wall | Beam Height Mark | Adjustment Goal |
|---|---|---|
| 25 feet (7.6 meters) | Current beam center height | Set beam center 2 inches (5 cm) below headlight height |
Turn the adjustment screws clockwise to raise the beam or counterclockwise to lower it. Aim for the beam to be slightly below the headlight height on the wall.
Testing The Vertical Aim
After adjusting, test the headlights on a dark road. Check if the light pattern is clear and does not blind oncoming drivers.
- Drive at normal speed on an empty road at night.
- Observe the light coverage and height.
- Ask a friend to watch if the beams shine too high.
- Repeat adjustments if needed for better alignment.
Adjusting Horizontal Aim
Properly aiming your car headlights improves road visibility at night. It also helps avoid blinding other drivers.
This guide focuses on adjusting the horizontal aim of your headlights to keep the beam centered and safe.
Centering The Beam
Start by parking your car on a flat surface facing a wall. Measure the height from the ground to the center of each headlight.
Mark the wall with tape at the same height as your headlights. Switch on the low beams and observe the light spots on the wall.
- Adjust the horizontal screws on the headlights to move the beam left or right.
- Keep the brightest part of the beam aligned with the tape marks.
- Make small adjustments and check after each change.
Avoiding Glare To Other Drivers
Incorrect horizontal aim can cause glare. This blinds oncoming drivers and increases accident risk.
- Do not aim headlights too far to the right or left.
- Keep the beam within the marked tape lines on the wall.
- Check your adjustments by driving on a dark road with oncoming traffic.
Final Horizontal Check
After adjusting, perform a final check to confirm proper beam alignment. Use this table to verify your results.
| Check Point | Expected Result |
|---|---|
| Beam center on wall tape | Aligned within 2 inches of tape mark |
| Beam spread | Even and symmetrical on both headlights |
| Glare test | No discomfort to oncoming drivers |
Common Mistakes To Avoid
Aiming car headlights correctly is important for safe driving at night. Many drivers make errors that reduce visibility or blind other drivers. Avoiding these mistakes helps keep the road safer for everyone.
Below are common mistakes people make when adjusting their headlights. Learn what to watch out for and how to aim your lights properly.
Over-adjusting Lights
Turning the headlight adjustment screws too much can cause problems. Lights aimed too high can blind other drivers. Lights aimed too low reduce how far you can see.
- Adjust lights little by little, not all at once.
- Check light height after each small change.
- Use a flat surface and a wall to guide adjustments.
- Refer to your car manual for proper aiming methods.
Ignoring Vehicle Load
Vehicle load affects headlight aim but many drivers ignore this fact. Carrying heavy loads in the back can tilt the car down in front. This changes where the lights point.
| Load Condition | Effect on Headlight Aim |
| Empty car | Lights aim at correct height |
| Full passenger load | Lights may point slightly higher |
| Heavy cargo in trunk | Lights point lower than needed |
| Mixed load | Lights aim varies, must be checked |
Not Testing In Real Conditions
Many people adjust headlights during the day or in a garage. This misses real driving conditions like road angle and darkness. Testing only in these conditions can cause errors.
To test headlights correctly:
- Drive on a dark road after adjustment.
- Observe if the lights illuminate the road properly.
- Check if the lights cause glare to oncoming drivers.
- Make small adjustments if needed, then retest.
Maintaining Headlight Performance
Proper headlight maintenance helps you see clearly at night. It also keeps your car safe for driving in low light.
Regular care keeps headlights bright and aimed correctly. This guide explains how to maintain your headlights well.
Regular Cleaning
Dirt and grime can block light from your headlights. Cleaning them often keeps light shining bright and clear.
Use a soft cloth and mild soap to clean the headlight lens. Avoid harsh chemicals that can damage the surface.
- Clean headlights monthly or after bad weather
- Use water and gentle soap for washing
- Dry with a soft, clean cloth
- Check for cracks or damage during cleaning
Replacing Bulbs Timely
Old bulbs can dim or stop working. Changing bulbs on time ensures your headlights shine bright.
Check your car manual for the right bulb type. Replace bulbs in pairs for even light output on both sides.
- Inspect bulbs every 6 months
- Replace bulbs if light is dim or flickering
- Use the correct bulb type for your car
- Wear gloves to avoid oil from your skin on bulbs
Checking Alignment Periodically
Headlights that are not aligned can blind other drivers or reduce your view. Check alignment often to stay safe.
You can check alignment at home or have a mechanic do it. Proper aim helps you see the road clearly and avoid accidents.
- Test alignment every 6 months or after hitting bumps
- Park your car on a level surface facing a wall
- Measure light height and adjust screws to align beams
- Consult your car manual for specific alignment instructions

Credit: classicbroncos.com
Frequently Asked Questions
How Do I Know If My Headlights Need Aiming?
If your headlights are dim, uneven, or blinding other drivers, they likely need aiming. Check alignment regularly for safety.
What Tools Are Needed To Aim Car Headlights?
You need a flat surface, a wall, tape measure, screwdriver, and your vehicle’s manual for correct aiming instructions.
How Often Should I Aim My Headlights?
Aim your headlights at least once a year or after replacing bulbs or suspension work to ensure proper visibility.
Can I Aim Headlights Myself At Home?
Yes, you can aim headlights at home using a wall and measuring tools. Follow your car manual for accuracy.
Conclusion
Properly aiming your car headlights improves road safety at night. It helps you see better and avoids blinding other drivers. Regular checks keep your lights aligned and effective. Simple tools and steps make the process easy at home. Taking time to adjust headlights is worth the effort.
Drive safer with clear, focused lighting every time.