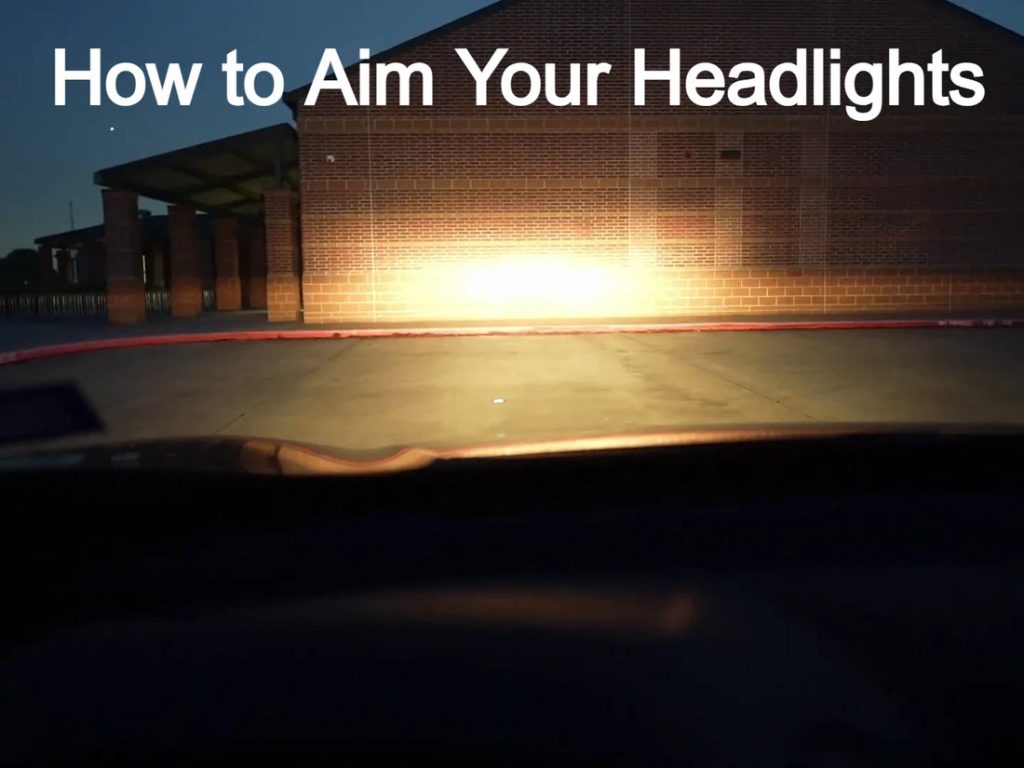
Are your headlights shining too high or too low? This can make night driving unsafe for you and others on the road.
Knowing how to aim headlights on your car is a simple skill that can save you from accidents and improve your visibility instantly. You’ll learn easy steps to adjust your headlights correctly, even if you have no prior experience. Keep reading to discover how a small fix can make a big difference in your driving safety.
Tools Needed
Aiming headlights on a car requires some basic tools. These tools help you adjust the light beam properly.
Using the right tools makes the process easier and ensures safety on the road at night.
Screwdriver Or Adjustment Tool
Most headlights have adjustment screws. You need a screwdriver or a special tool to turn these screws.
The type of screwdriver depends on your car. It can be a flathead or a Phillips screwdriver.
- Flathead screwdriver for horizontal or vertical screws
- Phillips screwdriver for cross-shaped screws
- Special head tools for some modern cars
Measuring Tape
You need a measuring tape to check the distance between the car and the wall. This helps to aim headlights correctly.
Measure both the height of the headlights and the distance from the wall to get the right beam level.
Flat Surface And Wall
A flat surface and a wall are needed to test the headlight aim. The car must be parked straight facing the wall.
The wall shows where the light beam hits so you can make adjustments easily.
Masking Tape
Masking tape helps mark the spots on the wall where the light beams hit. This guide shows if the lights are too high or low.
It is easy to remove and does not damage the wall.
Car Owner’s Manual
Your car owner’s manual provides specific details about headlight adjustment points and screw types.
It can also show the proper height for your car’s headlights.
Prepare Your Car
Before you aim your car’s headlights, prepare your vehicle first. Proper preparation ensures that the headlights are aimed correctly.
Let’s discuss some key steps to get your car ready for headlight aiming. These steps help in providing accurate results.
Check Tire Pressure
Tire pressure affects your car’s height. Ensure that all tires have the correct pressure. This helps in accurate headlight aiming.
Use a tire gauge to measure the pressure. Adjust if necessary to match the recommended levels in your car’s manual.
- Locate the recommended tire pressure in your car’s manual.
- Use a tire gauge to check each tire.
- Adjust the pressure to the recommended levels.
Remove Excess Weight
Extra weight in the car can affect headlight aim. Remove heavy items from the trunk and interior. This helps maintain a balanced vehicle height.
Check for any unnecessary items in the car. Keeping the car light ensures a more accurate headlight aim.
- Check the trunk for heavy items.
- Remove unneeded tools and equipment.
- Ensure the car interior is free from excess weight.
Ensure Proper Fuel Level
Fuel level affects the car’s balance. Aim for a half-full tank when adjusting headlights. This provides a standard level for accurate aiming.
Fill the tank to the halfway mark if needed. This helps maintain an even balance for the car.
- Check the fuel gauge for current level.
- Fill the tank to half if necessary.
- Maintain this level during the headlight aiming process.
Find A Suitable Location
Aim headlights correctly by choosing the right place. The location must allow clear adjustments and accurate results.
Pick a spot that gives you space and a flat surface for your car. This helps to get the best aim for your headlights.
Flat Surface
Use a flat surface like a driveway or parking lot. It must be level to avoid wrong headlight angles.
- Check the surface is clean and free of debris
- Park your car facing straight ahead
- Measure the distance from the car to the wall or screen
- Mark the center points of your headlights on the wall
Wall Or Garage Door
A plain wall or garage door works well as a target. It shows where your headlights point.
| Feature | Why It Works |
| Flat and vertical surface | Shows clear light patterns |
| Neutral color (white or light) | Improves visibility of light beams |
| Large enough area | Allows marking headlight centers |
| Close to flat surface | Keeps measurements accurate |
Credit: medium.com
Measure Headlight Height
Measuring the headlight height is important for aiming your car headlights correctly. This helps you see better at night and avoid blinding other drivers.
Use a flat surface and a wall to get an accurate height measurement before adjusting your headlights.
Find A Level Surface
Park your car on a flat, level ground. This ensures the measurement is correct and the headlights will be aimed properly.
A driveway or garage floor works well. Avoid parking on a slope or uneven ground.
Measure From The Ground To Headlight Center
Use a tape measure to find the distance from the ground to the center of your headlight lens. This is your headlight height.
Measure both headlights to check if they are at the same height. Write down the numbers for later use.
Mark The Wall At Headlight Height
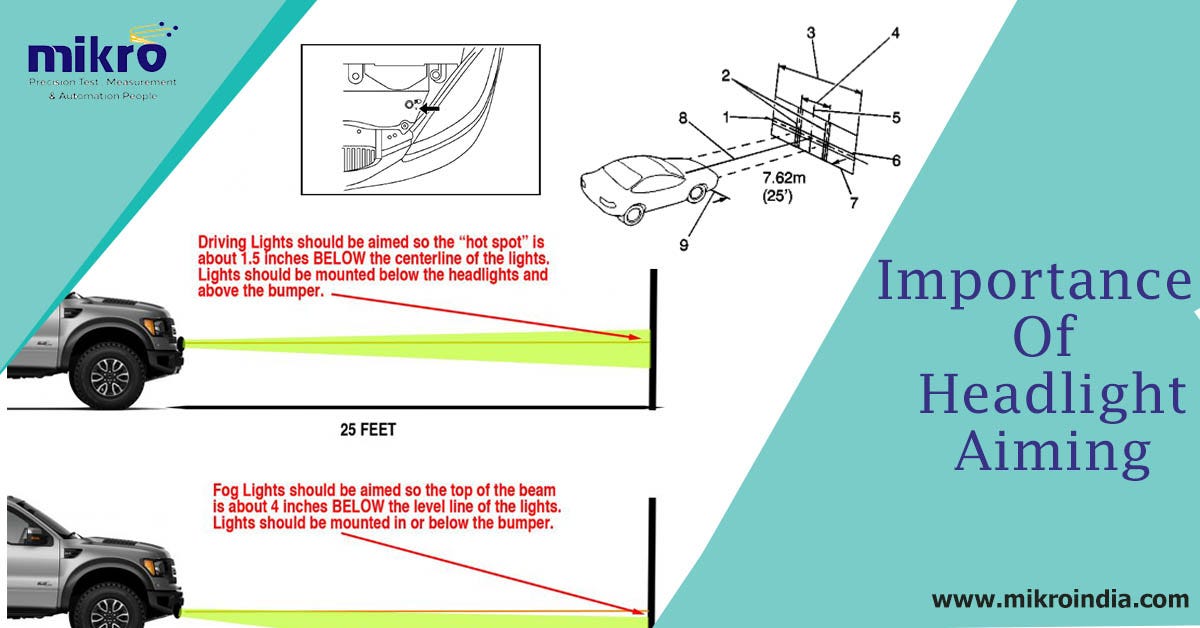
Park your car about 25 feet from a wall or garage door. Use masking tape to mark the height of each headlight on the wall.
Place a horizontal piece of tape at the same height as your headlights. This will guide you when adjusting the beam angle.
- Measure distance from ground to headlight center
- Mark this height on the wall with tape
- Use marks to aim headlights at correct level
Mark The Wall
Marking the wall is an important step to aim your car headlights. It helps you align the lights correctly.
You need a flat wall and a level surface in front of your car. This setup makes it easier to see the light patterns.
Draw Horizontal Line
First, measure the height from the ground to the center of your headlights. Use this height to draw a straight horizontal line on the wall.
Use a level tool or a long straight edge to keep the line even. This line shows the correct height for your lights.
Mark Vertical Lines For Each Headlight
Next, measure the distance between your headlights. Mark two vertical lines on the wall. Each line should match a headlight’s center.
These vertical marks help you aim each headlight separately. The lines create a grid to check the light beams’ position.

Credit: www.youtube.com
Adjust Headlight Screws
Properly aimed headlights help you see the road clearly at night. Adjusting the headlight screws allows you to align the beams correctly.
This guide explains how to find and turn the screws to aim your headlights safely.
Locate Adjustment Screws
Open the hood of your car to find the headlight assembly. Look for small screws near the back or top of the headlight.
These screws control the vertical and horizontal movement of the headlight beam.
- Vertical adjustment screw moves the beam up and down
- Horizontal adjustment screw moves the beam left and right
- Some cars have one or two screws for each headlight
Turn Screws To Align Beams
Use a screwdriver to turn the adjustment screws slowly. Turn the vertical screw to raise or lower the beam.
Turn the horizontal screw to shift the beam left or right. Stop when the beams point straight ahead and are level.
- Turn screws in small increments
- Check beam position after each turn
- Test headlights on a flat surface against a wall
- Adjust until beams align with the marks on the wall
Check Beam Alignment
Proper headlight alignment is important for safe driving at night. Misaligned beams can blind other drivers or reduce your visibility.
Checking the beam alignment helps ensure your headlights point in the right direction. This improves road safety for everyone.
Low Beam Positioning
Low beams provide light for normal driving without blinding other drivers. They should point slightly down and to the right.
To check low beam alignment, park your car 25 feet from a wall on a flat surface. Turn on the low beams and mark the brightest spots.
- The beams should be level with the car’s centerline.
- Light should be slightly lower than the headlight height.
- The brightest part should shift right to avoid blinding oncoming traffic.
High Beam Positioning
High beams help you see farther on dark roads. They should point straight ahead and be level with the car’s center.
To check high beams, park your car 25 feet from a wall. Turn on the high beams and note the bright spots on the wall.
- High beams should be at the same height as the headlights.
- The beams should be centered and not tilted up or down.
- Make small adjustments to keep the beams straight and level.
Test Headlights On The Road
Testing your car headlights on the road helps ensure they shine correctly. Proper aim improves your vision and keeps others safe.
Drive at night in a dark area to check how well your headlights light the road. Watch for bright spots and dark zones.
Find A Safe Testing Location
Choose a quiet, dark road with no street lights. This helps you see the true light pattern of your headlights.
A flat and straight road is best. Avoid hills or curves that can affect your view of the light beams.
Check Headlight Brightness And Aim
Drive slowly and watch the light beam on the road. The bright spot should be just above the road surface.
The beam should point straight ahead and slightly to the right to avoid blinding other drivers.
- Bright spot not too high or low
- Beam centered in front of the vehicle
- Light angled slightly right
Observe For Glare Or Dark Areas
Look for glare that could blind other drivers. If headlights are too high, they create glare.
Watch for dark spots ahead. Poor aiming may cause parts of the road to stay in shadow.
- Glare means lights point too high
- Dark spots mean lights point too low or misaligned
- Adjust headlights to fix these issues
Test Both High And Low Beams
Switch between high and low beams while driving. Each beam should light the road properly.
High beams should reach far and wide. Low beams should focus closer and avoid glare.
- Check high beams for long distance visibility
- Check low beams for near visibility and no glare
- Adjust each beam if needed
Get Feedback From Another Person
Ask someone to stand in front of the car. They can tell if the lights aim too high or low.
Use their feedback to fine-tune your headlight aim. This helps achieve the best light spread.
- Person watches light beam on wall or road
- Calls out if beam is too high, low, left, or right
- You adjust headlights based on feedback
Common Mistakes To Avoid
Aiming headlights incorrectly can reduce your visibility on the road. It also makes it harder for other drivers to see you. Avoiding common mistakes helps keep everyone safe.
This guide explains common errors to watch out for when aiming your car’s headlights.
Not Preparing The Car Properly
Many people skip important preparation steps. This causes inaccurate headlight alignment. Make sure the car is on level ground and the tires have the right pressure. Remove extra weight inside the car.
Ignoring Manufacturer Instructions
Every car has specific guidelines for aiming headlights. Do not guess or use general methods. Using the wrong instructions can cause poor lighting and blind other drivers.
Using Improper Tools Or Equipment
Using the right tools is important for accurate adjustment. Avoid makeshift tools or guessing the angle. You need a screwdriver or adjusting tool that fits your car’s headlight screws.
Not Checking Headlight Height And Distance
Distance and height measurements affect where the light hits. Skip this step, and your headlights may shine too high or too low. This mistake is common but easy to fix.
- Measure the height from the ground to the center of the headlight
- Mark a wall or screen at the correct distance from the car
- Use these marks to guide your adjustments
Adjusting Both Headlights Unequally
Both headlights must be aimed at the same level and direction. Unequal adjustment causes uneven lighting on the road. It also confuses other drivers about your car’s position.
| Problem | Effect | How to Avoid |
| Wrong height | Glare or poor road visibility | Measure headlight height carefully |
| Incorrect distance | Light hits too close or too far | Mark wall at correct distance |
| Unequal adjustment | Uneven road lighting | Adjust both headlights equally |
| Using wrong tools | Damage or poor aim | Use correct adjusting tools |
| Ignoring instructions | Wrong light pattern | Follow manufacturer guide |

Credit: www.familyhandyman.com
Frequently Asked Questions
How Do I Know When To Aim My Car Headlights?
You should aim your headlights if they seem too dim or misaligned. Regular checks ensure proper road visibility and safety.
What Tools Do I Need To Aim Car Headlights?
Basic tools include a tape measure, screwdriver, masking tape, and a flat wall. These help adjust and align headlights accurately.
Can I Aim Headlights Without Professional Help?
Yes, you can aim headlights at home. Follow step-by-step guides and use simple tools for precise adjustments.
Why Is Proper Headlight Aiming Important?
Correctly aimed headlights improve nighttime visibility. They prevent blinding other drivers and enhance overall road safety.
Conclusion
Properly aiming your car headlights improves safety on the road. Clear, focused lights help you see better at night. They also make your car more visible to others. Regular checks keep your headlights working well. Use a flat surface and a wall to adjust lights.
Small changes can make a big difference in driving comfort. Take time to aim headlights correctly and drive with confidence. Safe driving starts with clear vision ahead.