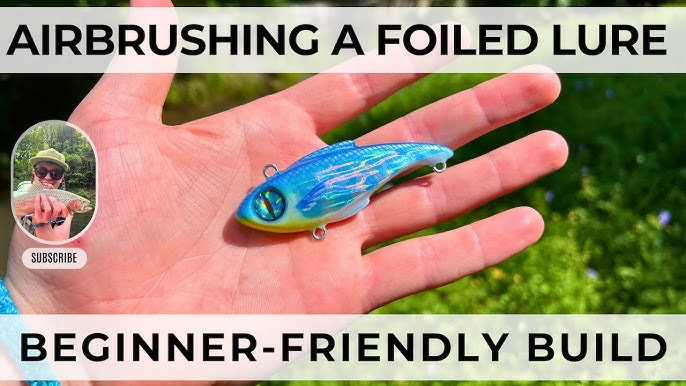
If you want your fishing lures to stand out and catch more fish, learning how to airbrush them is a game-changer. Imagine creating custom designs that mimic real bait, making your lures irresistible to fish.
You might think airbrushing is complicated, but it’s easier than you expect—and the results are worth it. In this guide, you’ll discover simple steps and insider tips to transform plain lures into eye-catching masterpieces. Ready to boost your fishing success with your own unique touch?
Let’s dive in.

Credit: spraygunner.com
Choosing The Right Airbrush
Airbrushing fishing lures needs the right tools. The airbrush you pick affects your paint job.
Choosing the right airbrush helps you paint fine details and smooth colors. It also saves paint and time.
Types Of Airbrushes
There are different airbrush types. Each works best for certain tasks and skills.
- Single-action airbrush:Controls air, paint flow is fixed. Good for simple work.
- Double-action airbrush:Controls air and paint flow. Great for detailed work.
- Gravity feed airbrush:Paint cup is on top. Uses less paint and works well with thin paints.
- Side feed airbrush:Paint cup is on the side. Offers better view of your work.
- Bottom feed airbrush:Paint cup is under the airbrush. Holds more paint but can be heavier.
Essential Features For Lure Painting
Some features make airbrushes better for painting fishing lures. Look for these to get good results.
- Fine needle and nozzle:Allows detailed lines and small spots.
- Adjustable paint flow:Lets you control paint amount easily.
- Comfortable grip:Helps you hold steady for long periods.
- Easy cleaning:Paint can clog, so choose a model that is simple to clean.
- Compatible with water or acrylic paints:These paints dry fast and are safe for lures.
Selecting Paints And Materials
Choosing the right paints and materials is key to airbrushing fishing lures. Good selections help your lure last longer and look better.
This guide covers the best paints for durability and finish, plus how to prepare lure surfaces for painting.
Best Paints For Durability And Finish
Select paints that resist water and wear. Acrylic and urethane paints are popular choices. They dry fast and hold color well.
- Acrylic paints are easy to use and clean up with water.
- Urethane paints offer strong protection but need special cleaners.
- Enamel paints provide a hard finish but take longer to dry.
- Use clear coats to add shine and extra durability.
| Paint Type | Dry Time | Water Resistance | Finish |
| Acrylic | Fast | Good | Matte to Glossy |
| Urethane | Medium | Excellent | Glossy |
| Enamel | Slow | Good | Hard Glossy |
Preparing Lure Surfaces
Proper surface prep helps paint stick and last. Clean and smooth the lure before painting.
- Wash the lure with warm soapy water to remove oils and dirt.
- Lightly sand the surface with fine-grit sandpaper for better paint grip.
- Wipe the lure with a clean cloth to remove dust and debris.
- Apply a primer to create a uniform base for paint.
- Let the primer dry completely before airbrushing paint.
Setting Up Your Workspace
Creating a good workspace helps you airbrush fishing lures well. It makes the process easier and keeps you safe.
A clean and organized area saves time and stops mistakes. Let’s look at how to set it up.
Organizing Tools And Supplies
Keep all your airbrushing tools in one place. This includes the airbrush, paints, and cleaning items.
Arrange your supplies so you can reach them easily. It helps you work faster and avoid spills.
- Place paints by color or type
- Keep brushes and needles in a safe container
- Have paper towels and water nearby
- Use trays or small boxes for small parts
Ensuring Proper Ventilation
Good airflow is important when airbrushing. It removes fumes and keeps the air fresh.
Work near a window or use a fan to move air out. You can also use a mask to protect your lungs.
- Open windows or doors for fresh air
- Use an exhaust fan if possible
- Wear a mask designed for paint fumes
- Avoid small, closed rooms
Basic Airbrushing Techniques
Airbrushing is a popular method for painting fishing lures. It allows for smooth, even coats and detailed designs. Knowing the basics helps you get better results.
This guide covers controlling air pressure and paint flow, plus creating smooth base coats. These skills are key to a good airbrushing job.
Controlling Air Pressure And Paint Flow
Control the air pressure to avoid splatters or uneven paint. Lower pressure gives soft edges. Higher pressure creates harder lines. Adjust paint flow to match your pressure.
- Use 15-30 psi for most lure painting
- Start with low paint flow and increase slowly
- Test spray on paper before painting
- Keep the airbrush 6-8 inches from the lure
- Clean the airbrush often to prevent clogs
Creating Smooth Base Coats
A smooth base coat helps paint stick and shows colors well. Use thin layers and let each dry before the next. Avoid thick coats that drip or crack.
| Tip | Description |
| Thin Paint | Use paint thinned to the consistency of milk |
| Light Passes | Spray several light coats instead of one heavy coat |
| Dry Time | Wait 5-10 minutes between coats |
| Even Movement | Keep airbrush moving steadily to avoid buildup |
Advanced Design Methods
Airbrushing fishing lures lets you create lifelike and eye-catching designs. Using advanced methods adds realism and depth. These methods help your lures stand out in the water.
Focus on color layers, stencils, masks, and fine details. Each technique builds on the last to improve your lure’s look. Let’s explore these methods step-by-step.
Layering Colors For Depth
Start with a base color that matches your target fish. Add thin layers of different colors on top. Each layer should dry before adding the next. This process creates depth and realism.
- Use lighter colors first to highlight raised areas
- Apply darker shades in recesses for shadow effects
- Blend edges softly to avoid harsh lines
- Allow each layer to dry fully to prevent smudging
- Use transparent paints for subtle color shifts
Using Stencils And Masks
Stencils and masks help add consistent patterns and shapes. They protect parts of the lure while you paint others. This keeps designs sharp and clean.
| Tool | Use | Material |
| Stencil | Create repeated shapes like spots or scales | Plastic or thin metal |
| Masking Tape | Cover large areas for blocking colors | Paper or vinyl tape |
| Liquid Mask | Protect small or curved areas | Liquid latex or masking fluid |
Adding Details And Textures
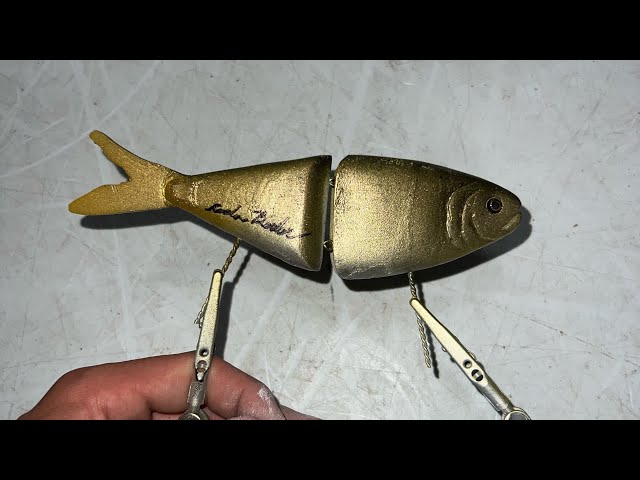
Details make your lure look lifelike. Use fine brushes or a small airbrush tip. Textures mimic fish scales, eyes, and fins.
- Paint small dots or lines for scale patterns
- Use metallic or pearlescent paints for shine
- Add eyes with glossy paint for realism
- Use dry brushing to create fine texture
- Seal your work with a clear coat to protect details
Credit: www.youtube.com
Common Mistakes To Avoid
Airbrushing fishing lures needs patience and care. Many beginners make errors that cause poor results.
Knowing what to avoid helps you paint better and save time. Below are common mistakes and tips to fix them.
Preventing Paint Runs And Blotches
Paint runs and blotches spoil the look of your lure. They often happen because of too much paint or wrong spray distance.
- Do not hold the airbrush too close to the lure.
- Avoid spraying too much paint in one spot.
- Keep the air pressure steady and not too high.
- Use thin layers of paint instead of one thick coat.
- Allow paint to dry between layers to prevent blotches.
Maintaining Consistent Airbrush Performance
Consistent airbrush performance ensures even paint coverage. Dirt or clogs can cause uneven spray or splatters.
| Problem | Cause | Solution |
| Uneven spray | Clogged nozzle | Clean nozzle regularly with proper tools |
| Paint sputtering | Dirty paint cup or needle | Rinse paint cup and needle after each use |
| Air pressure drops | Leaking hose or loose fittings | Check and tighten all connections |
| Inconsistent color flow | Thick paint | Thin paint to correct consistency |
Sealing And Finishing Lures
Sealing and finishing fishing lures protect your airbrush paint. It keeps the colors bright and strong underwater. A good finish also stops chips and scratches.
This guide covers choosing clear coats and applying protective finishes. These steps help your lures last longer and look better.
Choosing The Right Clear Coats
Clear coats add a shiny or matte layer over your paint. They protect the lure from water and wear. Pick a clear coat that fits your fishing style and lure type.
- Glossy clear coats give a shiny, bright look.
- Matte clear coats reduce shine for a natural look.
- UV-resistant clear coats stop colors from fading in sunlight.
- Flexible clear coats prevent cracking on soft lures.
- Fast-drying clear coats save time between layers.
Applying Protective Finishes
Apply clear coats in thin, even layers. Let each layer dry fully before adding the next. This avoids drips and bubbles. Use a spray or airbrush for smooth coverage.
| Finish Type | Drying Time | Durability |
| Glossy | 30 minutes | High |
| Matte | 45 minutes | Medium |
| UV Resistant | 1 hour | Very High |
| Flexible | 1 hour | High |
| Fast Drying | 15 minutes | Medium |

Credit: www.battlbox.com
Care And Maintenance
Proper care keeps your airbrush working well for a long time. It also helps you paint fishing lures with better results.
Cleaning and storing your tools correctly protects your work and your equipment from damage.
Cleaning Your Airbrush
Clean your airbrush after every use to stop paint from drying inside. This keeps it clear and working smoothly.
Use water or a cleaner made for airbrush paint. Flush the paint cup and needle carefully to remove all paint.
- Empty any leftover paint from the airbrush cup
- Spray cleaner through the airbrush until it runs clear
- Remove the needle and wipe it gently
- Clean small parts with a soft brush or cloth
- Reassemble the airbrush only when all parts are dry
Storing Painted Lures Properly
Store painted fishing lures in a dry place to keep the paint from peeling or fading. Avoid direct sunlight and heat.
Use containers or boxes with soft dividers to stop lures from touching and scratching each other.
- Keep lures in a cool, dry spot away from sunlight
- Use plastic boxes with compartments or foam inserts
- Separate lures to avoid paint damage
- Check lures regularly for any signs of wear
- Handle lures with clean hands to protect the finish
Frequently Asked Questions
What Materials Are Needed For Airbrushing Fishing Lures?
To airbrush fishing lures, you’ll need an airbrush kit, acrylic paints, and a clear coat sealer. Additionally, prepare some fine sandpaper, masking tape, and a clean workspace. These materials ensure precise designs and a professional finish. Always choose non-toxic paints to protect the environment and aquatic life.
How Do I Prepare Lures For Airbrushing?
Start by cleaning the lures with soap and water. Dry them thoroughly and lightly sand the surface. This helps the paint adhere better. Use masking tape to cover areas you don’t want painted. Proper preparation ensures a smooth and durable finish on your fishing lures.
What Is The Best Technique For Airbrushing Lures?
The best technique involves applying thin, even coats of paint. Start with a light base coat and build up layers. Maintain a consistent distance between the airbrush and lure. Practice on a scrap piece first to perfect your technique and achieve professional-looking results.
How Do I Clean My Airbrush After Use?
Clean your airbrush by flushing it with water or a specific cleaner. Disassemble the airbrush and clean each part thoroughly. Use a small brush to remove paint residues. Regular cleaning maintains the airbrush’s performance and prolongs its lifespan, ensuring consistent results every time.
Conclusion
Airbrushing fishing lures adds color and detail easily. Practice helps improve your skills over time. Use good quality paints for the best results. Keep your workspace clean and organized for safety. Experiment with designs to create unique lures. Small steps lead to better and brighter finishes.
Enjoy the process as much as the fishing. With patience, your lures will attract more fish. Try these tips and have fun airbrushing!