Are you struggling with spongy brakes and longing for that smooth, responsive feel when you hit the pedal? You’re not alone.
Many car enthusiasts and everyday drivers face the same issue. The good news is, you can easily fix this problem yourself with a vacuum pump. Imagine the satisfaction of knowing you’ve enhanced your car’s safety and performance with your own hands.
In this guide, we’ll take you step-by-step through the process of bleeding your brakes using a vacuum pump, ensuring you can tackle this task confidently and efficiently. Ready to transform your driving experience? Let’s get started!
Tools And Materials Needed
Bleeding brakes with a vacuum pump requires specific tools and materials to ensure the process is smooth and effective. Having the right equipment not only makes your job easier but also prevents damage to your brake system. Let’s explore what you need before you start.
Vacuum Pump Essentials
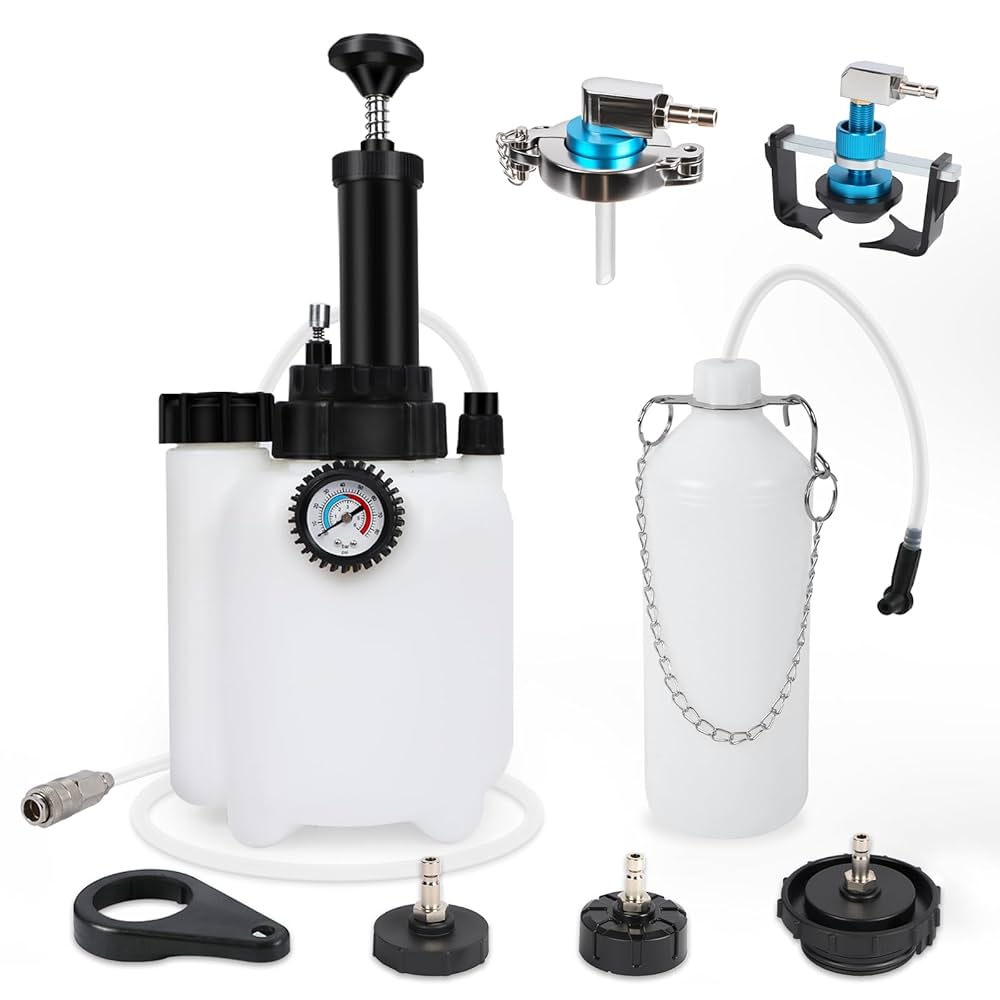
A quality vacuum pump is the heart of this brake bleeding method. Look for a pump that creates a strong, consistent vacuum to draw air and old fluid from the brake lines efficiently. Some pumps come with built-in gauges to monitor vacuum pressure, which can help you avoid over-pumping.
Also, make sure you have clear, durable hoses that fit tightly on the brake bleeder valves. A secure connection prevents air leaks that would ruin the bleeding process. Don’t underestimate the value of a comfortable grip and easy-to-use controls on your pump—it makes the task less tiring.
Brake Fluid Types
You need the correct brake fluid to refill your system after bleeding. Most vehicles use DOT 3, DOT 4, or DOT 5.1 fluids, but some require DOT 5, which is silicone-based and not compatible with others. Check your vehicle’s manual carefully to avoid mixing fluids, as this can cause brake failure.
Buying fresh, sealed brake fluid is crucial because it absorbs moisture over time, reducing braking performance. Have enough on hand—bleeding can use more fluid than you expect, especially if you’re flushing the system.
Additional Supplies
- Wrench or spanner:Choose the right size to open and close the bleeder valves without rounding them off.
- Catch container:A clear container to collect old brake fluid helps you see when the fluid runs clear.
- Gloves and safety glasses:Brake fluid is corrosive; protect your skin and eyes during the job.
- Rags or paper towels:Useful for wiping spills and keeping the work area clean.
Have you ever struggled with brake fluid spills or confusing hose connections? Preparing these supplies ahead saves frustration and keeps your workspace safe.

Credit: wilmarllc.com
Preparing Your Vehicle
Getting your vehicle ready before bleeding brakes with a vacuum pump sets the foundation for a smooth and safe process. Taking time to prepare ensures you avoid common pitfalls and makes the job more efficient. Let’s focus on the essential steps you must take before touching the brake system.
Safety Precautions
Safety should be your top priority. Always work on a flat surface and engage the parking brake to prevent your vehicle from moving unexpectedly.
Wear gloves and eye protection to shield yourself from brake fluid, which is corrosive and can damage your skin or eyes. Keep a clean rag handy to wipe up any spills immediately.
Have a fire extinguisher nearby. Brake fluid is flammable, and accidents can happen even in the most controlled environments.
Locating Bleeder Valves
Knowing where the bleeder valves are is crucial for using a vacuum pump effectively. These valves are usually found on each brake caliper or wheel cylinder.
Check your vehicle’s manual or online forums if you’re unsure. Sometimes the valves can be hidden behind dirt or brake dust, so clean the area gently to get a clear view.
Identify the valve’s size and shape to ensure your vacuum pump’s hose fits securely. A loose connection can cause air to enter the system and defeat the purpose of bleeding.
Checking Brake Fluid Level
Before you start bleeding, inspect the brake fluid reservoir under the hood. The fluid level should be between the “MIN” and “MAX” marks.
If the fluid is low, add the recommended brake fluid type for your vehicle. Avoid mixing different types of brake fluid as this can damage your brake system.
Keep the reservoir cap loosely placed but don’t fully close it during bleeding. This prevents pressure build-up and allows air to escape smoothly.
Setting Up The Vacuum Pump
Setting up the vacuum pump correctly is key to bleeding brakes safely and effectively. This process ensures air is removed from the brake lines, improving brake performance. Start with clean tools and a clear workspace for best results.
Connecting The Pump To The Bleeder
Attach the vacuum pump hose firmly to the brake bleeder valve. Make sure the connection fits snugly to avoid air leaks. Use the right size adapter if needed to secure the hose. Tight connections help maintain steady vacuum pressure during bleeding.
Creating A Proper Seal
Check the connection for any gaps or loose fittings. A proper seal stops air from entering the brake system. You can wrap the joint with a rubber gasket or tape if the fit is loose. Inspect the seal regularly as you pump to keep it airtight.
Positioning The Pump
Place the vacuum pump at a comfortable height and stable surface. The pump should be close enough to the bleeder valve to prevent hose kinks. Keep the hose straight and free from bends to maintain strong vacuum flow. Position yourself to easily see the fluid and air bubbles during bleeding.
Bleeding The Brakes Step-by-step
Bleeding brakes with a vacuum pump requires a clear and careful approach. This step-by-step guide helps remove air bubbles from brake lines effectively. Follow each step to ensure the brakes work safely and smoothly.
Starting With The Furthest Wheel
Begin at the wheel farthest from the master cylinder. This is usually the rear passenger side. It ensures air is pushed out in the correct order. Move to the next farthest wheel after finishing one.
Applying Vacuum Pressure
Attach the vacuum pump to the bleeder valve securely. Pump the vacuum to create suction. This draws brake fluid and air from the system. Keep steady pressure for smooth fluid flow.
Monitoring Fluid Flow
Watch the brake fluid coming out carefully. It should flow in a steady, clear stream. Look for air bubbles in the fluid. Stop pumping when the fluid runs clean and bubble-free.
Closing The Bleeder Valve
While maintaining vacuum pressure, close the bleeder valve tightly. This prevents air from returning into the brake lines. Release the vacuum pump slowly. Check the brake fluid level in the master cylinder and refill if needed.
Final Checks And Cleanup
After bleeding the brakes with a vacuum pump, final checks and cleanup are essential. This stage ensures the brake system works safely and prevents any damage from leftover fluid. Taking time here saves trouble later.
Inspecting Brake Fluid Level
Check the brake fluid reservoir carefully. The fluid should be at the recommended level marked on the container. Add fresh brake fluid if the level is low. Avoid overfilling to prevent spills.
Use the correct type of brake fluid for your vehicle. Clean the reservoir cap before closing it to keep dirt out.
Testing Brake Pedal Feel
Press the brake pedal several times to feel its resistance. It should feel firm and steady, not soft or spongy. A soft pedal may mean air still remains in the lines.
If the pedal feels soft, repeat the bleeding process. Confirm that the brake system responds well before driving the vehicle.
Cleaning Tools And Workspace
Clean the vacuum pump and any other tools used. Use brake cleaner or warm soapy water to remove fluid residues. Dry all items thoroughly to prevent rust.
Wipe down the workspace to remove spilled brake fluid. Brake fluid can damage paint and surfaces, so clean spills immediately. Store tools in their proper place for next use.

Credit: www.amazon.ca
Troubleshooting Common Issues
Bleeding brakes with a vacuum pump can seem straightforward, but you might run into a few common problems along the way. Troubleshooting these issues quickly ensures your brakes work safely and effectively. Let’s focus on some practical tips to overcome these hurdles.
Dealing With Air Bubbles
Air bubbles trapped in the brake lines reduce braking power and cause a spongy pedal feel. If you notice this, check the brake fluid reservoir—make sure it’s topped up and clean. Sometimes, slowly squeezing the brake pedal while using the vacuum pump helps push out stubborn air pockets.
Keep an eye on the brake lines themselves. Tiny cracks or loose connections can let air back in. You might need to tighten fittings or replace worn parts to fully eliminate air bubbles.
Handling Leaks
Leaks in the brake system are a common headache during bleeding. Look closely at the hose connections and bleeder screws for any signs of fluid dripping. Even a small leak can cause the vacuum pump to lose suction, making the bleeding ineffective.
If you spot a leak, stop immediately and fix it before continuing. Tighten fittings or swap out damaged hoses. A well-sealed system ensures you get the best results without wasting brake fluid.
When To Repeat The Process
You might wonder how many times you should bleed your brakes to get them perfect. If the brake pedal still feels soft or spongy after your first attempt, don’t hesitate to repeat the process. Sometimes, multiple cycles are necessary to flush out all the air completely.
Also, if you open the bleeder valve for too long or the fluid reservoir runs low during bleeding, you should start over. Maintaining the right fluid level and a closed system is key to success.
Have you ever stopped midway because something didn’t feel right? Trusting your instincts and redoing the bleeding can save you from brake failure later. Your safety depends on it.

Credit: www.reddit.com
Frequently Asked Questions
What Is The Purpose Of Bleeding Brakes With A Vacuum Pump?
Bleeding brakes with a vacuum pump removes air bubbles from brake lines. This ensures firm brake pedal feel and proper braking performance. It is faster and cleaner than traditional methods.
How Do You Use A Vacuum Pump To Bleed Brakes?
Attach the vacuum pump to the brake bleeder valve. Create suction to draw brake fluid and air out. Keep topping up the master cylinder reservoir to avoid air entry.
Can I Bleed Brakes Alone Using A Vacuum Pump?
Yes, a vacuum pump allows one-person brake bleeding. It creates continuous suction, eliminating the need for a helper to press the pedal. This simplifies the brake bleeding process.
How Often Should Brake Bleeding Be Done With A Vacuum Pump?
Brake bleeding frequency depends on vehicle use and brake maintenance. Typically, every 1-2 years or when brakes feel spongy. Using a vacuum pump speeds up the process.
Conclusion
Bleeding brakes with a vacuum pump is simple and safe. It helps remove air from brake lines quickly. Follow the steps carefully to avoid mistakes. Use the right tools and check for leaks. Clean brake fluid ensures better brake performance.
Take your time and work steadily. Your brakes will feel firmer and more responsive. Regular brake maintenance keeps your vehicle safe on the road. Keep practicing to gain confidence with the process. A smooth brake system means safer driving for everyone.