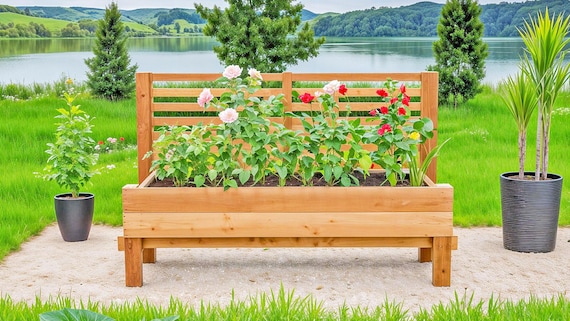
Are you ready to transform your garden and grow your own fresh veggies, herbs, or flowers? Building a cedar raised garden bed is a simple way to create a beautiful and durable space for your plants.
With cedar’s natural resistance to rot and insects, your garden bed will last for years while looking great. In this guide, you’ll discover easy steps to build your own cedar raised garden bed, even if you’ve never done a project like this before.
Keep reading, and you’ll have everything you need to start growing your dream garden in no time!
Choosing The Right Cedar
Cedar is a popular choice for raised garden beds. It is durable and looks great. Choosing the right cedar is important for building a long-lasting garden bed.
Not all cedar wood is the same. You need to know what to look for when selecting cedar for your project.
Benefits Of Cedar Wood
Cedar wood has many benefits for garden beds. It resists rot and insects. This means your garden bed will last longer.
Cedar is also environmentally friendly. It does not need chemical treatments to stay strong.
- Natural resistance to decay
- Repels insects without chemicals
- Long-lasting and durable
- Attractive appearance
Selecting Quality Lumber
Quality lumber is key for a sturdy garden bed. Look for boards that are straight and free of large knots.
Choose cedar boards that have a smooth texture. This makes them easier to work with and ensures a neat finish.
- Check for straight boards
- Avoid large knots
- Look for smooth texture
- Ensure even color

Credit: eartheasy.com
Planning Your Garden Bed
Building a cedar raised garden bed starts with careful planning. You must think about size, location, and what you need to get started.
Good planning helps your garden grow well and makes building easier. Let’s look at how to plan your garden bed.
Determining Size And Location
Choose a size that fits your space and needs. Decide where to place your garden bed for the best sunlight and access.
- Measure available space in your yard or patio
- Pick a sunny spot with at least six hours of light
- Ensure the location has good drainage
- Leave enough room around the bed for walking and gardening
- Consider the height of the bed for easy access
Gathering Tools And Materials
Collect all tools and materials before you start building. This helps keep the project smooth and fast.
| Item | Purpose |
| Cedar boards | Build the bed frame |
| Screws | Hold the boards together |
| Drill | Drive screws into wood |
| Measuring tape | Measure wood and space |
| Level | Make sure bed is flat and even |
| Shovel | Prepare the ground |
| Soil and compost | Fill the bed for planting |
Preparing The Site
Preparing the site is important before building your cedar raised garden bed. A good site helps plants grow strong and healthy.
This section explains how to clear and level the ground and improve soil drainage.
Clearing And Leveling Ground
Start by removing grass, weeds, and rocks where you want the garden bed. Clear the area completely to stop plants from growing inside the bed.
Next, use a rake or shovel to make the ground flat. A level surface helps the bed stay steady and makes watering easier.
- Remove all plants and debris
- Use a shovel to dig up roots
- Rake the soil to smooth the surface
- Check for levelness with a board or level tool
Improving Soil Drainage
Good drainage stops water from sitting in the bed. Standing water can hurt plant roots and cause mold.
To improve drainage, loosen the soil under the bed. You can add sand or compost to help water flow better.
- Dig the soil about 6 inches deep
- Mix in sand or organic compost
- Check that water drains away quickly
- Fix any low spots that hold water
Cutting And Assembling The Frame
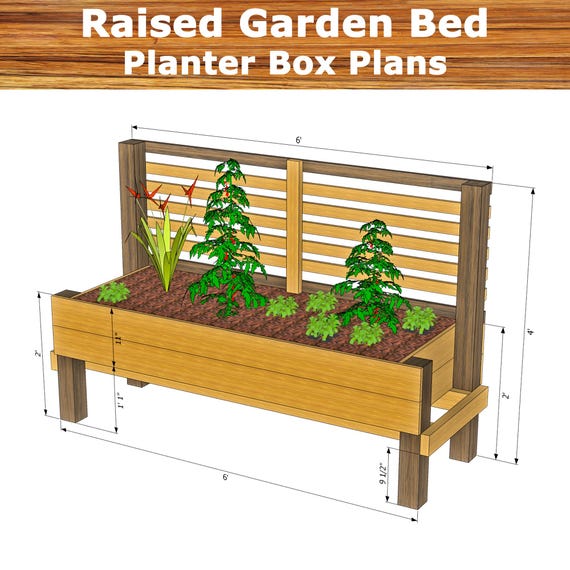
Building a cedar raised garden bed starts with cutting and assembling the frame. Proper measurements and secure joints are key to a strong structure.
This guide covers how to measure and cut the boards and how to join the corners firmly for a lasting frame.
Measuring And Cutting Boards
Measure each board carefully to fit the size of your garden bed. Use a tape measure and mark the cuts clearly with a pencil.
- Measure the length and width of the bed.
- Mark cedar boards according to these measurements.
- Use a saw to cut along the marks straight and clean.
- Check each piece for smooth edges and even lengths.
Joining Corners Securely
Connecting the corners firmly keeps the frame square and stable. Use screws and corner brackets for strong joints.
| Tool | Purpose |
| Wood Screws | Hold boards tightly together |
| Corner Brackets | Reinforce corner strength |
| Drill | Make pilot holes for screws |
| Screwdriver | Drive screws into wood |
Start by drilling pilot holes at each corner joint. Then, fix the boards with screws and add corner brackets inside the frame for extra support.
Installing The Bed
Installing your cedar raised garden bed properly ensures a strong and lasting structure. This process helps your plants grow well and keeps the bed stable.
We will focus on positioning the frame and securing the bed to the ground. These steps make your garden bed ready for soil and planting.
Positioning The Frame
Find a flat, sunny spot for your garden bed. The place should get at least six hours of sunlight each day.
Clear the area of grass, rocks, and debris. Level the ground if needed so the frame sits evenly.
- Check that the frame fits in the chosen spot.
- Use a level tool to make sure the frame is even.
- Adjust the ground by adding or removing soil if the frame tilts.
Securing The Bed To The Ground
Secure the garden bed to keep it from moving or tipping. This helps during strong winds or when working inside the bed.
Use stakes or anchors driven into the ground at each corner. Attach them firmly to the frame for extra support.
- Drive wooden or metal stakes about 12 inches into the soil.
- Use screws or brackets to fix the stakes to the frame.
- Check the bed is stable by gently pushing it.

Credit: www.youtube.com
Filling And Planting
After building your cedar raised garden bed, the next step is filling it with soil and planting. Good soil and careful planting help your garden grow strong and healthy.
This guide will explain how to choose the right soil mix and give tips for planting success.
Choosing Soil Mix
Use a soil mix that drains well and holds moisture. Raised beds need soil that is light but full of nutrients.
A good mix includes garden soil, compost, and some sand or perlite. This mix lets roots grow easily and gets air to plants.
- One-third garden soil
- One-third compost
- One-third sand or perlite
- Optional: add organic fertilizer for more nutrients
Planting Tips For Success
Plant your seeds or seedlings at the right depth. Follow the instructions on seed packets or plant tags.
Water the soil well after planting. Keep soil moist but not soggy to help plants start strong.
- Space plants to avoid crowding
- Water gently to avoid washing seeds away
- Use mulch to keep soil moist and control weeds
- Check plants daily for water and growth
Maintaining Your Cedar Bed
Keeping your cedar raised garden bed in good shape helps your plants grow well. Regular care stops damage and keeps the wood strong.
Simple steps can make your cedar bed last longer and stay healthy. Water and feed your plants right. Protect the wood from weather and pests.
Watering And Fertilizing
Water your cedar bed deeply but not too often. This helps plants grow strong roots. Check soil moisture before watering to avoid overwatering.
Feed your plants with natural fertilizer. Use compost or slow-release fertilizer to keep soil rich. Fertilize every few weeks during growing season.
- Water early in the morning or late afternoon
- Use mulch to keep soil moist
- Add compost to improve soil health
- Avoid chemical fertilizers that can harm wood
Protecting Wood Longevity
Cedar is strong but still needs protection from rain and sun. Use a natural sealant to keep the wood safe. Reapply every year or two.
Keep soil and plants away from the wood edges. This stops wood from rotting. Check for cracks or damage and fix them fast.
- Apply a non-toxic wood sealant yearly
- Raise the bed slightly to prevent water pooling
- Trim plants to avoid constant wetness on wood
- Inspect the bed each season for damage
Credit: www.etsy.com
Frequently Asked Questions
What Materials Are Needed For A Cedar Raised Garden Bed?
You need cedar boards, screws, a drill, soil, and plants. Cedar is durable and naturally resistant to rot, ideal for outdoor use. Choose untreated cedar for a safe, long-lasting garden bed.
How Deep Should A Cedar Raised Garden Bed Be?
A depth of 12 to 18 inches is ideal for most plants. This allows enough room for roots to grow and access nutrients. Deeper beds work better for root vegetables like carrots and potatoes.
Can Cedar Raised Beds Improve Soil Quality?
Yes, raised beds improve soil drainage and reduce compaction. They allow you to control soil mix and fertility easily. This creates an optimal growing environment for healthier plants.
How Long Does A Cedar Raised Garden Bed Last?
Cedar beds typically last 15 to 20 years if maintained properly. Cedar’s natural oils resist decay and insect damage. Regularly check for damage and reseal to extend lifespan.
Conclusion
Building a cedar raised garden bed is simple and rewarding. Cedar wood lasts long and resists rot. You can grow vegetables, flowers, or herbs easily. Raised beds improve soil and help plants grow better. Follow the steps carefully, and enjoy your new garden space.
Gardening becomes more fun and less messy with raised beds. Start small, and expand as you learn. Your plants will thank you with fresh, healthy growth. Enjoy the process and watch your garden thrive.