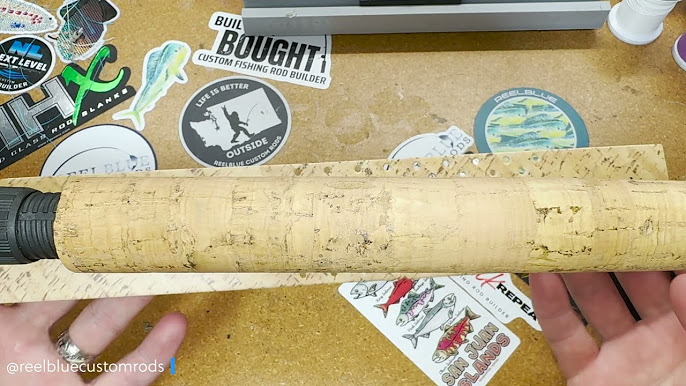
Have you ever dreamed of catching the biggest fish with a rod made just for you? Building your own custom fishing rod lets you do exactly that.
It’s not only fun but also gives you a rod that fits your style and needs perfectly. Imagine the pride you’ll feel casting a rod you built yourself. In this guide, you’ll learn simple steps to create a fishing rod that works great and feels just right in your hands.
Ready to start? Let’s dive in and make your perfect fishing companion!
Choosing The Right Rod Blank
Building a custom fishing rod starts with picking the right rod blank. The blank is the main part of the rod and affects how it feels and performs.
Choosing the right blank depends on the type of fishing you want to do. It also depends on your personal style and the fish you want to catch.
Types Of Rod Blanks
There are several types of rod blanks made from different materials and designed for different uses. The main types are spinning, casting, and fly rod blanks.
Each type works best for certain fishing styles. Spinning blanks are good for light lures and easy casting. Casting blanks offer more control for heavy baits. Fly rod blanks are flexible and designed for fly fishing techniques.
- Spinning rod blanks: lightweight and easy to use
- Casting rod blanks: strong and precise
- Fly rod blanks: flexible and sensitive
Selecting Material And Length
Rod blanks come in different materials, like graphite, fiberglass, and composite blends. Graphite is light and sensitive. Fiberglass is strong and flexible. Composites mix both for balance.
Length affects how far and how easy you cast. Shorter rods give more control. Longer rods help cast farther. Choose a length that fits your fishing style and spot.
- Graphite: best for sensitivity and lightness
- Fiberglass: best for strength and durability
- Composite: balance of strength and sensitivity
- Short rods (5-6 feet): good for close fishing
- Medium rods (6-7 feet): versatile for many uses
- Long rods (7+ feet): best for long casts
Power And Action Considerations
Power tells how strong the rod is. Action shows how much the rod bends. Both affect how you catch fish and feel the bite.
Light power rods work for small fish. Heavy power rods handle big fish and heavy lures. Fast action rods bend near the tip. Slow action rods bend more evenly.
| Power | Best Use |
|---|---|
| Light | Small fish, light lures |
| Medium | Average fish, general use |
| Heavy | Large fish, heavy lures |
- Fast action: bends near tip, good for quick hook sets
- Medium action: bends in mid-section, versatile
- Slow action: bends throughout, good for casting soft baits
Credit: lakeladyrods.com
Picking The Best Guides
Choosing the right guides is key to building a good fishing rod. Guides help control the fishing line during casting and retrieval.
This guide explains how to pick the best materials, sizes, and placement of guides. It also covers how to install guide wraps properly.
Guide Materials And Sizes
Guides come in different materials like stainless steel, ceramic, and titanium. Each material affects durability and smoothness.
Choose guide sizes based on the rod type and line weight. Larger guides reduce friction for heavier lines.
- Stainless Steel:Durable and affordable
- Ceramic:Smooth, reduces line wear
- Titanium:Lightweight and strong
- Small Guides:Used near the tip for control
- Large Guides:Placed near the base for line flow
Number And Placement
The number of guides affects the rod’s performance and strength. Too few guides cause line tangles.
Place guides evenly along the rod. Start with a guide close to the handle, then space others towards the tip.
| Position | Guide Size | Purpose |
| Near Handle | Large | Reduce line friction |
| Middle Section | Medium | Support line flow |
| Near Tip | Small | Control and accuracy |
Installing Guide Wraps
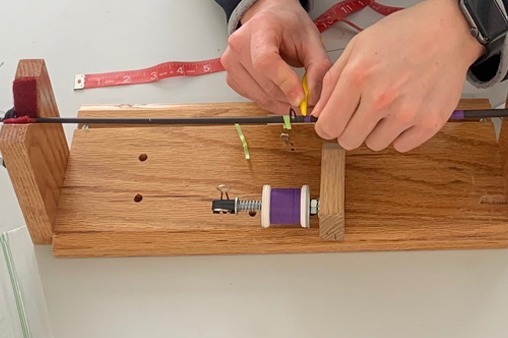
Guide wraps secure the guides to the rod. Use strong thread for wrapping.
- Start wrapping below the guide foot
- Wrap tightly and evenly around the rod
- Cover the entire guide foot area
- Finish with several tight wraps
- Seal wraps with epoxy resin for strength
Selecting A Reel Seat
Building a custom fishing rod means choosing the right parts. The reel seat is important because it holds the reel in place. Picking the right one can make fishing more enjoyable.
Consider the type of fishing you will do. The reel seat should match your rod and fishing style.
Types Of Reel Seats
There are different types of reel seats available. Each type suits different fishing rods and styles.
- Spinning reel seats are common for light rods.
- Casting reel seats are used for baitcasting rods.
- Fly reel seats are designed for fly fishing rods.
Fitting And Comfort
The reel seat should fit well in your hand. Comfort matters when you fish for long hours.
Try holding different reel seats. Check which one feels best when you grip it.
Securing The Reel Seat
The reel seat must be secured tightly to the rod. This prevents the reel from moving during use.
Use strong glue or tape to attach the reel seat. Make sure it is stable before using the rod.
- Check for any movement after securing.
- Ensure it aligns with the rod guides.
- Test with the reel attached before going fishing.
Choosing A Handle
Choosing the right handle is key to building a custom fishing rod. The handle affects how you hold the rod and your overall fishing comfort.
Good handles improve grip and reduce hand fatigue. Let’s explore the main types of handles, materials, and ways to customize them.
Types Of Handles
Fishing rod handles come in several styles. Each style fits different fishing needs and personal preferences.
- Split Grip:Has two separate sections with a gap in the middle. It is lightweight and good for casting rods.
- Full Grip:Runs the full length of the handle. Offers more surface area for holding and better control.
- Fighting Butt:A thicker end section used for big fish. It helps to apply pressure and hold the rod firmly.
Grip Materials And Shapes
| Material | Comfort | Durability | Common Use |
|---|---|---|---|
| Cork | Soft and warm | Moderate | Freshwater rods |
| EVA Foam | Firm and cushioned | High | Saltwater rods |
| Rubber | Grippy and firm | High | All-purpose rods |
Handle shape affects how the rod feels in your hand. Common shapes include round, oval, and contoured grips.
Customizing For Comfort
Customizing your handle improves comfort during long fishing trips. You can add features to fit your hand better.
- Add a soft grip wrap to reduce slipping.
- Shape the handle with light sanding for a personal fit.
- Use heat shrink tubing to add padding.
- Choose a handle length that matches your fishing style.
Gathering Tools And Supplies
Building a custom fishing rod needs the right tools and materials. Preparing all supplies first saves time and helps the work go smoothly.
Each part of the rod requires specific items. This guide shows what you need to gather before starting your project.
Essential Tools List
You need some basic tools to build your fishing rod. These tools help with measuring, cutting, and assembling parts.
- Measuring tape or ruler
- Utility knife or sharp blade
- Fine sandpaper
- Rod wrapping jig or holder
- Small scissors or thread snips
- Drill with small bits
- Clamp or vise
- Heat gun or lighter for wrapping
Adhesives And Finishes
Choosing the right glue and finish protects the rod and makes it strong. They hold parts together and give a smooth look.
| Item | Purpose |
| Epoxy resin | Seals and strengthens wraps |
| Super glue | Quick bonding for small parts |
| Varnish or polyurethane | Protects rod finish from water |
| Thread wraps | Secures guides and adds decoration |
Safety Equipment
Safety is important when building a fishing rod. Use proper gear to avoid injuries while working with tools and chemicals.
- Protective gloves to avoid cuts and glue contact
- Safety glasses to protect eyes from dust and splinters
- Mask or respirator when using epoxy or varnish
- Work in a well-ventilated area
Credit: erinmills.ca
Step-by-step Assembly
Building a custom fishing rod lets you create a tool made just for you. Follow clear steps to assemble your rod with care.
This guide shows how to prepare the blank, add the reel seat and handle, wrap guides, and finish your rod.
Preparing The Rod Blank
Start by choosing the right rod blank for your fishing style. Check it for any cracks or damage before you begin.
Clean the blank with alcohol to remove oils and dirt. This helps glue and wraps stick better.
Installing The Reel Seat And Handle
Slide the reel seat onto the blank where you want to place your reel. Make sure it fits snugly but can still move slightly.
Attach the handle next. Use epoxy glue to secure both the reel seat and handle. Let the glue dry fully before moving on.
- Check the reel seat alignment
- Apply epoxy inside reel seat and handle
- Slide parts onto the blank carefully
- Allow 24 hours for glue to cure
Wrapping And Gluing Guides
Place the guides along the blank following your rod’s design. Start from the tip and space them evenly toward the handle.
Use thread to wrap each guide foot tightly to the blank. Then, apply thin coat of epoxy over the wraps to secure them.
- Position guides straight on the blank
- Wrap thread tightly around each guide foot
- Keep thread wraps smooth and close
- Brush epoxy evenly over wraps
- Let epoxy dry completely before use
Applying Finish
After the epoxy dries, apply a clear finish to protect your rod. Use a brush or spray for a smooth coat.
Apply several thin layers, letting each dry before adding the next. This makes the rod strong and shiny.
- Use a clear rod finish or varnish
- Apply thin, even coats
- Let each coat dry fully
- Sand lightly between coats if needed
- Finish with a glossy or matte look
Testing And Fine-tuning
After building your custom fishing rod, testing and fine-tuning are important. This process ensures your rod works well and feels right.
Small adjustments can make a big difference in how the rod performs during fishing.
Checking Alignment
Check if all guides are in a straight line from the handle to the tip. Proper alignment helps the line flow smoothly.
Look along the rod in good light to spot any guides that are off-center.
- Place the rod on a flat surface
- Look from the handle to the tip
- Adjust guides that do not line up
Adjusting Guide Placement
Guide placement affects casting distance and accuracy. Move guides slightly to find the best position.
Spacing guides evenly helps balance line tension and reduces wear on the rod.
- Test cast the rod several times
- Note any spots where the line gets stuck
- Shift guides to remove friction points
Balancing The Rod
Balance affects how comfortable the rod feels in your hand. A well-balanced rod reduces fatigue.
Add or remove weight near the handle or tip to improve balance.
- Hold the rod at the handle
- Check if the tip drops or rises
- Add weight to the light end if needed
- Test balance by swinging the rod gently

Credit: anglersresource.net
Maintenance Tips For Longevity
Building a custom fishing rod is rewarding. Proper care helps it last longer.
This guide covers cleaning, storage, repair, and upgrades to keep your rod strong.
Cleaning And Storage
Clean your rod after each use. Remove dirt, salt, and fish slime with fresh water.
- Use a soft cloth to wipe the rod and reel.
- Dry all parts before storing to prevent rust.
- Store the rod in a cool, dry place away from direct sunlight.
- Keep the rod upright or in a rack to avoid bending.
Repairing Damage
Check your rod for cracks, loose guides, or worn handles often. Fix small issues early.
| Problem | Repair Method |
| Cracked rod blank | Use epoxy resin and wrap with thread |
| Loose guide rings | Tighten or rewrap with fresh thread |
| Worn handle grip | Replace cork or foam grip |
| Rust on reel seat | Clean with fine sandpaper and oil |
Upgrading Components
Improving parts keeps your rod performing well. Upgrade guides, reel seats, or handles as needed.
- Choose lightweight guides to reduce rod weight.
- Select corrosion-resistant reel seats for saltwater use.
- Try ergonomic handles for better grip and comfort.
- Balance new parts carefully to keep rod performance stable.
Frequently Asked Questions
What Materials Are Needed To Build A Custom Fishing Rod?
You need a rod blank, guides, reel seat, handle, thread, and epoxy. Select materials based on fishing type and personal preference. Quality materials improve rod durability and performance.
How Do I Choose The Right Rod Blank?
Choose a rod blank by fishing style, target species, and rod action. Consider length, power, and flexibility for the best fishing experience.
How To Install Guides On A Custom Fishing Rod?
Align guides evenly along the rod blank. Secure them using thread wraps and epoxy for strong, durable placement. Proper guide placement ensures smooth casting and retrieval.
Can I Customize The Fishing Rod Handle?
Yes, customize handle material like cork or EVA foam for comfort. Shape and length can be tailored to your grip and fishing needs.
Conclusion
Building a custom fishing rod takes time and patience. You get to choose every part to fit your style. The process makes fishing more enjoyable and personal. Small steps lead to a strong, reliable rod. Practice helps you improve and feel confident.
Try different materials and techniques as you go. Enjoy the satisfaction of catching fish with your own rod. Keep learning and have fun on your fishing trips. Creating your rod is a rewarding experience anyone can try.