Have you ever wanted to catch fish with a rod you built yourself? Imagine the pride and satisfaction of holding a fishing rod crafted by your own hands, designed exactly how you want it.
Building your own fishing rod might sound tricky, but it’s easier than you think. In this guide, you’ll discover simple steps to create a rod that feels just right for you. Keep reading, and soon you’ll be ready to enjoy your next fishing trip with a one-of-a-kind fishing rod made by you.

Credit: anglersresource.net
Choosing The Right Materials
Building a fishing rod starts with picking good materials. The right parts help you fish better.
Each piece of the rod needs care in selection. This guide covers the main parts to choose.
Selecting The Rod Blank
The rod blank is the main shaft of the fishing rod. It affects strength and flexibility.
Choose blanks made from graphite or fiberglass. Graphite is light and sensitive. Fiberglass is strong and durable.
- Graphite: light, sensitive, good for small fish
- Fiberglass: tough, heavy, good for big fish
- Composite: mix of graphite and fiberglass for balanced use
Picking Suitable Guides
Guides are the rings on the rod that hold the fishing line. They help the line move smoothly.
Pick guides made from stainless steel or ceramic. Steel is strong and lasts long. Ceramic reduces line friction.
- Stainless steel guides: durable and rust-resistant
- Ceramic guides: smooth, protect the line from wear
- Number and size of guides affect casting and control
Choosing The Reel Seat
The reel seat holds the fishing reel on the rod. It must fit well and be sturdy.
Materials for reel seats include plastic, graphite, and metal. Graphite is light. Metal is strong but heavier.
- Plastic reel seats: affordable, less durable
- Graphite reel seats: light and strong
- Metal reel seats: very strong but heavier
Handle Options And Grip Materials
The handle affects comfort and control while fishing. Choose a grip that feels good in your hand.
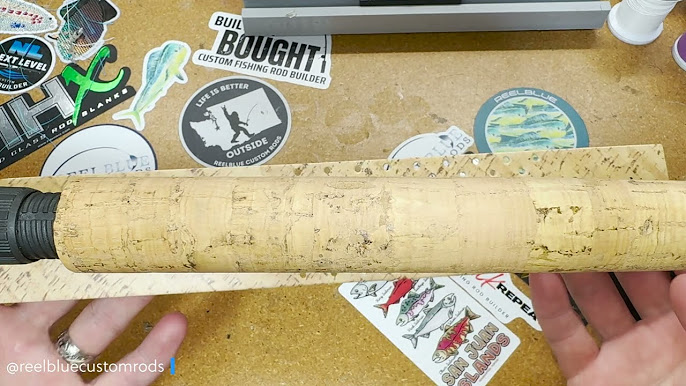
Common handle materials are cork, EVA foam, and rubber. Cork is light and comfortable. EVA foam is soft and durable. Rubber offers a firm grip.
- Cork: lightweight, comfortable, classic look
- EVA foam: soft, durable, easy to clean
- Rubber: firm grip, good for wet conditions

Credit: www.youtube.com
Essential Tools For Rod Building
Building a fishing rod requires specific tools to ensure a strong and reliable rod. Using the right tools helps you work with materials safely and accurately.
We will cover two main groups of tools: basic tools everyone needs and specialized tools for more detailed work.
Basic Tool Kit
The basic tools help you start and complete most rod building tasks. These are easy to find and useful for many parts of the process.
- Measuring tape or ruler for exact length measurements
- Sharp scissors or rod blank cutter for trimming materials
- Sandpaper for smoothing rod blanks and guides
- Epoxy or rod building glue to attach parts
- Masking tape to hold guides in place during gluing
- Small brush for applying epoxy evenly
- Marker pen for marking guide positions
Specialized Rod Building Tools
Specialized tools help with more detailed and precise work on your fishing rod. These tools can improve the quality and durability of the final product.
| Tool | Purpose |
| Rod Dryer | Evenly dries epoxy coatings on the rod |
| Guide Wrap Jig | Keeps thread wraps tight and even around guides |
| Thread Tensioner | Maintains consistent tension on wrapping thread |
| Rod Blank Vise | Holds rod blank steady during work |
| Coating Spreader | Applies smooth epoxy layers without bubbles |
Preparing The Rod Blank
Preparing the rod blank is the first step in building a fishing rod. This process ensures the blank is ready for guides and handle installation.
Careful measuring, marking, sanding, and cleaning help make a strong and smooth rod.
Measuring And Marking
Measure the rod blank carefully to mark where the guides and handle will be placed. Use a tape measure for accuracy.
- Start by measuring the full length of the blank.
- Mark the center point where the handle will attach.
- Mark guide positions evenly along the blank.
- Use a fine-tip marker to make clear, thin lines.
Sanding And Cleaning The Blank
Sanding smooths the blank and prepares it for glue and paint. Cleaning removes dust and oils for better adhesion.
| Task | Tools Needed | Tips |
| Sanding | Fine-grit sandpaper (400-600 grit) | Sand gently to avoid damage |
| Cleaning | Isopropyl alcohol and soft cloth | Wipe the blank thoroughly after sanding |
Installing The Guides
Installing the guides is a key step in building a fishing rod. Guides help control the fishing line and improve casting.
Placing and securing the guides carefully ensures the rod works well and lasts long.
Guide Placement And Spacing
Place the guides evenly along the rod blank. Start near the handle and move toward the tip. Proper spacing helps the line flow smoothly.
- Install the first guide about 4 inches from the handle.
- Space the next guides closer near the tip of the rod.
- Keep the distance between guides about 6 to 8 inches in the middle section.
- Make sure all guides line up in a straight path.
Wrapping Guides Securely
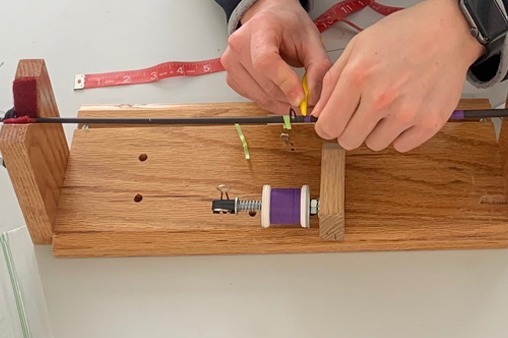
Wrap the guide feet tightly with thread to keep them in place. Use smooth, even wraps to avoid gaps or loose areas.
| Wrapping Tips | Details |
|---|---|
| Use quality thread | Strong nylon or silk thread works best |
| Tight tension | Keep the thread tight but do not break it |
| Overlap wraps | Overlap each wrap slightly for strength |
| Apply finish | Use epoxy or finish to protect wraps |
Attaching The Reel Seat And Handle
Attaching the reel seat and handle is a key part of building a fishing rod. This step lets you hold the rod comfortably and attach the reel firmly.
Follow careful steps to align and secure these parts. This ensures your rod works well and lasts long.
Aligning The Reel Seat
Start by placing the reel seat on the rod blank. Make sure it points in the right direction for easy casting.
Check the reel seat’s alignment with the rod guides. They should line up straight to avoid twisting when you fish.
- Place the reel seat on the rod blank
- Point it toward the rod guides
- Make sure everything lines up straight
- Adjust the seat if it looks off-center
Securing The Handle
After aligning the reel seat, fix the handle in place. The handle gives you grip and comfort while fishing.
Use epoxy or strong glue to attach the handle. Hold it steady until the glue dries to keep it tight.
- Apply glue evenly on the rod blank
- Slide the handle over the glued area
- Keep the handle straight and aligned
- Let the glue dry fully before use
Applying Finishing Touches
After assembling your fishing rod, the finishing touches protect it. These steps help the rod last longer and look better. Finishing also improves the rod’s strength.
Careful application of coatings and proper drying are key. This guide explains how to apply epoxy and how to dry the rod correctly.
Epoxy Coating For Durability
Epoxy coating adds a strong, clear layer on your fishing rod. It protects the rod from water, dirt, and scratches. This layer keeps your rod safe during fishing trips.
Apply the epoxy evenly with a small brush. Make sure to cover the whole rod, including guides and wraps. Avoid thick layers to prevent drips and uneven surfaces.
- Use a high-quality epoxy suitable for rods.
- Work in a dust-free area to avoid particles.
- Apply thin, even coats for the best finish.
- Wear gloves to keep hands clean.
Drying And Curing Process
After coating, the rod needs time to dry and cure. This process makes the epoxy hard and strong. It stops the coating from being sticky or soft.
Place the rod in a warm, dust-free place. Avoid moving it while drying. Drying time can vary but usually takes 24 to 48 hours.
- Keep the rod horizontal to avoid runs in the epoxy.
- Maintain a stable temperature between 70-80°F (21-27°C).
- Do not touch the epoxy until it is fully cured.
- Check the rod after 24 hours and add another coat if needed.
Testing And Adjusting Your Rod
After building your fishing rod, you need to test how it performs. Testing helps find any problems and lets you improve the rod.
Adjusting the rod is important to make it work better for your fishing style. This step ensures your rod is balanced and reacts well.
Balance And Action Check
Check the rod’s balance by holding it at the handle. The rod should feel steady and not heavy at the tip.
Test the rod action by bending it gently. The rod should bend smoothly from the tip to the middle, not just in one spot.
- Hold the rod at the grip and feel for weight balance
- Bend the rod slowly to see how it flexes
- Look for smooth, even bending along the rod
- Note any stiff or overly flexible areas
Making Necessary Adjustments
If the rod feels unbalanced, try moving the reel seat or handle slightly. Small changes can improve the feel.
Adjust the action by changing the line weight or replacing the rod tip. These changes affect how the rod bends.
- Shift the reel seat forward or backward to fix balance
- Replace the rod tip to change flexibility
- Use different line weights to test rod response
- Retest balance and action after each adjustment
Common Mistakes To Avoid
Building a fishing rod is a fun project. You can make a rod that fits your style and needs.
Many beginners make simple mistakes. These errors can cause problems with the rod’s performance.
Using The Wrong Rod Blank
The rod blank is the main part of your fishing rod. Picking the wrong blank affects strength and action.
Choose a blank that matches the type of fishing you want to do. A heavy blank may be too stiff for small fish.
Poor Guide Placement
Guides help the fishing line move smoothly along the rod. Placing them incorrectly causes line problems.
Put guides in a straight line with even spacing. Too few or too many guides can hurt casting distance and accuracy.
- Place the first guide close to the rod tip
- Space guides evenly along the blank
- Align guides on the same side
Using Incompatible Reel Seats
The reel seat holds your fishing reel on the rod. Using the wrong size seat can make the reel loose or unstable.
Check that the reel seat fits your reel perfectly. A good fit keeps the reel steady during fishing.
Skipping Epoxy Curing Time
Epoxy glue holds guides and reel seats in place. Not waiting enough time for it to cure weakens the rod.
Allow epoxy to dry fully before using the rod. This ensures all parts stay firmly attached.
Ignoring Handle Comfort
The handle lets you hold the rod comfortably. A poor handle causes hand pain and reduces fishing time.
Choose a handle shape and material that feels good in your hand. Test the grip before final assembly.
Overtightening Parts
Tightening screws and parts too much can crack or damage the rod components.
Use moderate force when securing parts. Check that everything is firm but not stressed.
Tips From Experienced Rod Builders
Building a fishing rod can be a fun and rewarding project. Experienced rod builders share their best tips to help you create a strong, reliable rod.
These tips cover choosing materials, assembling parts, and finishing your rod for the best fishing experience.
Select Quality Materials
Start with good materials to ensure your rod lasts long. Choose a blank that fits the type of fishing you want.
Use strong guides and a comfortable handle. These parts affect how well your rod works and feels.
- Pick a rod blank for your fishing style
- Use corrosion-resistant guides
- Choose a handle material you like
Wrap Guides Carefully
Guides must be wrapped tightly to avoid loosening over time. Use even tension and neat wraps for strength.
Apply epoxy carefully to protect the wraps and give a smooth finish.
- Keep wraps tight and even
- Check guide alignment before wrapping
- Use quality epoxy for a clear finish
Align Guides Precisely
Proper guide alignment helps your line flow smoothly. Make sure guides are straight and spaced well.
Check alignment from the handle to the tip before wrapping guides.
- Place guides along the rod’s spine
- Use a marker to mark guide spots
- Check alignment from different angles
Finish With Sanding And Sealing
Sand the handle and wraps smoothly to avoid rough spots. Use fine-grit sandpaper for best results.
Apply a protective seal to keep your rod safe from water and dirt.
- Sand handle and wraps lightly
- Use waterproof sealant for protection
- Let sealant dry fully before use
Test Your Rod Before Use
Check your rod for any loose parts or weak spots. Test it by casting in a safe area.
Make small adjustments if needed. This helps avoid problems while fishing.
- Look for loose guides or wraps
- Test casting with a light line
- Fix any issues before fishing
Credit: lakeladyrods.com
Frequently Asked Questions
What Materials Do I Need To Build A Fishing Rod?
To build a fishing rod, gather a blank rod, guides, reel seat, handle, epoxy, and thread. These materials ensure strength and durability for a quality rod.
How Do I Choose The Right Rod Blank?
Select a rod blank based on fishing type, target species, and desired rod action. Consider length, power, and flexibility for optimal performance.
What Is The Best Way To Attach Guides?
Use thread wraps to secure guides evenly along the rod blank. Apply epoxy over wraps to protect and strengthen the attachment.
How Do I Install The Reel Seat Properly?
Slide the reel seat onto the rod blank at the handle end. Secure it firmly with epoxy or locking rings to prevent movement.
Conclusion
Building your own fishing rod can be a fun and rewarding task. It lets you choose the parts you like best. You learn how each piece works together. This can make your fishing trips better. Take your time and follow each step carefully.
Soon, you will have a rod made just for you. Enjoy the process and the fishing that follows. Simple tools and patience lead to great results. Try it yourself and feel proud of your work.