
Are you ready to take your gardening to the next level? Building a raised garden bed with legs is a smart way to grow your plants higher off the ground.
This means less bending, easier access, and better control over soil quality. Whether you have limited space or want to protect your plants from pests, this guide will show you step-by-step how to create a sturdy, stylish garden bed that fits your needs.
Keep reading, and soon you’ll have a custom garden space that makes planting and harvesting a breeze.
Choosing Materials
Building a raised garden bed with legs needs good materials. Picking the right materials helps your garden last long and stay strong.
Focus on wood, fasteners, and soil. These three parts make the garden bed stable and healthy for plants.
Wood Types
Choose wood that resists rot and insects. Cedar and redwood are popular because they last longer outdoors.
Pressure-treated wood is cheaper but may have chemicals. Use safe wood if you grow food plants.
- Cedar: natural, durable, and insect-resistant
- Redwood: strong and lasts many years
- Pressure-treated wood: affordable but check for safety
- Composite wood: low maintenance but less natural
Fasteners And Hardware
Use rust-resistant screws or nails. Galvanized or stainless steel fasteners prevent rust and keep the bed strong.
Metal brackets add support to corners. Choose hardware that fits the size of your wood pieces.
- Galvanized screws: prevent rust and hold wood tightly
- Stainless steel nails: strong and rust-free
- Metal brackets: support corners and legs
- Wood glue: optional for extra hold
Soil And Compost
Good soil helps plants grow healthy roots. Use a mix of topsoil, compost, and organic matter.
Compost adds nutrients and improves soil texture. Avoid heavy clay or sandy soil alone.
- Topsoil: base for good drainage and root growth
- Compost: enriches soil with nutrients
- Peat moss or coconut coir: retains moisture
- Organic matter: improves soil health and air flow
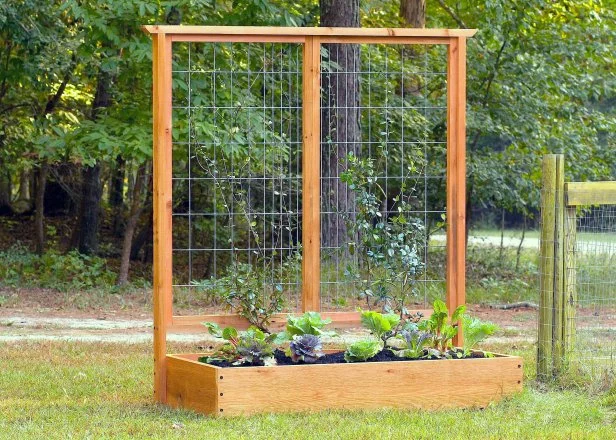
Credit: www.hgtv.com
Selecting The Location
Choosing the right place is key for building a raised garden bed with legs. A good location helps plants grow strong and healthy.
Think about sunlight, soil, and space before you start building. These factors will make your garden successful.
Sunlight Requirements
Most plants need at least six hours of sunlight every day. Pick a spot that gets plenty of direct sun.
Avoid shady places near tall trees or buildings. Sunlight helps plants make food and grow strong.
- Choose a spot with full sun for most vegetables
- Some herbs and leafy greens grow well in partial shade
- Watch the sun’s path to find the brightest area
Ground Preparation
Clear the ground where you will place the raised bed. Remove grass, weeds, and rocks to make a flat surface.
Level the soil to keep the bed stable. Good drainage helps prevent water from pooling under the bed.
- Remove debris and plants from the area
- Use a shovel or rake to level the ground
- Add gravel or landscape fabric for better drainage
Measuring And Cutting
Building a raised garden bed with legs requires careful measurement and cutting. These steps ensure your garden bed is sturdy and fits your space.
Let’s start by determining the size of your garden bed and then move on to cutting the wood pieces accurately.
Determining Bed Size
First, decide on the dimensions of your raised garden bed. Consider the available space and how much you want to grow.
Common sizes include 2×4 feet or 4×8 feet. Measure your garden area carefully before deciding.
- Small spaces: 2×4 feet is ideal
- Medium spaces: 3×6 feet works well
- Large spaces: 4×8 feet provides ample room
Cutting Wood Pieces
Once you have your measurements, it’s time to cut the wood. Use treated lumber for durability.
Measure and mark the wood pieces before cutting. Ensure all pieces are of equal length for balance.
| Quantity | Piece Description | Length |
| 4 | Side planks | Desired length |
| 4 | Legs | 2-3 feet |

Credit: www.youtube.com
Assembling The Frame
Building a raised garden bed with legs starts by assembling the frame. This frame holds the soil and plants securely. You need to prepare the wooden boards and tools before you begin.
The frame consists of the box that holds the soil and the legs that raise it off the ground. Follow these steps carefully to ensure a strong and stable bed.
Constructing The Box
First, create the rectangular box that will hold the garden soil. Use sturdy wooden boards that resist moisture. Cut four pieces: two for the length and two for the width.
- Arrange the boards in a rectangle on a flat surface.
- Join the corners using screws or nails to form the frame.
- Check that the corners are square using a carpenter’s square.
- Sand the edges to avoid splinters.
- Optionally, apply a wood sealant for longer life.
Attaching The Legs
Next, attach the legs to lift the bed. Legs should be strong and tall enough for comfortable gardening.
| Leg Material | Recommended Height | Attachment Method |
|---|---|---|
| Wooden 4×4 posts | 24 to 30 inches | Use metal brackets and screws |
| Metal pipes | 24 to 30 inches | Drill and bolt directly to frame |
| Recycled wooden pallets | 20 to 24 inches | Nail or screw securely |
Secure the legs firmly to each corner of the box. Make sure the bed stands evenly and does not wobble.
Securing And Leveling
Building a raised garden bed with legs needs solid support. Securing and leveling the bed keeps plants safe and healthy. This guide helps you make a strong and even garden bed.
Focus on two key parts: stabilizing the structure and checking for level. These steps stop the bed from moving or leaning over time.
Stabilizing The Structure
Make sure the legs and frame stay firm. You want the garden bed to stay in place even in wind or rain. Use screws and braces to hold everything together tightly.
- Attach corner braces inside each corner for extra strength.
- Use long screws to fix legs to the frame securely.
- Check all joints to avoid any loose parts.
- Add cross supports between legs if the bed is wide.
- Place the bed on solid ground to prevent sinking.
Checking For Level
Use a level tool to check if the bed is flat. A flat bed helps water drain well and plants grow evenly. Adjust legs or add shims to fix any tilt.
| Tool | Purpose | How to Use |
| Bubble Level | Check horizontal level | Place on frame edges and read bubble position |
| Shims | Raise low legs | Insert under legs to fix height differences |
| Measuring Tape | Measure leg height | Compare each leg length to keep even height |
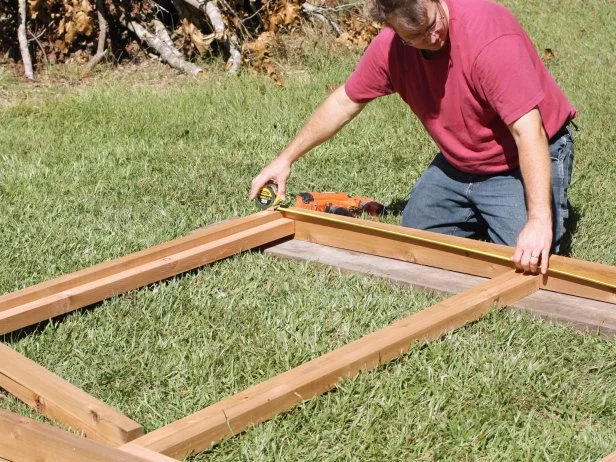
Credit: www.hgtv.com
Adding Soil And Plants
After building your raised garden bed with legs, it is time to add soil and plants. Good soil helps plants grow strong and healthy.
Choosing the right soil mix and planting carefully will give your garden a good start.
Filling With Soil Mix
Fill your raised bed with a mix of soil that holds water and drains well. This helps plants get enough air and moisture.
Use a mix of garden soil, compost, and peat moss or coconut coir. This blend gives plants nutrients and keeps soil loose.
- 50% garden soil
- 30% compost
- 20% peat moss or coconut coir
Planting Tips
Choose plants that fit your garden size and sunlight. Plant seeds or seedlings gently to avoid damage.
Space plants evenly to give roots room to grow. Water them after planting to help settle the soil.
- Pick plants suited to your climate
- Leave enough space between plants
- Water plants well after planting
- Check soil moisture regularly
Maintenance Tips
Building a raised garden bed with legs is just the start. Proper care keeps your garden healthy. Regular maintenance helps plants grow strong.
Simple steps make your garden last longer. Focus on watering and seasonal care to keep your plants happy.
Watering Routine
Water your raised bed regularly to keep soil moist. Check soil daily during hot weather. Water early morning or late evening.
Use a watering can or hose with gentle spray. Avoid overwatering to prevent root rot. Make sure water reaches deep roots.
- Water 2-3 times a week in dry weather
- Adjust frequency based on rainfall
- Mulch soil to keep moisture
- Check soil moisture before watering
Seasonal Care
Prepare your garden bed for each season. Remove dead plants and weeds in spring and fall. Add fresh soil or compost as needed.
Protect your raised bed legs from moisture. Use wood sealant or paint to prevent rot. Cover your bed in winter to avoid frost damage.
- Clear debris in early spring and late fall
- Add compost before planting season
- Seal or paint wooden legs yearly
- Use frost covers during cold months
Frequently Asked Questions
What Materials Are Needed For Raised Garden Beds With Legs?
You need untreated wood, screws, a drill, measuring tape, and soil. Choose durable wood like cedar. Legs should be sturdy and properly measured for height. Quality soil and compost improve plant growth in your raised bed.
How High Should The Legs Be For Comfort?
Legs should be 24 to 36 inches high. This height reduces back strain while gardening. Adjust height based on your comfort and mobility. Taller beds help with drainage and prevent pests.
Can I Build Raised Beds With Legs On Any Surface?
Yes, you can build on grass, concrete, or soil. Ensure the surface is level for stability. Raised beds with legs improve drainage and soil quality on hard surfaces. Consider placing a weed barrier underneath.
How Do I Maintain A Raised Garden Bed With Legs?
Regularly check screws and wood for damage. Reapply protective wood sealant yearly. Remove weeds and replace soil as needed. Proper maintenance extends bed life and keeps plants healthy.
Conclusion
Building a raised garden bed with legs is a smart choice. It helps keep plants safe and makes gardening easier. You can place it anywhere, even on hard surfaces. Using simple tools and materials saves time and money. Enjoy fresh vegetables and flowers from your own garden.
Start small and grow as you learn. Gardening brings joy and fresh air. Try this project and see the benefits yourself.