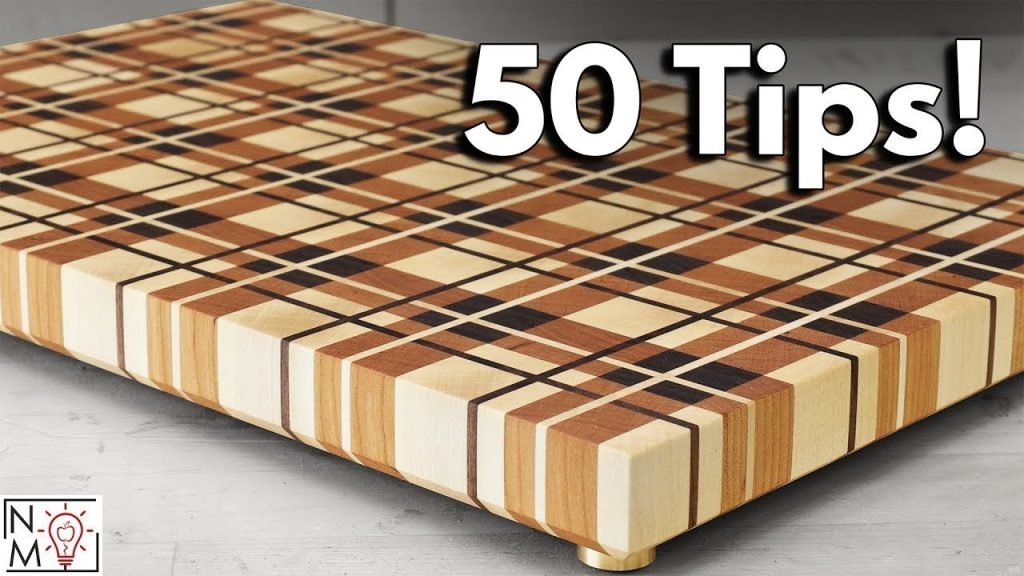
If you love cooking and want a cutting board that lasts for years, building an end grain cutting board is a great choice. It’s strong, gentle on your knives, and looks beautiful in any kitchen.
You might think it’s complicated, but with the right steps, you can make one yourself—even if you’re new to woodworking. In this guide, you’ll discover simple tips and clear instructions to help you create a durable and stunning board that you’ll be proud to use every day.
Ready to start? Let’s dive in.
Choosing The Right Wood
Building an end grain cutting board starts with picking the right wood. Wood choice affects durability, appearance, and safety.
Not all wood is fit for cutting boards. This guide covers hardwood types, wood quality, and sourcing materials.
Hardwood Varieties
Hardwoods work best for cutting boards because they resist cuts and dents. Choose woods that are safe and long-lasting.
- Maple: Light color, hard, and fine grain
- Walnut: Dark color, strong, and smooth grain
- Cherry: Reddish tone, durable, and tight grain
- Beech: Pale color, hard, and even grain
- Oak: Strong wood but has open pores
Wood Quality And Grain
High-quality wood is free of knots and cracks. Tight grain means fewer spaces for bacteria and dirt.
| Quality Feature | Why It Matters |
| No knots or cracks | Prevents weak spots and bacteria traps |
| Tight grain | Creates a smooth, durable surface |
| Dry wood | Reduces warping and cracking over time |
| Food safe finish | Protects wood and user health |
Sourcing Materials
Find wood from trusted sources. Check if the wood is sustainably harvested and untreated.
Good places to source wood:
- Local lumber yards with hardwood selections
- Woodworking specialty stores
- Reclaimed wood suppliers
- Online hardwood retailers with clear product info
Tools And Supplies Needed
Building an end grain cutting board requires the right tools and supplies. Having these ready helps you work safely and efficiently.
This guide lists the main tools and materials you will need to create a quality cutting board.
Essential Power Tools
Power tools make cutting and shaping wood faster. They help you get precise cuts for your board.
- Table saw for cutting wood strips
- Jointer to flatten wood edges
- Planer to smooth and level wood surfaces
- Random orbit sander for sanding the board
- Clamps to hold pieces during glue-up
Hand Tools
Hand tools help with fine details and finishing touches on your board.
| Tool | Purpose |
| Chisels | Cleaning glue lines and corners |
| Block plane | Trimming edges and smoothing surfaces |
| Hand scraper | Removing small imperfections |
| Measuring tape | Checking dimensions accurately |
| Marking gauge | Marking wood for cutting |
Finishing Materials
Finishing materials protect your cutting board and bring out the wood’s natural beauty.
- Food-safe mineral oil for sealing the wood
- Beeswax for adding a protective layer
- Clean rags or brushes for applying finishes
- Sandpaper with varying grits for smoothing
Preparing The Wood
Building an end grain cutting board starts with good wood preparation. Proper steps help the board last longer and look better.
This section covers cutting the lumber, smoothing the surfaces, and arranging the grain for a strong and attractive board.
Cutting Lumber To Size
Choose hardwoods like maple, walnut, or cherry. Cut the lumber into strips about 1 to 1.5 inches wide. Keep the lengths consistent for easier assembly.
Use a table saw or miter saw for clean cuts. Check that edges are straight to avoid gaps in the final board.
Planing And Jointing
Planing and jointing create flat, smooth surfaces. This step is important to get tight glue joints without gaps.
- Run each strip through a jointer to straighten one edge.
- Use a planer to even out the thickness of all pieces.
- Check for any warping and fix it before gluing.
Arranging The Grain Pattern
Arrange strips so their end grain faces up. This pattern shows the wood’s growth rings and adds strength to the board.
| Grain Arrangement | Effect |
|---|---|
| Checkerboard | Classic look with alternating colors |
| Striped | Simple lines, easy to cut and glue |
| Random | Natural style with varied wood pieces |

Credit: www.newtonmakes.com
Gluing And Clamping
Building an end grain cutting board needs strong glue and good clamping. These steps hold the wood pieces tightly. This helps the board last long and stay flat.
Careful gluing and clamping give the board strength. You should pick the right glue and clamp correctly. Then wait enough time for the glue to dry fully.
Choosing The Right Glue
Use wood glue made for cutting boards. It must be strong and safe for food contact. PVA glue is a common choice. It sticks well and is easy to clean.
Avoid glues that are not water resistant. Your cutting board will get wet often. The glue should hold tight even after many washes.
- Use FDA-approved wood glue
- Choose waterproof or water-resistant glue
- Avoid glues with strong odors or chemicals
- Test glue on scrap wood first
Clamping Techniques
Clamp the board evenly to press all pieces together. Use bar clamps or pipe clamps for best results. Place the clamps across the board width and length.
Do not overtighten clamps. Tight clamps can squeeze out all glue and leave weak spots. Tighten just enough to hold pieces firmly.
- Use multiple clamps for even pressure
- Place cauls (wood strips) under clamps to protect the board
- Check for gaps and adjust clamps if needed
- Wipe off extra glue immediately
Drying Time Tips
Let the glued board dry for at least 24 hours. This ensures the glue sets fully and the board stays strong. Avoid moving the board during this time.
Keep the board in a warm, dry place. Avoid high humidity or cold. These conditions slow down glue drying and weaken the bond.
- Wait 24 hours before removing clamps
- Do not disturb or move the board while drying
- Store in a dry, warm area
- Check glue instructions for exact drying time
Shaping The Board
Shaping the end grain cutting board is an important step. It helps make the board safe and comfortable to use. This process includes trimming the edges, adding rounded corners, and sanding the surface.
Each part shapes the board to look good and feel smooth. Let’s look at how to do each of these tasks.
Trimming Edges
After gluing the board pieces together, the edges may be uneven. Use a table saw or a hand plane to trim the edges straight. This step makes the board squared and neat.
Trim slowly and check often to avoid removing too much wood. Keep the edges flush and smooth for the next steps.
Adding Rounded Corners
Rounded corners prevent sharp edges that can hurt hands. Use a router with a round-over bit or sand the corners by hand. This will make the board safer and give it a nice look.
- Mark the corners lightly with a pencil
- Use a router or sanding block to round the edges
- Check the curve for evenness
- Repeat on all four corners
Sanding Steps
Sanding smooths the surface and removes any rough spots. Start with coarse grit sandpaper and move to finer grits. Sand the entire board, including edges and corners.
| Sanding Grit | Purpose |
| 80-100 | Remove glue and rough spots |
| 120-150 | Smooth the wood surface |
| 220 | Prepare for finishing |

Credit: m.youtube.com
Finishing Touches
After crafting your end grain cutting board, the final steps help protect and enhance its beauty. Proper finishing keeps the board safe for food use and extends its life.
Below are key steps to finish your board, including oiling, sealing, and care tips to maintain its quality over time.
Applying Food-safe Oils
Use oils that are safe for cutting boards to nourish the wood and prevent drying. Apply evenly with a clean cloth, letting the oil soak in overnight. Repeat as needed for the best protection.
- Choose mineral oil or beeswax-based oils
- Apply a generous amount to all surfaces
- Allow oil to soak in for 8 to 12 hours
- Wipe off excess oil with a dry cloth
- Repeat oiling monthly for heavy use boards
Sealing The Surface
Sealing adds an extra layer of protection against water and stains. Use a food-safe finish that does not create a hard film but penetrates the wood.
| Sealant Type | Benefits | Application Tips |
| Beeswax and Mineral Oil Mix | Natural, food safe, easy to apply | Rub on warm board, buff after drying |
| Tung Oil (Pure) | Water-resistant, durable finish | Apply thin coats, allow 24 hours between |
| Walnut Oil | Penetrates deeply, enhances wood grain | Apply regularly, avoid with nut allergies |
Maintenance Tips
Keep your cutting board in top shape with simple care. Clean, dry, and oil it regularly to prevent cracking and warping.
- Wash board with mild soap and warm water
- Dry immediately with a towel
- Do not soak or put in a dishwasher
- Apply food-safe oil every month
- Sand lightly if surface gets rough
Common Mistakes To Avoid
Building an end grain cutting board takes care and attention. Some errors can ruin your project or shorten its life. Knowing these mistakes helps you make a strong, lasting board.
This guide covers three common problems to avoid. Fixing these will improve your woodwork and final product.
Wood Movement Issues
Wood expands and contracts with changes in humidity and temperature. Ignoring this causes cracks or warping in your board.
- Do not seal all sides of the board unevenly. Seal all sides to slow moisture changes.
- Avoid using wood pieces with different grain directions without proper glue and support.
- Let your wood dry fully before cutting and gluing.
- Use end grain orientation to absorb movement better.
Improper Glue Application
Glue holds your wood pieces together. Poor glue work leads to weak joints and board failure.
| Glue Mistake | Effect | How to Avoid |
|---|---|---|
| Too little glue | Weak joints, easy breakage | Apply glue evenly on all surfaces |
| Too much glue | Messy squeeze-out, longer drying | Use a thin, even layer |
| Not clamping tightly | Gaps and weak bonds | Use strong clamps and check pressure |
| Using wrong glue | Poor adhesion, unsafe board | Use food-safe wood glue |
Finishing Pitfalls
Finishing protects your board and gives it a nice look. Mistakes here can harm the wood or make it unsafe for food.
- Do not use finishes that are not food safe.
- Avoid thick, sticky coats that never dry well.
- Do not skip sanding between finish layers.
- Apply finish evenly to all sides, including edges.
- Let each coat dry fully before adding more.

Credit: m.youtube.com
Frequently Asked Questions
What Is An End Grain Cutting Board?
An end grain cutting board is crafted by arranging wood fibers vertically. This orientation results in a durable and knife-friendly surface. It minimizes wear on knives and showcases intricate wood patterns. End grain boards are preferred for their longevity and aesthetic appeal in kitchens.
Why Choose An End Grain Cutting Board?
End grain cutting boards offer durability and knife preservation. Their vertical wood fibers provide a forgiving cutting surface. This prevents knife dulling and extends the board’s lifespan. Additionally, these boards are visually appealing, showcasing unique wood patterns.
How Do You Maintain An End Grain Cutting Board?
To maintain an end grain cutting board, regularly oil it with mineral oil. Clean with mild soap and water, then dry thoroughly. Avoid soaking or using a dishwasher to prevent warping. Regular maintenance ensures longevity and maintains the board’s appearance.
What Wood Is Best For Cutting Boards?
Hardwoods like maple, walnut, and cherry are ideal for cutting boards. They offer durability and resistance to knife marks. These woods also feature tight grains that minimize bacterial growth. Choose a wood that complements your kitchen aesthetics and provides lasting performance.
Conclusion
Building an end grain cutting board takes patience and care. Choose the right wood and cut it precisely. Glue the pieces tightly for a strong bond. Sand the board smooth to protect your knives. Finish with oil to keep the wood healthy.
With practice, your skills will improve. This project offers a useful and beautiful kitchen tool. Give it a try and enjoy the process. Your efforts will result in a board that lasts for years. Simple steps lead to great results.